
Edureka DevOps Training (Use Code "YOUTUBE20"): https://www.edureka.co/devops-certification-training This Edureka ...
20 videos · Jul 13, 2026

The video discusses the traditional separation between software development and operations teams, which often leads to delays in the software development cycle due to feedback bottlenecks. It introduces the DevOps approach, which promotes collaboration between these teams, resulting in faster and more efficient software delivery. The DevOps process is outlined in phases, starting with planning and coding, followed by building, testing, and deployment, utilizing various tools like Git, Maven, Selenium, and Jenkins. The video highlights successful implementations of DevOps by companies like Netflix, which developed innovative tools to enhance system resilience. Overall, the video emphasizes the importance of adopting DevOps for improved automation and reduced delivery times in software development.
Right from the start, software development comprise two different departments. The development team that develops the plan, designs and builds the system from scratch and the operation team for testing and implementation of whatever is developed. The operations team gave the development team feedback on any bugs that needed fixing and any rework required. Invariably, the development team would be idle awaiting feedback from the operations team.
This undoubtedly extended timelines and delayed the entire software development cycle. There would be instances where the development team moves on to the next project while the operations team continues to provide feedback for the previous code. This meant weeks or even months for the project to be closed and final code to be developed. Now what if the two departments came together and worked in collaboration with each other?
What if the wall of confusion was broken? And this is called the DevOps approach. The DevOps symbol resembles an infinity sign suggesting that it is a continuous process of improving efficiency and constant activity. The DevOps approach makes companies adapt faster to updates and development changes.
The teams can now deliver quickly and the deployments are more consistent and smooth. Though there may be communication challenges, DevOps manages a streamlined flow between the teams and makes the software development process successful. The DevOps culture is implemented in several phases with the help of several tools. Let's have a look at these phases.
The first phase is the planning phase where the development team puts down a plan keeping in mind the application objectives that are to be delivered to the customer. Once the plan is made, the coding begins. The development team works on the same code and different versions of the code are stored into a repository with the help of tools like git and merged when required. This process is called version control.
The code is then made executable with tools like Maven and Gradel in the build stage. After the code is successfully built, it is then tested for any bugs or errors. The most popular tool for automation testing is Selenium. Once the code has passed several manual and automated tests, we can say that it is ready for deployment and is sent to the operations team.
The operations team now deploys the code to the working environment. The most prominent tools used to automate these phases are Anible, Docker and Kubernetes. After the deployment, the product is continuously monitored and Nagios is one of the top tools used to automate this phase. The feedback received after this phase is sent back to the planning phase and this is what forms the core of the DevOps life cycle that is the integration phase.
Jenkins is the tool that sends the code for building and testing. If the code passes the test, it is sent for deployment and this is referred to as continuous integration. There are many tech giants and organizations that have opted for the DevOps approach. For example, Amazon, Netflix, Walmart, Facebook, and Adobe.
Netflix introduced its online streaming service in 2007. In 2014, it was estimated that a downtime for about an hour would cost Netflix $200,000. However, now Netflix can cope with such issues. They opted for DevOps in the most fantastic way.
Netflix developed a tool called the Simeon Army that continuously created bugs in the environment without affecting the users. This chaos motivated the developers to build a system that does not fall apart when any such thing happens. So, on this note, here is a quiz for you. Match the DevOps tool with the phase it is used in.
A B, B, B, [Music] C, D, none of the above. Today, more and more companies lean towards automation with the aim of reducing its delivery time and the gap between its development and operations teams. To attain all of these, there's just one gateway, DevOps. If you enjoyed this video, if you did, a thumbs up would be really appreciated.
Here's your reminder to subscribe to our channel and to click on the bell icon for more on the latest technologies and trends. Thank you for watching and stay tuned for more from SimplyLearn.

The video addresses the intimidating nature of DevOps, often perceived as a complex and exclusive field. It aims to demystify DevOps by providing a comprehensive course that covers everything from the basics to building a production-ready API. Key topics include version control with Git, CI/CD pipelines, Docker for containerization, Kubernetes for orchestration, and security measures integrated from the start. The course emphasizes hands-on learning, encouraging viewers to set up their development environment with free tools like Node.js, Neon DB, and Arjette for security. Ultimately, the video invites viewers to engage with DevOps as a collaborative culture that streamlines software development and operations, making it accessible and practical for all developers.
DevOps, the word that makes half of YouTube tutorials feel like you don't really belong. Like you should stick to HTML while the real engineers handle the big stuff. But when you try learning it yourself, you're slammed with Docker commands that look like alien code, YAML files that read like broken poetry, and the jungle of tools that never seem to connect. That's the trap.
DevOps gets sold as a scary gatekeeping monster. And the problem is that no one shows you how this puzzle fits together. You either get a 10-minute look, it works demo or a six-hour death by PowerPoint lecture that has nothing to do with the apps you actually want to ship. So, welcome to the full DevOps course where you'll finally see the whole picture step by step as we go from fundamentals to a productionready API that looks and feels like something you'd actually run in the real world.
Here's what you'll get. A no BS intro to what DevOps actually is and why it matters. A hands-on Git crash course so version control stops feeling like black magic. CI/CD pipelines that deploy your code automatically.
A Docker crash course to containerize your apps for dev and production. Kubernetes deployments like real companies use them. Infrastructure as code to spin up environments on demand and monitoring, logging, and security baked in from the start. And of course, we won't end there.
In the signature JavaScript mastery style, you'll then use this learn knowledge to build and deploy acquisitions, a realworld API for buying and selling SAS businesses with tons of features like JWTbased authentication and authorization. Role- based access control for admins and users. User management for accounts. Business listings to create, update, delete, and browse.
Deal management to track deals from pending to completed. Health monitoring of all the endpoints, request validation using ZOD, structured logging with Winston, completely secured endpoints using Arkjet, a painless security system for developers that protects your app from bots, spam, and abuse in real time. For the database, we're using Postgress with Neon DB. It's serverless, lightning fast, and built for modern cloud apps that even work locally.
Adding on to it, Drizzle RM for type- safe database queries, Docker for containerizing applications across dev and production environments, Kubernetes to orchestrate containers at scale, justest and superest for automated testing and validating application behavior, CI/CD pipelines for linting, testing, deployment and automation, clean absolute imports, eslint and prettier for clean maintainable code and much more using warp, the fastest way to build and ship applications with AI. It's an all-in-one environment where you run commands, write code, and prompt top AI agents in parallel. This isn't just another DevOps demo. By the end, you'll have hands-on experience and productionready backend you can actually ship tomorrow.
And if you want to dive deeper into building scalable productionready back-end systems from the ground up in a beginner-friendly way, check out the upcoming ultimate back-end developer course. It's the perfect combination of strong foundations taking you all the way from core networking concepts all the way to building and deploying APIs with full DevOps and AWS integration. You can either join the wait list if it's not out or if you're lucky, it's already out and you can get started with it right away. So, grab your cup of coffee and let's ship code like six figure salary engineers.
By the way, I recently opened up channel memberships. So, if you've been enjoying these videos and want to support the channel, that's one of the best ways to do it. In return, you'll also get access to extra resources like the Figma design files from my tutorials, detailed cheat sheets paired with this video, and even complete ebooks. Plus, as a member, you'll actually get a say in what I record next for YouTube.
It's totally optional, but if you've been finding value here and you're not quite ready to become pro yet, if you want to dive a bit deeper while helping me make these full courses free, I would be thankful if you joined today. Before we start building, let's get our environment set up. Because here's the thing, DevOps isn't something you watch, it's something you do. And to actually follow along without getting stuck, you'll need the same stack I'm using.
The good news, it's all free. And these are real tools companies are using every day. First, make sure you've got Node.js installed. That's the core runtime we'll be using to build our backend API.
Then our database. We'll be using a cloud Postgress provider called Neon DB. This will power up everything in our API. So, you'll want an account ready before we dive in.
Click the link down in the description, create an account, and you're good to go. Next, Arjette. You can build the cleanest API in the world, but if it's wide open to bots, spam or abuse, it's useless. Arjet gives you a real-time protection while you build.
So security isn't something you tackle on later. It's there from day one. And finally, warp. This is where all the action happens.
Running commands, shipping code, and even prompting AI agents to speed up your workflow. It's a modern AI powered developer environment you'll never want to leave. And right now, their pro plan is literally one buck, which makes it kind of a no-brainer. So once you've set those up, you'll have the exact stack I'm using.
That way when I say run this command, you can run it too with no interruptions, no detours, just straight into building. Very soon, you'll build and deploy your very own production ready API. But first, let's dive right into the crash course. You've heard this term a hundred times, but let's be real.
DevOps sounds scary as hell, right? Is it a job? A tool? A secret club for 10x engineers with six monitors and a tolerance for drinking five Red Bulls?
You're not alone. Everyone feels like this at first. DevOps sounds massive, mysterious, and way too complicated. But here's the truth.
DevOps is simpler than it sounds. And in this crash course, I'll break it down like we're just chatting over coffee. Here's how software used to work. You write some code, it runs on your laptop, you deploy to a server, done.
And if you're a vibe coder, you might even skip testing entirely, push it straight to production, and call it a day. That actually works. If your app is tiny, and no one cares if it crashes. But the second your app grows, traffic spikes, and the real money is on the line, that's when this vibe ship starts sinking.
Servers crash, hackers attack, thousands of users log in at once, and your app dies at 3:00 a.m. Tell me, who handles all that chaos? Early on, it was the same developers writing features. But most devs aren't trained to babysit servers or fight off security attacks.
Their job is to build, not panic at midnight. So companies created operation teams or ops. They managed servers, scaled apps, monitored uptime and performance, applied security patches, and got woken up at 3:00 a.m. when everything broke.
Honestly, props to them. Ops became the guardians of stability, while devs focused on speed. So now you've got two camps. Devs who ship features fast and ops who keep things stable.
So what happened? Well, a tug of war. Devs tossed code over the wall. Ops slow them down, blocked releases, or spent weeks cleaning up.
Result: frustration, silos, and slow delivery. So finally, DevOps was the solution. Not a tool or a role, a culture shift. It's about breaking down silos so devs and ops work together.
Backed by automation, they deliver software faster and safer. DevOps is a culture of collaboration, a set of practices for building, testing, and releasing reliably and an automation toolbox for deployments, monitoring, and infrastructure. Think of your app like a restaurant. Devs are the chefs who are cooking meals or code, and ops are waiters and managers getting meals to customers.
They handle servers and uptime. Without DevOps, chefs would toss random dishes onto the counter and hope for the best. Chaos. With DevOps, the kitchen runs like a welloiled machine.
Orders flow smoothly, food is consistent, and customers are happy. So, why not just Vibe Code? I mean, you can skip all of this if your project is just for fun, but once you have real users, especially paying users, vibe coding quickly turns into vibe burning. So, let's skip the burnout and learn DevOps the right way.
You have a sense of DevOps, but not the full picture yet. You might be thinking, I get that DevOps is a culture, but how do I learn it? And what does it look like day-to-day? If you've ever Googled or chat GPT, if that's even a word, the term DevOps, you've definitely come across the famous infinity loop diagram.
You know the one where arrows chase each other endlessly labeled plan, code, build, test, release, deploy, operate, and monitor. That loop is not just a conference graphic even though it looks that way. It is the process of how an idea becomes software in users hands and then gets better with feedback. Dev and ops are connected the entire time.
So, let me show you what each stage means in practice. We start with a plan. Imagine you're building a multi-million dollar SAS application. Doesn't hurt to imagine, right?
Before a single line of code, you decide what you want to build, when to ship, who owns that, and how you will measure success. Page speed, user growth, revenue, and make it traceable, not sticky notes that'll disappear. Use tools that the team will actually keep up to date. Be it Jira, Linear, GitHub projects, or just notion, the tool is less important than the discipline.
A plan without action is just a dream. So make it explicit and visible. Once we're done with planning, we move over to code. Code quality matters as much as code output.
So write clean, modular, and testable code that others can extend. Use Git with reviews, branch rules, or automated checks, ship readable code, and not hacky solutions that only you can understand. And now we enter the build phase. Because when you finish writing source code, it's still just raw text files.
Those files cannot always be executed directly in production. They often need to get compiled or transpiled. Dependencies need to get installed. It needs to get bundled or packaged like in Docker.
And we need to check for linting or security mistakes. The build step is all about preparing code so it can actually run an artifact, a ready to run package. Think of it like baking dough into bread. You can't eat raw dough, which is the source code.
So you can bake it build into something edible, an artifact. In DevOps, this process is automated for consistency. You build Docker images, run containers through make files, and build them every time you make a commit. You'll learn all of that in the next lesson.
And then we get to testing. Of course, you wouldn't want untested code to reach production. The test stage exists to catch problems early when they're still cheap and easy to fix. Automated tests run as part of the CI pipeline, covering everything from basic unit tests to integration tests, end-to-end workflows, and security scans.
For instance, let's say you're building a payments feature. Unit tests verify the math for totals. Integration tests ensure the checkout flow works with a database. And end-to-end tests simulate a customer actually completing a purchase.
Security tests scan for vulnerable dependencies or insecure patterns. And by the time the code passes all of these stages, the team can be confident that it behaves as expected and won't break the system when deployed. All of this runs in automation pipelines. So when all the tests pass, the build is finally marked as ready for release.
This doesn't mean it's already running in production. It means that the artifact has been approved and cued for deployment. Think of this as moving from dev to ops. In practice, the release stage involves versioning, tagging artifacts, and pushing them into a release repository like Docker Hub, Nexus, or an internal store.
This ensures the exact same build that was tested will be the one deployed later on. No surprises or mismatches. And then comes the big moment, deployment. In traditional setups, someone might have to log into a server at 2 a.m.
to run some manual scripts. But in DevOps, deployments are automated and repeatable. Pipelines handle the process, and tools like Kubernetes orchestrate deployments at scale. But more on that soon.
For now, understand that you have to use these tools to build pipelines for automated deployments that scale up and down based on defined needs. For example, when deploying a new version of a web app, Kubernetes might spin up new pods with the updated code while gradually phasing out the old ones, a strategy known as rolling deployment. This ensures a minimal downtime and a smooth user experience. Some teams even practice blue green deployments or canary releases to test new versions with a small subset of users before rolling out widely.
And once deployed, the application is live. But the work isn't over. You have to operate. See, the operate stage is all about ensuring the system continues to run reliably under real world conditions.
This includes monitoring server health, scaling resources when traffic spikes, applying security patches, and managing infrastructure configurations. Think about an e-commerce platform on a Black Friday. At 2 p.m. traffic might skyrocket, requiring the system to scale horizontally across multiple servers.
At 2 a.m., when traffic is low, resources can be scaled down to save costs. DevOps teams ensure that the system is resilient, stable, and performant at all times. So, finally, we have the monitoring. Here teams gather data about the systems performance.
Uptime, error rates, and business metrics. Monitoring tools like Prometheus, Graphana, Data Dog, New Relic, or Century act like CCTV cameras for your app. They let you see not only technical metrics like CPU usage, latency or error logs, but also business outcomes like orders processed, signups completed, and revenue generated. For instance, if your new checkout flow increases card abandonment, monitoring will catch it.
That insight then loops back into the plan stage where the team can adjust priorities and improve the product and then the cycle starts again. That's the beauty of DevOps. It never really stops. Each stage feeds the next, forming a continuous loop of building, testing, delivering, operating, and improving.
And it's not just a set of tools or a job title. It's a culture of constant learning and iteration. But wait, does that mean that as a DevOps engineer, you're expected to handle everything in this cycle? Are you supposed to code like a developer, test like a QA, deploy like ops, and monitor like SRRES?
That's a great question. No, you're not supposed to do everything. This is one of the biggest misconceptions about DevOps. If DevOps is a culture, a way of working where dev, ops, QA, and security work closely together, then a DevOps engineer is not a superhum who replaces all those roles.
Instead, your role is all about bridging the gap between teams, automating the boring or manual work so teams can move faster, and setting up tools and practices that make collaboration smoother. See, developers still write features. QA still ensures quality. Ops still keeps server running, but as a DevOps engineer, you make sure that all these moving parts are connected and running without chaos.
So, what does a DevOps engineer actually do? You're not here to replace developers, QA, or ops. You're here to connect all the dots and keep things running smoothly. So let's run through the entire life cycle once again, but from your point of view.
When it comes to the planning phase, developers and product managers decide what to build. You make sure that planning tools like Jira, Confluence, or notion are wired into your pipeline. For example, when someone closes a Jira ticket, it should link straight to a commit or a deployment log. In the coding phase, you're not writing every feature, but you set the rules of the road.
Branching strategies, code review requirements, autolinting, and security scans all run automatically. So code quality stays high. Then in the build phase is where raw code becomes something that can actually run anywhere like a Docker image. Your job is to set up pipelines.
So this happens on every commit consistently with zero manual steps. When it comes to testing, QA owns it, but you make it effortless. You integrate unit tests, integration tests, and security scans into the pipeline so bugs get caught early before they even reach production. And then for the release and deploy phases, this is where you shine.
Instead of someone sshing into a server at midnight, you automate deployments with Kubernetes. Terraform or Helm. In the operation phase, the ops teams keep everything alive, but you help them codify the infrastructure with Terraform or cloud for set scaling rules and make systems highly available. An example of this would be spinning up a new AWS cluster with a single config file instead of spending hours in the console.
And finally, in the monitor and feedback phase, once the code is live, you keep watch. Metrics, logs, dashboards, and alerts feed straight to Slack or Teams. If something breaks or slows down, you know it before customers do. So, no, you're not coding the app and writing tests and running servers all by yourself.
You're the air traffic controller. Developers fly the planes or build the features. Ops is the ground crew. QA is the safety check.
And you're in the tower keeping everything smooth and safe. Let's dive into the heartbeat of DevOps. CIC CD. But what does that actually mean?
Well, picture a kitchen in a restaurant. The chef chops the vegetables. The assistant cooks them. The manager inspects the dish.
And the waiter finally serves it to the table. If every step was manual, the service would be slow. In the same way, we manually go through different stages such as coding, building, testing, and deployment. Pretty manual, right?
Now, imagine a conveyor belt moving the dish automatically from one step to the other. That's a pipeline. It's an automated conveyor belt for software. So, let's break it down.
CI stands for continuous integration. Every time a developer pushes code, tests run automatically. And if something breaks, the pipeline stops and you fix it before moving forward. CD stands for continuous deployment where once tests pass, the app is automatically deployed to staging or production.
No late night manual deployments. Your job is to write these pipelines using tools like GitHub actions, GitLab CI, Jenkins, or CircleCI. You'll define each step from build, test, release to deploy. Back in the day, running apps was messy.
You'd install them directly on servers, and if one needed version 18 of Node.js and another one needed version 20, you'd have conflicts everywhere. Containers solve this by packaging apps with everything they need. The most popular tool here is Docker. Now imagine not just one container, but hundreds of them for microservices, background jobs, and databases.
Someone needs to decide where do these containers run? How many copies do we need right now? What happens if one crashes? And how do they securely talk to each other?
That's called orchestration. And the go-to tool here is Kubernetes, which acts like the conductor of an orchestra, coordinating containers, so everything runs smoothly and scales automatically. Traditionally, people clicked around in a cloud dashboard to create servers and networks. That's like building IKEA furniture without instructions.
Slow, errorprone, and almost impossible to recreate. With infrastructure as code or ISC for short, you describe your entire setup. Servers, networks, databases, all in code. You store it in Git, review changes, and recreate environments any time.
Tools like Terraform or AWS Cloud Form make your infrastructure predictable and repeatable. So if something goes down, you just rerun your code to rebuild it from scratch. And almost no company runs their own physical service anymore. Instead, they rent them from cloud providers like AWS, which are Amazon's web services, Azure from Microsoft, or GCP, which is Google Cloud Platform.
You don't need to master all three. Focus on one primary provider. AWS is the most common. And get comfortable deploying apps, setting up networks, and managing storage.
Once you know one well, switching to another is easier. Like learning to drive one car and then trying out a different brand. And once your app is live, you need visibility. Monitoring and logging tools show what's happening in real time.
Not just server performance, but also user behavior and errors. You've seen me use Sentry in some of my projects to track errors and performance. That's a great starting point. Some DevOps teams use different tools like Prometheus and Graphfana for custom metrics and dashboards, Elk Stack or Data Dog for centralized logs, or Post Hawk for product analytics and funnels.
With the right setup, you know about problems before your users do. And finally, scripting ties everything together. A DevOps engineer should be comfortable with at least Bash or Shell scripting and one programming language like Python or JavaScript. Why?
Because automation is the heart of DevOps. And if you're onboarding 10 new developers and need to set up their accounts and permissions, don't just click through dashboards 50 times. Write a script once and automate the whole process. I know it's a lot, but if you take it step by step from Git, pipeline, containers, ISC, cloud monitoring, and scripting, you'll go from confused to confident pretty fast.
And in this video, we'll skim the surface of each one of these topics in a beginnerfriendly way. And if you'd like some deep dives on advanced DevOps concepts, drop a comment down below and I'll make it happen. Imagine you're working on a coding project and you make a mistake that breaks everything. Your boss would most likely fire you if you were even able to get a job in the first place.
Without Git, you'd have no easy way to go back and undo the changes. You're toasted. Git is the industry standard. Most companies, team, and open- source projects use Git.
So, naturally, every job description mentions it. Learning Git isn't just a nice to have. It's your get good or get out moment. It's a must for any serious developer wanting to land a job.
So, what is Git and why is it so popular? Git is a distributed version control system. Sounds fancy, right? Well, let's break it down.
The version control part helps you track and manage code changes over time. While distributed means that every developer's computer has a complete copy of the codebase, including its entire history of changes and information about who changed what and when, allowing you to get blame someone. Hopefully, people won't blame you. But do you really need it?
Can you code without using it? Well, of course you can, but then your workflow would look something like this. You start coding your project in a folder named my project. And as you make progress, you worry about losing your work.
So you create copies, my project v1, v2, v3, and so on. Then your colleague asks you for the latest version. You zip up my project v3 and email it over. They made some changes and sent it back as my project v3 johns changes.zip.
zip. Meanwhile, you've continued to work. So now you have my project V4. You then need to manually compare J's changes with your V4 and create a V5 incorporating everyone's work.
And then a week later, you realize you accidentally removed a crucial feature in V2. You dig through your old folders trying to figure out what changed between versions. Now imagine doing this with 10 developers, each working on different features. It's a recipe for chaos, lost work, and countless hours wasted on a version management system instead of actual coding.
Git solves all of these problems and more. It tracks every change automatically, allows multiple people to work on the same project seamlessly, and lets you easily navigate through your project's history. No more final version v2 final, really final zip files. Git does all of this for you, but in a much more powerful and organized way.
To get started, you need Git installed. Whether on Windows, Mac, or Linux, it's just two clicks away. Google download Git and get it for your operating system. Once Git is installed, open up your terminal.
Nowadays, I prefer using a terminal built into my IDE. First things first, let's check whether you've installed Git properly. run git d- version and you'll get back the version that is installed on your device. Next, you need to configure git to work with your name and email.
This is just to track who made the changes in the project so your colleagues know who to blame. Here's the command. git config- global user.name and then in single quotes put in your name. Once you do that, you can repeat the same command, but this time instead of changing user.name, we'll change user.
And here you can enter your email. Press enter. And that's it. You're all set up.
Now, let's talk about repositories. A repo or a repository is where Git tracks everything in your project. Think of it like a folder that stores all the versions of your code. Simply put, if a folder is being tracked by Git, we call it a repo.
Now, let's create a new repository. In your terminal, type git in it and press enter. As you can see, git has just initialized a new repository. On top of the success message, we can also see a warning.
In previous times, the default name of a branch has been master. But nowadays, you'll see main used much more frequently as the name for the primary branch. So, let's immediately fix it by configuring the initial branch name. You can copy this command right here.
And at the end, you can just say main. Now, considering that we have just changed the initial configuration settings, we have to create a new folder. create a new one called something like mastering git. Open it within your editor and then rerun git in it.
As you can see here and here, now we're in the main branch. That means that git has initialized an empty repository. You won't see any changes yet in your folder, but a hidden.git folder has been created inside your directory. You don't need to touch this folder.
Git handles everything inside from commit history, branches you'll make, remote repos, and more. Most of the time, Git will already come pre-initialized by the framework or library that you use to set up your project with. That's how integrated Git is into every developer's life. So now that we have this main right here, what does that exactly mean?
Well, main is the default branch name of your repo created by Git. Every time you initialize git, this branch will be automatically created for you. I'll teach you more about Git branches soon, but for now, know that a branch is nothing but a parallel version of your project. All right, let's add some files and track changes.
I'll create a new file called hello.js. And you can see how smart WebStorm is. It automatically asks me whether I want to add it to Git. But for now, I'll cancel that because I want to explain everything manually.
Let's make it simply run a console.log that prints hello get. Alongside this file, let's create another new file and I'll call it readme.md. In here, we can do something similar and say hello get. And now run git status.
Git will tell you that you're currently on the main branch, that there are no commits yet, and that there are two unttracked files, one of which is a markdown document. So to track it, use git add readme.md. After adding a file, we need to commit it. Committing in git is like taking a snapshot of your project at a certain point.
Think of it as creating a whole new copy of your folder and telling git to remember when you did it at what time. So in the future, if anything happens, you'll time travel to this folder with the commit name you specify to git and see what you had in there. It's essential to commit your changes regularly. Regular commits help you keep track of your progress and make it easier to revert to previous versions if you break something.
You can commit by running get commit-m which stands for message and then in single quoted strings you can add that message. For example, add readme.md file. There we go. Congrats.
You just created a checkpoint in your project's history. Now let's try running git status again to see what it shows. As you can notice that other file hello.js is still there. It's not tracked.
We asked git to track only the readme file. To track this file or other files that you may create, we'll have to run a similar command. It'd be too much work to commit each file individually. Thankfully, we have a command that commits all the files we've created or modified that Git is not tracking yet.
To see this in action, let's create another file test.js and let's add a simple console log that simply console logs a string of test. Now to track both files and commit them in a single commit action, we can do that by running git add dot. The dot after git add tells git to add all files created, modified or deleted to the git tracking. Next, as usual, we can specify the commit name for this tracked version by using git commit-m add hello and test files.
There we go. So now you can see that all of these files are tracked. And since I'm using webstorm, it also has a hidden ideid folder. So it added it to tracking as well, which I'm okay with.
Well done. Now to see the history of all commits we've created, we can use a new command get log. And there we have it, our git history. It contains a commit ID or a hash automatically created by git, the author we specified when using git config, a timestamp, and the commit message we provided.
Great. But how do we switch to an older commit and restore it? Let's say the commit add hello and test files introduces some buggy code and we want to restore our project to a previous version without these files. our brain would immediately suggest deleting those files entirely or clearing up their code.
And if you do that, you'll most likely break your production because other files depend on those files. So instead of deleting them manually to restore to the first version where we had only committed the readme file, we can use a new command. First, you have to copy the commit hash. Yours is going to be different from mine.
So make sure to copy yours. I'll get this one first that says add readme file. and I'll press copy. Then you have to exit this git log by pressing the Q letter on the keyboard.
And then you can use a command get checkout and then you can provide a hash of a specific commit or a branch you want to check out too. Now press enter. Okay, something happened. First of all, our two files are gone.
Detached head experimental changes. What's happening? Well, in git there is a concept of a head which refers to the pointer pointing to the latest commit you've created. When we created our second commit, our head shifted from readme commit to the latest add hello and test files commit.
But when we ran get checkout command, we moved the head to the previous older commit. That's why we got this detached head warning. It's a state where the head pointer no longer points to the latest branch commit. And the rest of this message tells you that you can create a new branch off of this commit.
But don't worry, your files are still somewhere. When you use a git checkout command, you're simply viewing the repository state as it was at the time of a specific commit. Like right now, we're viewing a snapshot of your codebase at a previous moment in time when we only had a readme.md file. The beauty of this is that all the logs and files, whether created or modified, remain untouched.
The get checkout command won't delete any logs or history, so you can safely explore past states without worry. But what if you actually want to discard changes made after that commit? Maybe you want to quickly roll back to a stable state after an issue hits production, tidy up messy commits to look more professional or undo a bad push you regret making. Perhaps you've been experimenting with a refactor that didn't pan out, or you need to recover from a messy merge conflict.
Thankfully, Git provides a few commands that'll help you in these scenarios and I'll teach you how all of that works very soon. So, just keep watching and we'll dive into these more advanced commands that are really going to help you well fix a broken production. Now, to go back to a current state, which is often called the head state, you simply have to run get checkout main. And there we go.
Previous head position was at the hash of this checkout. And now you switch the branch to main. You can see the same thing happen right here on the bottom right or the top left depending where your branching is. And if you made any changes while in the detached head state and you want to discard them, you can do the same thing.
Get checkout dash if that means force and then get back to main. In this case, we're good. We're already on main. And that's it.
You already know more about git than most developers do. Of course, we'll dive deeper into advanced use cases and tips and tricks soon, but now let's talk about GitHub and how it differs from Git. Git is a tool you use to track changes. Whereas GitHub is a cloud platform that allows you to store your Git repositories online and collaborate with others.
To push your local project to GitHub, you'll need to link your repository to a remote. But what's a remote? Well, there are two types of repositories. Local repository is a version of a project that exists on your own machine, laptop, or whatever else you use where you do your developer work.
When you initialize a repo using git init, you create a local repo in your folder. Changes you make there are private until you push them to a remote repository. So a remote repo is a version of a project stored on a server like GitHub, GitLab or Bitbucket. It's used to share code between collaborators and keep project versions in sync across different users computers.
When collaborating with a team, you'll have two kinds of repos. Everyone in the team will have a local repository on their machine and there will also be this one common remote repo from which everyone will sync their local repository versions. Now head over to github.com and create an account if you don't already have one. Once you're in, press the little plus icon on the top right and select new repository.
Enter a repository name such as mastering git. Choose whether you want to make it public or private. Leave the add readme file checkbox unticked and click create repository. This is a remote repository.
Here you can see your repository's origin. Copy it. When you clone a repository from GitHub, Git automatically names the remote repository as origin by default. It's basically an alias for the remote repositories URL.
Now, our goal is to link our local repository to the remote origin. If you haven't yet switched the default master branch name to main, you can do that by running git branch- m main and this will change the branch name to main which is a standard practice nowadays. And now we are ready to link our local repo to a remote origin. You have to run a command get remote add origin and then you have to paste the link to the origin that you just copied and press enter.
And a good thing to know is that you can have multiple remote repositories. You just have to rerun the command and change the origin name to something else. Of course, that's the name of your choice. And then you can also update the new URL.
But in most cases, you'll be fine with just one remote repo. Finally, to push your local commits to GitHub, use get push- origin main. And remember, we used origin here to refer to the remote repository instead of typing the full URL. So, press enter.
And there we go. This worked. If anything with git goes wrong, typically it goes wrong at this point when you're trying to push to a remote repo. So, if you don't see what I'm seeing right here, and instead you got some error, typically all of these errors are very easily resolvable.
I would just recommend copying the error message, pasting it in Google, and then fixing it right there and then. But in this case, we're good. And now, if you go back to your GitHub repository and reload, boom, your code is now online for the world or your team to see. And okay, okay, you might have already known this.
For some of you, that's about as far as you've gone with Git. create a repo, push your changes, and call it a day. But Git has so much more to offer, especially when you're working within a team. So now, let's take things up a notch and dive into branching and merging.
This is where Git truly shines. Branches in Git allow you to create different versions of your project, like making a copy of a project at a specific moment in time. Whatever changes you make in this copied version won't affect the original. The main project or branch stays untouched while you experiment, modify, or add new features in the copied branch.
If everything works out, you can later merge your changes back into the original project. If not, no worries. The original remains safe and unchanged. When working in a team, using separate branches for different features or bug fixes is essential.
It allows you and your team to work independently on different parts of the code without causing conflicts or errors, ensuring everyone can focus on their own tasks. At the start, you'll have one default branch called main. To create a new branch, run get branch and then type a branch name. This will create a new branch.
And if you want to switch to this newly created branch, then run get checkout and then enter the branch name you want to check out too. And there we go. Switch to branch branch name. Now, if you want to go back to main, just run get checkout main.
There we go. And here's a little pro tip. There is a shortcut to create a new branch and immediately move to it. To do that, run git checkout with a -ashb flag and then enter a branch name such as feature branch.
Of course, this branch name and feature branch are just dummy names. Make sure your branch name is short and explains which changes will you be making on that branch. For more tips on how to properly name your branches, you can download the git reference guide. So, let's create and move to this feature branch in one command.
There we go. And what I'm about to say next is very important. So keep it in mind. When you create a new branch, it'll be based on the branch you're currently on.
So if you're on the main branch and run the command, the new branch will contain the code from the main branch at that point in time. However, if you're on a different branch with different code, the new branch will inherit that code instead. So to ensure you're creating the new branch from the correct starting point, you should either first switch to the branch you want to base the new one on or run this command get branch. Then you can enter a new branch name and then the next thing can be the source branch.
So if you do it this way and replace the new branch name and the source branch with the names of actual branches, then it'll create a new branch from another specific branch. So if you run this command, you can directly create and switch to a branch based on any other branch without needing to check out to it first. For now, I'll remove that. And let's say that we want to go into our code and implement this feature we're working on.
Let's say that in our case the only feature we want to do is to modify the readme. So below hello git I'll say I'm adding this from feature dash branch. There we go. Feature implemented.
If only it was this easy. And you can see that our IDE immediately highlighted this readme file in blue indicating that it has some changes. Now we need to add it commit it and push it. This time instead of saying get add readme md let's just use the get add dot which is a command that you'll use much more often.
Next we need to commit the changes with git commit-m and then we have to add a commit message. So this is the perfect time to learn how to write a proper commit message. A quality commit message is written in the imperative mood. a grammatical mood that sounds like you're giving a command like improve mobile responsiveness or add AB testing.
When writing your commit message, make it answer this question. If applied to the codebase, this commit will and then fill in the blank like this commit will upgrade the packages or this commit will fix thread allocation. And why do we do this? Well, because it answers the question, what will happen when I merge the branch containing this commit?
It will add AB testing. For example, be direct and eliminate filler words. For example, let's use modify readme. In this case, it's short, sweet, and in an imperative mood.
And press enter. There we go. We've just made get aware of our commit. Now that you know how to write better commits, let's take a moment and check out our remote repository.
What do you think? Will it have the latest commit we made? Let's reload it. And it's the same.
It doesn't contain our newly created feature branch. Do you know why? It's because the changes we made are in the local repository, which has not yet been synced with the remote repo. To see those changes, first you'll have to publish your local branch.
And you can do that using the git push d- set dash upstream origin and then the name of the branch. In this case, feature dash branch and press enter. There we go. An upstream branch is a remote branch that your local branch tracks.
When you set an upstream branch using set upstream, you're essentially linking your local branch to a branch on a remote repo. Through this command, you push a local feature branch to the origin remote repository and then you set the upstream branch for your local feature branch to track origin feature branch. Alternatively, you can also use get push- u origin feature- branch or the name of your branch. Of course, both set upstream and -ash u establish a tracking relationship between your local branch and the remote branch.
This way, in the future, if you want to push something from your local branch to your remote branch, you simply have to run get push. That's it. At this moment for us, everything is up to date. But as you make future changes, you don't have to rerun set upstream or -ashu.
You only have to add it, commit it, and push it. That's it. And if somebody else made changes to your remote branch, either directly or by merging some other changes into it, you have to make your local branch up to date with the remote branch. And you do that by using the get pull command.
There we go. It's already up to date in this case. This command fetches changes from the remote repo and merges them into your local repo for that branch. There are all and the story doesn't stop there.
Git has plenty of advanced features like merge conflicts, reset, revert, stash, cherrypick, and more. And if you want to truly master Git, I've got a complete crash course waiting for you on YouTube, totally free. You'll find the link down in the description. But for now, what you've learned so far is enough to kick off your DevOps journey.
Though, it's definitely just the beginning. Make sure to keep digging deeper into Git as you grow. You'll soon use this knowledge to build pipelines that automatically build, test, and deploy code to staging or production servers. And guess what?
That entire process begins with a simple Git push. Git also plays a huge role in managing infrastructure with tools like Terraform or Pulumi. Your cloud setup whether it's virtual machines, databases or networks, lives inside a TF or ayaml files in git repository. Change a line, commit and push, and your entire infrastructure updates automatically.
All in all, in DevOps, you might not always write the application logic yourself, but you'll constantly review PRs, check configurations, and maintain secure workflows. GitHub or GitLab pull requests will become your daily workbench. And now you know exactly how they work. And once you've mastered Git, you're ready for the next big leap of building pipelines that take your commits and turn them into live runnable applications.
So, let's dive into that next. CI/CD pipelines. What are those? Well, a pipeline is just a set of automated steps that takes your code from the moment you push it all the way to production.
Instead of manually running mpm install, mpm test, docker build, and cubectl apply. Every single time, your pipeline does it for you. Over the years, the industry has developed a bunch of tools for managing pipelines. Some of the most popular ones are Jenkins, which is the OG, highly customizable but self-hosted and heavy.
GitLab CI/CD, which is built right into GitLab, great if you have your repos there. CircleCI, TravisCCI, and Azure DevOps if you're on the Microsoft ecosystem. They all automate, build, test, and deploy. But most devs today prefer GitHub actions because it's deeply integrated with where your code already lives.
I prefer it because it's built right into GitHub which means no extra setup or third party login. It's event driven which means that it triggers on push PRs or cron jobs. So in simple words when you push your pipeline runs. It has a massive library of pre-built actions which means that you can just grab community workflows for testing docker deployments and more.
and it has version controlled YAML configs. This is where the automation lives right within your repo. So, it's easy to audit and reuse. In other words, it's super simple to use and that's why I personally use it and recommend you do too.
At its core, a GitHub actions pipeline is called a workflow. Workflows live in your repo inside the folder.github/workflows. And each workflow is just a YAML file defining triggers, what events start the workflow like pushing code or opening a PR, jobs which are a set of tasks each running on its own virtual machine, and the steps which are actual commands or actions executed in a job. So what is YAML?
Well, YAML stands for YAML aim markup language. Funny name, right? It basically means that YAML is not about complicated tags like HTML or XML. Instead, YAML is designed to be human friendly and machine readable.
Compare that to JSON or XML. YAML is cleaner, which is why Kubernetes, Docker Compose, and GitHub actions use it for configs. So, to truly master creating pipelines with GitHub actions, you need to understand YAML syntax rules. Unlike other file formats, YAML is whitespace sensitive, which means that indentation is everything.
You have things like key value pairs like language is Python. For indentation, there's no debate here. It only accepts spaces, no tabs. You can also have lists, nested structures where you can combine mappings and lists, scalers for strings, numbers, and booleans, and even things like multi-line blocks, and anchors and aliases where you can reuse different configs.
You don't need every detail right now. Just focus on writing clean YAML. And similar to any other language, YAML also has specific keywords and syntax. So, let me walk you through them real quick.
Some of the core actions include the keyword name which is used to define the workflow or the job title on which defines triggers such as push, PR or schedule. Jobs to define jobs, their OS and steps. Steps which are sequential commands or actions run which includes shell commands to execute. uses if you want to use pre-built actions with where you can pass params to actions env to set environment variables and needs to make one job depend on the other list can go on and on but these are some special keywords that matter most in GitHub actions YAML files and the list could go on and on and that's why I prepared a complete YAML and GitHub actions CI/CD cheat sheet it's packed with so many useful commands And hey, if you'd like to buy me a coffee and support me in making more highquality YouTube videos like this one, plus get a detailed cheat sheet on YAML and CI/CD pipelines, you can join our new channel membership.
No pressure at all. The link should be just somewhere below this video. All right, let's keep going. For now, let's move forward and put what we've learned into action by creating our first GitHub actions pipeline using YAML.
I'll start with creating a new GitHub repo. Let's call it something like DevOps pipelines. Create a new repo and then go ahead and clone it locally by copying this URL and then just clone it. In this case, I'll be using WebStorm to clone it automatically.
Once you're in, you'll have an empty repo. So, what you can do is initialize a project by running mpm init-y. And this will give you a new package json with a new node project. Alongside it, go ahead and create a new file called index.js which will act as the starting point of our application.
And in there, add a new console log saying hello DevOps. We can also add maybe an additional console log saying something along the lines of I'm learning CI/CD using GitHub actions. Perfect. And what we can do is also create another file called test.js.
Within it, I'll add a console log when we start the tests. So I'll say starting tests. And I'll also add a timeout right here that'll wait for 3 seconds. So say console.log waiting 3 seconds.
And of course it'll take 3,000 milliseconds which is 3 seconds. And then I'll add another console log saying something like tests complete. Now we can add both of these files as scripts within package JSON. So right here instead of test I'll simply add a run script which will run node index.js and I'll also add a test script which will also run the test.js file.
Now we want to create a special folder right here in the root of our application. Create a new folder that's called.github. And within GitHub create a new folder called workflows. Within workflows, you can see how my IDE automatically recognizes that I might want to do a GitHub workflow, which would create a workflow.
file, but in this case, we can create it manually by creating a new pipeline. And we can start creating it. First, it needs a normal human readable name. So, I'll say name is CI pipeline, which will make it easier to identify this pipeline in GitHub actions tab as you create more pipelines.
Then it needs an on property which will define the trigger event. What action in GitHub should start this pipeline. In this case, we can say that it'll be a push action. So whenever somebody pushes code to the repo and then we only want to restrict it when changes are pushed to the main branch.
So I'll say branches is going to be set to an array of main. So if you push to a feature branch, nothing happens. Only when you merge into main, which is our production ready branch, the pipeline will run. This will prevent the unnecessary builds for every branch and ensure that main always stays tested.
After that, we can define the jobs. A job is a group of steps that run together. You can think of it like a container in which multiple actions are executed in sequence. In this case, we will name this job build and we have to define what it will run on.
So in this case, we'll tell it to use runs on the latest fresh YUbuntu latest machine. Why Ubuntu? Because it's fast, lightweight, and widely supported. Then inside a job, you have to define different steps.
These are the actual instructions to be executed one after another. Each step has a name. In this case, we'll call it checkout code. And then you can say what it uses.
So in this case, you can say uses actions/checkout atv5. This means that we're using a pre-built GitHub action such as this one right here, GitHub actions checkout. And this is the action we're using that checks out our repository under the GitHub workspace so our workflow can access it. Now we can add some more steps such as another one with a name of set up Node.js JS which will also use so uses another predefined action of actions forward slash setup- node at v3 with and here you can define the node version that you want to set it up with in this case let's do 16 after that we want to run some dependencies so I will create another package that'll have a name of install dependencies and the only thing that it'll is it'll run mpm install and after that we'll have another one which will run the tests.
So it'll be a step of name run tests and it'll run mpm test. This is typically done using just or some other testing framework. But for now we'll just run our manual test file. Now as you can see we have some yellow squiggly lines right here saying that we have some issues with our setup.
And that's because I used tabs for indentation instead of using spaces. So after fixing the indentation, it should look something like this. You should have two spaces for each indentation point. We have jobs, then the build, then we have runs on, and then steps is directly below runs on.
Two spaces indented after build. Perfect. Now let's go ahead and add and commit those changes to GitHub by running git add dot getit commit-m feature add ci pipeline and then get push. Now if you head back over to your GitHub repo, you'll be able to see your latest changes.
And now if you head over to the actions tab, you'll be able to see your newly created pipeline right here. expand it and you'll see all the job details if you enter the build such as setting up the job, setting up Node.js, installing dependencies, and then even running tests. And you can see the results of those tests right here. Starting, completed, waiting 3 seconds, and the job finally is done.
Now, this pipeline will run on every single main push. I can prove that to you by heading over to the code and adding a readme which will automatically push a new readme.md file to main. So I'll say testing the CI pipeline and commit and push. Since a push has been made, if you head over to actions, you'll see that a new action run automatically based off of my commit which pushed over to main.
It'll rerun the tests for the entire application and make sure that everything is good. From here on, you can add additional test coverage checks, deploy to staging your production, or find actions from the GitHub marketplace where there are so many different actions that you can immediately use within your application. So, in the build and deploy stage, this allows you to see your CI/CD pipelines, which enforce code quality, passing tests, and shipping inside Docker container. This was just one simple example.
Based off of this, you can create more workflows or reuse existing workflows from the community. Later on in the build and deploy stage of this project, you'll actually set up real CI/CD pipelines for our acquisitions application, ensuring that your formatting is consistent, your tests pass successfully, and everything runs smoothly within a Docker container. Speaking of which, let's dive into Docker next. It works on my machine.
Have you ever heard or said this? Or it works on Windows but not Mac OS. Or have you ever struggled with juggling different NodeJS versions for different projects? This is why Docker was created in 2013.
And it's not just a tool to solve compatibility issues. It's a critical skill required for the highest paying jobs as the surveys find Docker to be the most popular tool used by 57% of professional developers. If you don't learn it now, you significantly lower your chances of landing a job. You can think of Docker as a lunchbox for our application.
In the lunchbox, we pack not just the main dish, which is our code, but also all the specific ingredients or dependencies it needs to taste just right. Now, this special lunchbox is also magical. It doesn't matter where we want to eat, at our desk, a colleagueu's desk, or have a little picnic. No matter the environment or different computers, wherever we open the lunchbox, everything is set up just like it is in our kitchen.
It ensures consistency, portability, and prevents us from overlooking any key ingredients, making sure our code runs smoothly in any environment without surprises. Technically, that's what Docker is. It's a platform that enables the development, packaging, and execution of applications in a unified environment. By clearly specifying our applications requirements such as NOJJS versions and necessary packages, Docker generates a self-contained box that includes its own operating system and all the components essential for running our application.
This box acts like a separate computer virtually providing the operating system runtimes and everything required for our application to run smoothly. But why should we bother using Docker at all? Big shots like eBay, Spotify, Washington Post, Yelp, and Uber noticed that using Docker made their apps better and faster in terms of both development and deployment. Uber, for example, said in their study that Docker helped them onboard new developers in minutes instead of weeks.
So, what are some of the most common things that Docker helps with? First of all, consistency across environments. Docker ensures that our app runs the same on my computer, your computer, and your boss's computer. No more it works on my machine drama.
It also means everyone uses the same commands to run the app, no matter what computer they're using. Since downloading services like Node.js isn't the same on Linux, Windows, or Mac OS, developers usually have to deal with different operating systems. Docker takes care of all of that for us. This keeps everyone on the same page, reduces confusion, and boosts collaboration, making our app development and deployment faster.
The second thing is isolation. Docker maintains a clear boundary between our app and its dependencies. So we'll have no more clashes between applications much like neatly partitioned lunchbox compartments for veggies, fruits, and bread. This improves security, simplifies debugging, and makes development process smoother.
Next thing is portability. Docker lets us easily move our applications between different stages like from development to testing or testing to production. It's like packaging your app in a lunchbox that can be moved around without any hassle. Docker containers are also lightweight and share the host system resources making them more efficient than any traditional virtual machines.
This efficiency translates to faster application start times and reduced resource usage. It also helps with version control as just like we track versions of our code using Git, Docker helps us track versions of our application. It's like having a rewind button for our app so we can return to a previous version if something goes wrong. Talking about scalability, Docker makes it easy to handle more users by creating copies of our application when needed.
It's like having multiple copies of a restaurant menu. When there are more customers, each menu serves one table. And finally, DevOps integration. Docker bridges the gap between development and operations, streamlining the workflow from coding to deployment.
This integration ensures that the software is developed, tested, and deployed efficiently with continuous feedback and collaboration. How does Docker work? There are two most important concepts in Docker. images and containers and the entire workflow revolves around them.
Let's start with images. A Docker image is a lightweight standalone executable package that includes everything needed to run a piece of software, including the code, runtimes like Noode.js, libraries, system tools, and even the operating system. Think of a Docker image as a recipe for our application. It not only lists the ingredients being code and libraries, but also provides the instructions such as runtime and system tools to create a specific meal, meaning to run our application.
And we would want to run this image somewhere, right? And that's where containers come in. A Docker container is a runnable instance of a Docker image. It represents the execution environment for a specific application, including its code, runtime, system tools, and libraries included in the Docker image.
A container takes everything specified in the image, and follows its instructions by executing necessary commands, downloading packages, and setting things up to run our application. Once again, imagine having a recipe for a delicious cake. The recipe being the Docker image. Now when we actually bake the ingredients, we can serve it as a cake, right?
The baked cake is like a docker container. It's the real thing created from the recipe. Just like we can have multiple servings of the same meal from a single recipe or multiple documents created from a single database schema. We can run multiple containers from a single image.
That's what makes Docker the best. We create one image and get as many instances as we want from it in form of containers. Now, if you dive deeper into Docker, you'll also hear people talk about volumes. A Docker volume is a persistent data storage mechanism that allows data to be shared between a Docker container and the host machine, which is usually a computer or a server or even among multiple containers.
It ensures data durability and persistence even if the container is stopped or removed. Think of it as a shared folder or a storage compartment that exists outside the container. The next concept is Docker network. It's a communication channel that enables different Docker containers to talk to each other or with the external world.
It creates connectivity, allowing containers to share information and services while maintaining isolation. Think of a Docker network as a big restaurant kitchen. In a large kitchen being the host, you have different cooking stations or containers, each focused on a specific meal. Meal being our application.
Each cooking station or a container is like a chef working independently on a meal. Now imagine a system of order tickets or a Docker network connecting all of these cooking stations together. Chefs can communicate, ask for ingredients or share recipes seamlessly. Even though each station or a container has its own space and focus, the communication system or the Docker network enables them to collaborate efficiently.
They share information without interfering with each other's cooking process. I hope it makes sense but don't worry if it doesn't. We'll explore it together in the demo. So moving on, the Docker workflow is distributed into three parts.
Docker client, Docker host aka Docker Damon, and Docker registry aka Docker Hub. The Docker client is the user interface for interacting with Docker. It's the tool we use to give Docker commands. We issue commands to the Docker client via the command line or a graphical user interface instructing it to build, run, or manage images or containers.
Think of the Docker client as the chef giving instructions to the kitchen staff. The Docker host or Docker Damon is the background process responsible for managing containers on the host system. It listens for Docker client commands, creates and manages containers, builds images, and handles other Docker related tasks. Imagine the Docker host as the master chef overseeing the kitchen carrying out instructions given by the chef or the Docker client.
Finally, the Docker registry aka Docker Hub is a centralized repository of Docker images. It hosts both public and private registries or packages. Docker is to Docker Hub what git is to GitHub. In a nutshell, Docker images are stored in these registries.
And when you run a container, Docker may pull the required image from the registry if it's unavailable locally. To return to our cooking analogy, think of Docker registry as a cookbook or recipe library. It's like a popular cookbook store where you can find and share different recipes. In this case, Docker images.
In essence, the Docker client is the command center where we issue instructions. The Docker host then executes these instructions and manages containers. And the Docker registry serves as a centralized storage for sharing and distributing images. Using Docker is super simple.
All you have to do is click the link in the description, download Docker Desktop for your own operating system, and that will help you containerize your application in the easiest way possible. It'll definitely take some time to download, but once you're there, you can accept the recommended settings and sign up. Once you're in, on the left side, you can see the links to containers, which display the containers we've made, images, which shows the images we've built, and volumes, which shows the shared volumes we have created for our containers, and other beta features like builds, dev environments, and docker code. Now, return to the browser and Google Docker Hub.
The first result will surely be hub.docker.com. Then open it up. Go to explore and you can see all of the public images created so far by developers worldwide. from official images by verified publishers to sponsored open-source ones covering everything from operating system images like Ubuntu languages like Python and Golang, databases like Reddis, Postgress, for MongoDB, MySQL, runtimes like Noode.js to even Hello World Docker image and also the old peeps like WordPress and PHP.
Almost everything that you need is right here. But how do we create our own Docker images? Easy peasy. Creating a Docker image starts from a special file called Docker file.
It's a set of instructions telling Docker how to build an image for your application. There are some specific instructions and keywords we use to tell Docker what we want through the Docker file. Think of it as Docker syntax or language to specify exactly what we want. Here are some of the commands from specifies the base image to use for the new image.
It's like picking a starting kitchen that already has some basic tools and ingredients. Work deer sets the working directory for the following instructions. It's like deciding where in the kitchen you want to do all your cooking. Copy copies the files or directories from the build context to the image.
It's like bringing in your recipe, ingredients, and any special tools into your chosen cooking spot. Run executes commands in the shell during image build. It's like doing specific steps of your recipe, such as mixing ingredients. Expose informs Docker that the container will listen on specified network ports at runtime.
It's like saying, "I'm going to use this specific part of the kitchen to serve the food." Env sets environment variables during the build process. You can think of that as setting the kitchen environment such as deciding whether it's a busy restaurant or a quiet home kitchen. Arg defines built time variables. It's like having a note that you can change before you start cooking, like deciding if you want to use fresh or frozen ingredients.
Volume creates a mount point for externally mounted volumes. Essentially specifying a location inside your container where you can connect external storage. It's like leaving a designated space in your kitchen for someone to bring in extra supplies if needed. CMD provides default command to execute when the container starts.
It's like specifying what dish you want to make when someone orders from your menu. Entry point specifies the default executable to be run when the container starts. It's like having a default dish on your menu that people will get unless they specifically ask for something else. And you might wonder, isn't entry point the same as cmd?
Well, not really. In simple terms, both cmd and entry point are instructions in Docker for defining the default command to run when a container starts. The key difference is that cmd is more flexible and can be overridden when running the container while entry point defines the main command that cannot be easily overridden. Think of cmd as providing a default which can be changed and entry point as setting a fixed starting point for your container.
If both are used, cmd arguments will be passed to entry point. And this are the most used keywords when creating a docker file. I have also prepared a list of other options you can use in docker files. You can think of it as a complete guide and a cheat sheet you can refer to when using docker.
The link is in the description. But now, let's actually use some of these commands in practice. Let's try to run one of the images listed in the Docker Hub to see how that works. Let's choose one of the operating system images as an example.
Let's go for Ubuntu. On the right side of the details of the image, you'll see a command. Copy it and try executing it in your terminal. But before we paste it, first create a new empty folder on our desktop called docker_course and then drag and drop it to our empty Visual Studio Code window.
Open up your empty terminal and paste the command docker pool Ubuntu. It's going to do it using the default tag latest and it's going to take some time to pull it. As you can see, it's working. Docker initially checks if there are any images with that name on our machine.
If not, it searches for the Docker hub, finds the image, and automatically installs it on our machine. Now, if we go back to Docker Desktop, we'll immediately see an Ubuntu image right here under images. To confirm that we actually installed a whole different operating system, we can run a command that executes the image. Do you know how that process is called?
creating a container. So let's run docker run dashit for interactive and then Ubuntu and press enter. After you run this command, head over to docker desktop and if you go to containers, you'll see a new container based off of the Ubuntu image. Coming back to our terminal, you'll see something different.
If you've ever tried Ubuntu before, you'll notice that this terminal looks exactly like the Ubuntu command line. Let's test out some of the commands. ls for list. We have cd home to move to our home directory.
MK dear, which is going to create a new directory called hello. We can once again ls cd into hello to navigate to it. We can create a new hello-ubuntu.txt. txt.
We can ls to check it out if it's there. And it is. We have just used different Ubuntu commands right here within our terminal. Amazing, isn't it?
We are running an entirely different operating system simply by executing a Docker image within a Docker container. For now, let's kill this terminal by pressing this trash icon and navigate back to our Docker desktop. Now a bigger question awaits. How do we create our own Docker images?
We can start from a super simple Docker app that says hello world. Let's create a new folder called hello-ashd docker. Within it, we can create a simple hello.js file. And we can type something like console.log log hello docker.
Then comes the interesting part. Next, we'll create a docker file. Yep, it's just Docker file like this. No dots, no extensions.
VS Code might prompt you to install a Docker extension. And if it does, just go ahead and install it. Now, let's figure out what goes into the Docker file. Do you remember the special Docker syntax we talked about earlier?
Well, let's put it to use. First, we have to select the base image to run the app. We want to run a JavaScript file so we can use the node runtime from the Docker Hub. We'll use this one with an Alpine version.
It's a lightweight version of Linux. So, we can type something like from node 20-p. Next, we want to set the working directory to forward slapp. This is the directory where commands will be run.
And then forward/ app is a standard convention. So we can type work there and then type forward slash app. Next we can write copy dot dot like this. This will copy everything from our current directory to the docker image.
The first dot is the current directory on our machine and the second dot is the path to the current directory within the container. Next, we have to specify the command to run the app. In this case, cmd node hello.js will do the trick. And now that we have created our Docker file, let's move into the folder where the Docker file is located by opening up the terminal and then running cdello-d.
Inside of here, let's type docker build- t and t stands for the tag, which is optional. And if no tag is provided, it defaults to the latest tag. And finally, the path to the docker file. And in this case, that's hello-ashdocer dot because we're right there.
And press enter. It's building it. And I think it succeeded. Great.
To verify that the image has been created or not, we can run a command docker images. And you can see that we have two images, Ubuntu as well as hello docker created 16 seconds ago. Now, if you're a more visual person, you can also visit Docker desktop. Here, if you head to images, you can see all of the images we have created so far.
Now that we have our image, let's run or containerize it to see what happens. So, if we go back, we can run docker run hello-doer. There we have it, an excellent console log. If we go back to Docker desktop and then open up that container and navigate inside of the files, you'll see a lot of different files and folders, but there is one special file here.
Want to make a guess? Yes, it's app which we created in Docker file. Moving inside it, we can see that it contains two of the same files we have in our application. Docker file and Hello.js exact replica.
Also, if we want to open up our application in shell mode, similar to what we did with Ubuntu, we have to run docker run it hello-d. This puts us directly within the operating system and then you can simply run node hello.js to see the same output. We can also publish the images we have created on docker. But before that, let's build something a bit more complex than the simple hello world and then let's publish it to the Docker Hub.
Which means that now we're diving into the real deal, dockerizing ReactJS applications. Let's dockerize our first React application. I'm going to do that by quickly spinning up a simple React project by running the command mpm create vit latest and then react- docker as the folder name. If you press enter, it's going to ask you which flavor of JavaScript you want.
In this case, let's go with React. Sure, we can use TypeScript. And we can now cd into React-doccker. And we won't run any mpm install or mpm rundev because the dependencies will be installed within our dockerized container.
So with that said now if we clear it we are within react docker and you can see our new react application right here. So as the last time you already know the drill we need to create a new file called docker file. As you can see, it automatically gets this icon. And it's going to be quite similar to the original Docker file that we had, but this time I want to go into more depth about each of these commands so you know exactly what they do.
And because of that, below this course, you can find a complete Docker file for our React Docker application. Copy it and paste it here. Once you do that, you should be able to see something that looks like this. It seems like there's a lot of stuff, but there really isn't.
It's just a couple of commands, but I wanted to take my time to deeply explain all of the commands we're using right here. So, let's go over all of that together. First, we need to set the base image to create the image for React app. And we are setting it up from Node 20 Alpine.
It's just a version 20 of Node. You can use any other version you want. And in these courses, I want to teach you how to think for yourself, not necessarily just replicate what I'm doing here. So, if you hover over the command, you can see exactly what it does.
Set the base image to use for subsequent instructions. From must be the first instruction in a Docker file. And you can see a couple of examples. You can use a from base image or you can even add a tag or a digest.
In this case, we're adding a tag of a specific version, but it's not necessary. And if you click online documentation, you can find even more instructions on exactly how you can use this command. Next, we have to play with permissions a bit. Now, I know that these couple of commands could be a bit confusing, but we're doing it to protect our new container from bad actors and users wanting to do something bad with it.
So because of that we create a new user with permissions only to run the app. The s is used to create a system user and g is used to add that user to a group. This is done to avoid running the app as a root user that has access to everything. That way any vulnerability in the app can be exploited to gain access to the host system.
This is definitely not mandatory, but it's definitely a good practice to run the app as a non-root user, which is exactly what we're doing here. We're creating a system user, adding it to the user group, and then we set the user to run the app user app, and you can see more information about right here. Set the username to use when running the image. Next, we set the working directory to forward slash app.
And then we copy the package JSON and package log JSON to the working directory. This is done before copying the rest of the files to take advantage of Docker's cache. If the package JSON and package log JSON files haven't changed, Docker will use the cache dependencies. So copy files or folders from source to destination in the images file system.
So first you specify what you want to copy from the source and then you provide a path where you want to paste it to. Next, sometimes the ownership of the files in the working system is changed to root and thus the app can't access the files and throws an error eax permission denied. To avoid this, change the ownership of the files to the root user. So we're just changing it back from what we did above.
Then we change the ownership of the app directory to the app user by running a new command in this case chown where we specify which user and group and directory we're changing the access to and then we change the user back to the app user and once again if these commands are not 100% clear no worries. This is just about playing with user permissions to not let bad actors play with our container. Finally, we install dependencies. copy the rest of the files to the working directory.
Expose the port 5173 to tell Docker that the container listens on that specified network and then we run the app. If you want to learn about any of these commands, hover over it. You can already get a lot of info and then go to online documentation if you need even more. With that said, that is our Docker file.
Another great practice that we can do is just go right here and create another file similar to.git ignore. This time it's called docker ignore. And here you can add node_modules just to simply exclude it from docker because we don't really need it in our node modules on our github. We don't need it anywhere, not even in docker.
Docker is playing with our package json and package lock json and then rebuilds it when it needs to. Now finally once we have our docker file we are ready to build it. We can do that by opening up a new terminal, navigating to React Docker, and we can build it by running the command docker build- t for tag, which we can leave as default. React- Docker, which is the name of the image, and then dot to indicate that it's in the current directory.
And finally, press enter. This is going to build out the image, but we already know that an image is not too much on its own. To use the image, we have to actually run it. So, let's run it by running the command docker run react-doccker and press enter.
As you can see, it built out all of the packages needed to run our app and it seems to be running on localhost 5173. But if we open it up, it looks like the site isn't showing even though we specified thatexpose endpoint right here saying that we're listening on 5173. So why is it not working? Well, first we need to understand that expose does only one job and it's to inform docker that the container should listen to that specific exposed port in runtime.
That does make sense. But then why didn't work? Well, it's because we know on which port the docker container will listen to. Docker knows it and so does the container.
But someone is missing that information. Any guesses? Well, it's the host is the main computer we're using to run it. As we know, containers run in isolated environments and by default, they don't expose their ports to the host machine or anyone else.
This means that even if a process inside the container is listening on a specific port, the port is not accessible from outside the container. And to make our host machine aware of that, we have to utilize a concept known as port mapping. It's a concept in Docker that allows us to map ports between the Docker container and the host machine. It's exactly what we want to do.
So to do that, let's kill our entire terminal by pressing this trash icon. Reopen it. Reg to React-docker and let's run the same command docker run. And then we're going to add a P flag right here and say map 5173 in our container to 5173 on our host machine.
And then specify which image do we want to run and press enter. Now as you can see it seems to be good. But if I run it, same things happens again. It's not Docker's fold, but it's something that we missed.
It's a Vit. If you read the logs right here, it's gonna say use-host to expose. So, we have to expose that port for vit 2. So, let's modify our package json by going right here and adding the d-host to expose our dev environment.
And now again we'll have to stop everything, kill our terminal, reopen it, ren to React Docker, and then run the image again. Which makes you wonder, wouldn't it be great if Docker does it on its own whenever we make some file changes? And the answer is yes, definitely. And Docker heard us.
Later in the course, I'll teach you how to use the latest Docker features that allow us to automatically build images and save us from all of this hassle. But I first want to teach you how to do it manually to understand how cool Docker Compose is, which I'm going to teach you later on. So, let's just rerun the same command. And now we get an error.
This means that something is already connected to that port. And this indeed is true. If you check out our containers or images, we have accumulated a large number of images. So let's do a quick practice on how to clear out all of our images or containers.
Back in our terminal, we can run a command docker ps, which is going to give us a list of all of the current containers alongside their ids, images, created status, and more, as well as on which ports are they listening on. This is for all the active running containers. And if you want to get absolutely all containers, we can run docker ps- a. And here you can see absolutely all containers that we have.
That's a lot. Now the question is how do we stop a specific container? Well, we can stop it by running docker stop and then use the name or the ID of a specific container. You can use the first three digits of the container ID or you can use the entire name.
So let's use C3D C3D. And if you get back the same command, it means that it successfully stopped it. If we go back to containers, you can see that the C3D is no longer running. But now let's say we have accumulated a large number of containers, which we indeed have both the images and containers.
So, how can we get rid of all of the inactive containers we have created so far? Well, we can do that by running docker container prune. If you run that, it's going to say this will remove all stopped containers. So, let's press y.
And that's fine. We only had one that was stopped that we manually stopped and it pruned it. But you can also use the command docker rm to remove a specific container by name or its ID. So let's try with this one.
A A7 docker rm aa7 and press enter. Here we get a response saying that we cannot stop a running container. Of course you could always use the d-force and that's going to kill it. We can verify right here.
These commands are great and it's always great to know your way around the CLI. But nowadays we also have Docker Desktop which allows us to play with it within a graphical user interface which makes things so much simpler. You can simply use the stop action to stop the container or you can use the delete action to delete a container. It is that easy.
Similarly, you can do that for images by selecting it and deleting all images. And you can follow my process of deleting everything. Right now, I just want to ensure that we have a clean working environment before we build out our React example one more time. And while we're here, if you have any volumes, feel free to delete those as well.
There we go. So, moving back, we want to first build out our image. And now, let's repeat how to do that. You simply have to run docker build-asht the name of the image and then dot.
This is going to build out the image. After you do that, we have to run it with port mapping included. So that's going to be docker run-b map the ports and then the name of the container you want to run and press enter. It's going to run it.
And you can see a bit of a difference. Right now here it's exposed to the network. And if you try to run localhost 5173, you can see that this time it actually works. That's great.
But now if we go back to our code, go to source app and change this vit and react to something like docker is awesome and save it. Back on our local host, you can see that it didn't make any changes. That's very unfortunate. We hope that this container could somehow stay up to date with what we are developing.
Otherwise, it would be such a pain to constantly rebuild containers with new changes. This happens because when we build the Docker image and run the container, the code is then copied into that container. You can see all the files right here and they're not going to change. So, even if you go right here to app and then source and then app tsx, rightclick it and click edit file, you'll be able to see that here it still says vit plus react.
So, what can we do? Well, we'll have to further adjust our command. So, let's simply stop our active container so we can then rerun a new one on the same port. Let's go back to our Visual Studio Code.
Clear it. Make sure that you're in the React-docker folder and we need to run the same command. Then we have to also add a string sign dollar sign pwd close it and then say col/app and close it like so. It seems a bit complicated, doesn't it?
What this means is that we tell docker to mount the current working directory where we run the docker run command into the app directory inside the container. This effectively means that our local code is linked to the container and any changes we make locally will be immediately reflected inside the running container. This tiny pwd represents the current working directory over here. It executes in the runtime to provide the current working directory path.
And V, V stands for volume. That's because we're creating a volume that's going to keep track of all of those changes. Remember that we talked about volumes before. They try to ensure that we always have our data stored somewhere.
But before you go ahead and press enter, there is one more additional flag that we have to add to this command. And that is yet another dashv but this time forward slapp slode modules. Why are we doing this? Well, we have to create a new volume for the node modules directory within the container.
We do this to ensure that the volume mount is available in its container. So now when we run the container, it will use the existing node modules from the named volume and any changes to the dependencies won't require a reinstall when starting the container. This is particularly useful in development scenarios where you frequently start and stop containers during code changes. So let's run it.
It's running on localhost 5173. Docker is indeed awesome. But now the question is if we change it, what's going to happen? So we go here and say something like Docker is awesome, but also add a couple of whales at the end.
Press save. And then you can see PM V update source app tsx. And now if we run it, we have a couple of whales right here. There we go.
So whenever you change something, you'll see the result instantly in the UI. That's amazing. And even if we go back to our Docker desktop, you can see that now we have a volume that keeps track of these changes. And if you go under containers, go to our active container, go to files, and then let's go to app source app tsx and edit.
You can see that the changes are also reflected right here. So that's it. You have successfully learned how to dockerize a front-end application. Not many developers can do that.
But you, you are just getting started. Now that we have created our Docker image, let me teach you how to publish it. We can do that using the command line. So let's go right here, kill our current terminal, reopen it, and cd into React Docker.
Next, we can run docker login. And if you already logged in with docker desktop, it should automatically authenticate you. Next, we can publish our image using this command. Docker tag react-doccker.
Then you need to add your username and the name of the image. You can find your username by going to docker desktop, clicking on the icon on top right, and then copying it from there. In my case, it's JavaScript mastery. And then I'm going to do forward slreact-docker.
It's okay if we don't provide any tag right here as the default tag is going to be colon latest. Also, don't forget that below this course, I provided a complete list of all of the commands including different tag commands to help you get started with Docker anytime, anywhere. So, check them out and try running some of them. Finally, let's publish our image.
And now we have to run docker push javascript mastery or in this case your username/react-doccker. And this is going to actually push it to our docker hub. There we go. Now if you go back to docker desktop, you can see that we have a JavaScript master react docker image that is now actually pushed on the hub.
And you can also check it out right here by going to localhub images. And then you can see JavaScript mastery has one latest image. And another cool thing you can do is go to hub.docker.com where you can find your image published under repositories and then check out your account right here and you'll be able to see your React Docker image right here live on DockerHub. And now other people can run this image as well and containerize their applications by using it.
How cool is that? And that's all it is to it. You have successfully published your first Docker image. But now that you know the basis, let's find a more efficient way of dockerizing our applications.
Oh yeah, developers are lazy. So writing and running all of these commands for building images and containers and then mapping them to host is just too much to do. But it's not the only way. We can improve or automate this process with Docker Compose and run everything our application needs to run through Docker using one small single command.
Yes, we can use a single straightforward command to run the entire application. So, say hi to Docker Compose. It's a tool that allows us to define and manage multicontainer Docker applications. It uses a YAML file to configure the services, networks, and volumes for your application, enabling us to run and scale the entire application with a single command.
We don't have to run 10 commands separately to run 10 containers for one application. Thanks to Docker Compose, we can list all the information needed to run these 10 containers or more in a single file and then run only one command that automatically triggers running the rest of the containers. In simple words, Docker Compose is like a chef's recipe for preparing multiple meals in a single dinner. It allows us to define and manage the entire cooking process for recipes in one go, specifying ingredients, cooking instructions, and how different parts of the meal should interact.
With Docker Compose, we can serve up our entire culinary experience with just one command. And while we can manually create these files on our own and set things up, Docker also provides us with a CLI that generates these files for us. It's called Docker Init. Using Docker Init, we initialize our application with all the files needed to dockerize it by specifying our tech choices.
So let's go ahead and create another VIT project which we can use to test out the features of docker compose and docker init. We can open up a terminal and then run mpm create vit add latest. In this case we can call it vit- project and press enter. It's going to ask us a couple of questions.
It can be a react typescript application. We can cd into it. And please make sure that you are in the Docker course, meaning in the root of our folder. So it needs to create it right next to React.
If you were in React before when you run this command, it's going to create it inside of it. If that's the case, delete it and just navigate to Docker course and then run the command. Now we can cd into V project and we can learn how to use Docker in it. It's so simple.
You simply run Docker in it. That's all there is to it. And it's going to ask you many questions based off which it's going to generate a perfect YAML file for you. So what application platform are we planning on using?
In this case, it's going to be node. So you can simply press enter. What version? You can just press enter one more time to verify what they're saying in parenthesis.
20 is fine with us. MPM is good. Do we want to use mpm run build? No, actually uh in this case we're going to say no and we're going to say mpm rundev.
That's what we want to use. And the server is going to be 5173. And that's it. We can see that this has generated three new files for us.
The docker file which we already know a lot about. This one has some specific details in it. But you can see that again it's based off of the same thing. It starts from a specific version, sets up the environment variables, sets up the working directory and run some commands.
We also have a docker ignore where we can ignore some additional files. And then there's this new file compose.yaml. While all of these files are important with using docker compose, yaml is the most important one. And you can read all of these comments, but for now I just want to delete them to show you what it is comprised of.
We simply define which services we want our apps or containers to use. We have a server app where we build the context, specify environment variables, and specify the ports. Of course, these can get much more complicated in case you have multiple services you want to run, which is exactly what I want to teach you right now. Here, they were even kind enough to provide an example of how you would do that with running a complete Postgress database.
So you can specify the database, database image, and additional commands you can run. But more on that later. We're going to approach it from scratch. For now, we can leave this empty compos yaml.
And first, let's focus on just the regular Docker file. In this case, we can replace this Docker file with the one we have in our React Docker application. So, copy this one right here and paste it into this new one. This one we already know what it is doing.
Now moving inside of the YAML file here, we can rename the server into web as that's a common practice for running web applications and not servers. We can also remove environment variables as we're not using any and we can leave the port. Finally, we need to add the volumes for our web service. So we can save volumes.
Make sure to provide a space here and then a dash. And that's going to be colon slapp and another dash/app/node modules. Does this ring a bell? It's similar what we have done before manually by using the docker build command, but now we're doing it all with this compose yaml file.
And now all we have to do is run a new command. docker compose up and press enter. And as you can see, we get a permission denied. You never want to see this.
If you're in Windows, maybe you're used to seeing this every day. In which case, you simply have to close Visual Studio Code, rightclick it, and then press run as administrator. That should give you all the necessary permissions. On Mac OS or Linux, you can simply add sudo before the command.
Then it's going to ask you for your password and it's going to rerun it with admin privileges. So let's press enter. And the process started. It's building it out.
Now let's debug this further. We get the same response we've gotten before. Hm. What could this be?
Port is already allocated. Oh yeah, we forgot to delete or close our container that we used for previous React application. So now we know the easy way to do it. We simply go here, we select it and we can stop it or delete it.
Once it is stopped, we can go back and then simply rerun the command. I want to lead you through all of the commands together, even if the failed ones, just so you can get the feel of how you would debug or reapproach specific aspects once you encounter errors. That's what being a real developer is. getting stuck, resolving the obstacle, and getting things done.
And finally, let's run the command. It's running it. And if we go to localhost 5173, ah, the same thing as before. Any guesses?
The answer is that we once again forgot to add the d-host to our vit dev script right here. So if we add it stop our application from running by pressing Ctrl C, this is going to gracefully stop it. The cool thing about Docker Compose is that it's also stopping the container that it spun up. And now that we have canceled our action, we can try to rerun it with pseudo Docker Compose up, but this time with host included.
And press enter. It's going to rebuild it. And if we open it up now, it works. By now, you should have a solid understanding of how to containerize applications within Docker.
Of course, you can take this further by experimenting with dockerizing projects like MER or Nex.js apps. And if you want to deepen your Docker skills and see how it applies across different types of projects, check out my full Docker course on YouTube. It's completely free and the link is down in the description. And if everything makes sense so far, trust me, you're on the right track with DevOps.
You'll soon be applying this knowledge to containerize production ready applications and connect them with CI/CD pipelines. I'll cover all of that here. So, let's just keep going. In the previous lesson, you learned how to build and run containers with Docker.
You saw firsthand how containers package your applications into neat portable boxes that can run anywhere. That's already super powerful, but everything feels amazing until we start getting more users. Suddenly, there are too many requests for a single container to handle. That container has a ceiling and if it dies, your app dies with it.
That's where Kubernetes comes in. Kubernetes is a container orchestration platform. Its job to schedule, scale, self-heal, and load balance containers across machines so your app stays up. So, one container isn't enough.
Well, a single process handles only a limited number of concurrent requests before CPU and memory become bottlenecks. Sure, you can tune and scale vertically, but there's always going to be a ceiling and a single point of failure. And you can't bet on one thing for life. If it goes down, your application goes down and so do you.
So, you need replicas and an automated way to place and manage them. That is Kubernetes. often abbreviated as K8s with the eight representing the eight letters between K and S is an open- source container orchestration platform. At its core, Kubernetes helps you run your app across multiple nodes, scale replicas up and down based on demand, restart unhealthy containers automatically, and distribute traffic across replicas, all while rolling out updates without downtime.
Docker gives you containers. Kubernetes decides how, where, and when they run. You can think of Kubernetes as the operating system for your container. Without it, you'd be manually starting and stopping containers, keeping track of IP addresses, restarting crashed apps, and scaling things up or down by hand.
But to really understand Kubernetes, let's break it down into its building blocks. First, we have the cluster. A cluster is a group of machines either physical or virtual that work together as one single system. In Kubernetes, a cluster is made up of a control plane which decides, schedules, reconciles and monitors health.
And then we have worker nodes, physical or virtual machines where your containers actually run. Each worker node runs the cubullet, an agent that communicates with the control plane and a container runtime like docker. There is also something known as a cube proxy that handles networking and routing inside the cluster for every node. So when you tell kubernetes run three copies of my node.js app, the control plane decides where these containers go and the worker nodes actually run them.
Next up, we have pods. In Kubernetes, you don't run containers directly. Instead, containers are wrapped in something called a pod. A pod is the smallest deployable unit in Kubernetes.
There's usually one container per pod, and each pod gets its own IP address. So, when you deploy your app, Kubernetes runs it inside a pod. You never interact with containers directly in Kubernetes. you only interact with pods.
And you can even run multiple pods by specifying something known as a replica set. A replica set ensures a specified number of pods are always running. If you say, "I want three replicas," Kubernetes makes sure three pods are running at all times. And if one pod dies, Kubernetes spins up a new one automatically.
This is where scaling comes in. You don't manually start containers. You just declare how many replicas you want and then comes the deployment. Deployment is the higher level object that manages replica sets.
It allows you to define updates to your application. Kubernetes can do a rolling update, gradually replace old pods with new ones so your users never see downtime. It handles all of these and ensures reality always matches the desired state. If one pod crashes, it creates a new one.
So instead of saying, "Go ahead and run these containers," you say, "Here's my app. Here's the image. Here's how many replicas I need. Manage it for me." But there's one issue.
Pods are temporary. They come and go. And each time they get a new IP. So how do users or other pods connect to them?
They connect using something called a service. A service is a stable endpoint which is a permanent IP or DNS name that automatically routes traffic to the available pods behind it and it also load balances requests among multiple replicas. Think of a service as the reception desk. You don't care which employee helps you as long as someone does.
And apps often need configuration and credentials. So that's why we have config maps and secrets. Config maps store configuration data, for example, like a database URL. And secrets store sensitive data like passwords or API keys.
Kubernetes injects these into pods securely without baking them into your Docker image. All of this sounds good, right? But how do the external users access this? Welcome, Ingress.
Ingress is like a smart router that exposes HTTP and HTTPS routes to the outside world. For example, it can map api.mmyapp.com to your backend service. And similarly to Docker, Kubernetes also has volumes. Since containers are ephemeral, meaning data is lost if restarted, Kubernetes provides volumes for persistent storage.
That's what you need to know for now. If you want a separate advanced deep dive on Kubernetes, let me know down in the comments and I'll record one for you. And yeah, I think this goes without saying, but you should never do anything directly on production. Before touching production clusters, you can create local clusters that allow you to experiment safely.
They simulate a full Kubernetes environment without risking your production apps or cloud costs. Miniube is the most popular choice. It's lightweight and runs a single node cluster inside a virtual machine or container. When I say mini cube runs a single node cluster, I mean that that cluster has only one node that acts as both the control plane and worker node.
And this is different from production where clusters are usually multi-node which means that control plane nodes manage the cluster like the API server or theuler and worker nodes run your application workloads containing pods and containers. So with a single node cluster both roles live on the same machine which is perfect for development and testing. There are also some alternatives like kind kubernetes in docker which runs clusters inside docker containers. It's great for CI/CD pipelines and automated testing and K3S a lightweight Kubernetes distribution good for internet of things or resource constraint machines but I still recommend mini cube for learning because it gives you all the Kubernetes components locally including the API serverul and cubullet so you can see production-like behavior.
So let's get our hands dirty on creating your very first local cluster and running Kubernetes. Let's dive right into the Kubernetes demo. First things first, we'll create a new repo. So I'll call it Kubernetes demo and create.
Now you can copy this URL. So we can clone the repo within our IDE. I'll do it using WebStorm. So I simply need to provide the URL right here and click clone.
If you're using a terminal, you can just say get clone and then paste the URL. Once you're within it, we can run mpm init-y to initialize a new node application. It'll start with only package json. So while we're here, let's also install express by running mpm install express.
Now after that, we'll have to install a CLI for running Kubernetes. And if you head over to Kubernetes documentation, head over to tasks and then install tools, you'll see the cubectl installation on Linux, Mac OS or Windows. So just proceed with your operating system. I am on Mac OS Apple Silicon.
So I'll simply copy this girl command, head back within our console and type this. It'll download it and set it up. But of course, the setup for Windows is a bit different. So pause this video right here and install Cubectl.
Once you've installed it, you can run cubectl version-client and you'll be able to see a version right here. After that, you'll also need to install mini cube, which is local Kubernetes focusing on making it easy to learn and develop for Kubernetes. And here you can choose your operating system, the architecture, and just copy the installation command. Once again, I will paste it for my device.
You can clone it for yours. Let's wait until it gets installed. It might ask you the password as well. So just type it in and press enter and you'll be done.
Once it is done, you can run mini cube version to see whether it has been installed properly. If you see something like this, we're good. With mini cube and cubectl installed, we are ready to create our index.js file, the starting point of our express application. So just go ahead and create a new file called index.js.
And within it you can import express from express you can initialize a new app and define a port. It can be 3000 8080 5,000 or anything. After that you can create a new empty route that's going to be a forward slashhome route. You can open up a request and a response for this route and then you can send some kind of an output like a message of hello world.
Of course, to be able to reach this endpoint, we need to turn the server on and make it listen on a specific port. And we can also give it a console log saying something like example app listening on port. And then we define the port right here. Now, while we're here, we can also provide a bit more information.
So when somebody tries to make get requests to our API alongside passing the message of hello world instead of it actually we'll say something like hello from a container because we'll be running this within a cube container we'll also define a service which will be hello-ash node then I will also give it a pod which will be process.env.pod_name pod_name or we can make it unknown if we don't have a pod within our environment variables and finally we can define the time this is going to be a new date dot to ISO string so we return it in a human readable format alongside this home route we can also add some basic health endpoints for the probes we can do that by saying app.get get and then listen on something like ready Z where we'll also have a request and response and we'll just response with a status of 200 and send a message of ready. If we get this message that means that we are running and another very important endpoint that we need to have to make this work is this app.get health Z. This one can send a response of okay. Both of these two endpoints are needed for Kubernetes to know that our app is alive and well.
So make sure to have it and then we can head over to our package JSON. Let's change the type of this application from common.js to module. So we can use ES6 imports and exports. And then let's also add a new dev script that'll run node with a watch flag.
So whenever we make any changes, the terminal will be restarted. And we want to run this index.js file. And after adding this dev script, also make sure to add a start script. This one will be even simpler.
It'll be just node index.js. In this case, we don't have to add the watch flag because in deployment, we won't be making any changes that we'll have to listen for or watch for. Rather, we'll just run the finished server. Once you do that, we want to start doing the Docker setup.
Since we've already watched a crash course on Docker and since later on in the build and deploy part we will dockerize that application for now I'll provide you with the files needed to make it work. So first things first we need a docker file which you can create by just creating a docker file and then within it within the video kit down below you can copy and paste the Kubernetes demo docker file or feel free to pause this video and type it out. We're first defining a base image of an operating system that we want to run and setting a working directory. Then we're installing all the dependencies separately for caching, copying the app source, and then running the app as a nonroot user.
After that, we will also need a docker compose file. So create a new file called docker-mpose.yaml. And once again, I will provide this over within the video kit down below or feel free to write it by hand, but make sure to use the two spaces to do the indentation and not the tabs. Here we have the services where we're defining the API service.
And within it, we have a build where we want to build this docker file with a specific container image running on port 3000 with a node env. We give it access to different volumes and a command of mpm rundev. I will also define a getit ignore so that it knows what not to push over to GitHub. It's going to be node modules of course.
And we also want to do another one which will be docker ignore which will include node modules. mpm-debug.log. So all the log files docker filed docker ignore.git and dogggetit ignore. We don't need those within docker.
And now we are ready to create a new docker image and run a docker container in the foreground which means in an attached mode. You can use it this way when you've changed your docker file or code and want to rebuild it and run it in one go. Basically this is your go-to command in development mode. So open up your terminal and simply type docker compose up- d-build and press enter.
And if you run it, you'll see that it says no configuration file provided but we have our docker compose here or wait it is docker compon rather we want to make it compose. So, if we fix this snipo, which you most likely didn't have, and we rerun this docker compose up build command, you'll see that it'll start building, but it's having trouble finding the Docker file. And it looks like I misspelled that one, too. It's the Docker filer.
So, let's go ahead and rename it to Docker file. Hopefully, you had both of these, right? And now, if I rerun the Docker Compose up build command, and there we go. Our Kubernetes demo is now running on port 3000.
If you head over in your browser and head over to localhost 3000, you'll be able to see a JSON output that we're sending over from our application. Now, we can publish this Docker image so we can refer to it when deploying Kubernetes clusters. To publish our Docker image, you can head over to the Docker Hub. Just Google for it and you'll be able to find it.
Then, if you head over to your profile, you'll be able to find your username. So just copy it. Once you get your username, you can head over to your terminal. I'll open up a new one because this one is running the server.
So now we can use this username and the repo name to add a tag to it by saying docker tag kubernetes demo api or maybe it's something different for you. Add latest. Then put your username. For me, it's GSM mastery pro slash Kubernetes demo API add latest and press enter.
This will apply a tag. Once the tag is applied, you can then run docker push jsmastery pro or your name in this case forward slash the name of the repo or the container at latest and press enter. This will push this image to docker hub. As soon as this is done, you'll be able to head back to your Docker Hub and under repositories, you'll be able to see your first repo.
So, just reload and there we go. It's pushed right here. Okay, dockerization is done. But now is the time to make our Docker image horizontally scalable so that we don't just depend on the resources of a single container.
This means that we can actually start working on Kubernetes. First, I'll create a new directory called K8S, which is an abbreviation for Kubernetes. And within it, I will create a new file called deployment.yaml. Now, Kubernetes is declarative, which means that you describe what you want, not how to do it.
You do this using YAML files. Remember those? So within this YAML file, we can declare absolutely everything from how many copies of the app we want called replicas to which docker image we want to use and which ports to listen on. Everything can be done right here.
Now I'll share this full deployment with you in the video kit down below. So simply copy it and paste it right here and we can go through it together. First we define the API version. Then we add a bit of metadata about the name of our app.
And then the most important part is the specification. Here you define how many replicas of the app you want. In this case, I said two. You add some labels and then you further define the specification of those containers.
You give each container a name and the image to run off of. You also define on which port they'll be running. You can pass some additional environment variables and attach different amounts of resources to these containers and then you can provide some additional information. This is how you configure Kubernetes.
But after that, we also have to provide network access to our pods. So within the K8s folder, create a new file called service.yaml. I'll also pass this service file within the video kit down below. So simply paste it here.
And the same as before, we have to define our API version, the kind, in this case, it's a service, pass some additional metadata, and select which app we want to connect with and on which board it is and which type of a protocol we want to use. And now is the time to deploy it all locally. So, first things first, we'll use the CLI that we installed at the beginning of this lesson. It's mini cube, so I'll just say mini cube start.
You'll get back the output of what's happening such as whether the host cubeled and API server are running and the cube config should be configured. It might take some time to run it properly for the first time. Done. Mini cube has now been configured.
And once it is done, you can run cubectl get nodes. In the console, you'll see that mini cube is running a control plane. To check if your cluster is running, you can run cubectl cluster info. And here you can see more info about the control plane.
If the cluster is healthy, you'll see something like this where you can see the port where it's running without running mini cube. If you directly try to run this cubectl commands, you won't get anything as there is no cluster because mini cube is a tool that sets up a local Kubernetes cluster on a laptop. And without mini cube start, there's no cluster running. So cubectl can't connect anywhere.
And finally, we are ready to deploy these files service and deployment.yamel. You can do that in two separate lines by deploying each one individually by saying cubectl apply-f and then target the path to each one of these files. Or you can do it in a shorter single command by running cubectl apply-f k8s which is targeting the entire folder containing both of these files. If you do that for you, it should say that both got configured and through this process the Kubernetes API server will read those YAML files.
Deployment will create pods via replica set and the service will set up network routing to the pods. Exactly what we learned about not that long ago. So now we can get access to the pod information to check the pod status by running cubectl get pods-w. You should be able to see two right here.
I was doing some additional testing so I have four but essentially you should see Kubernetes demo API two times because we span up two replicas of our Docker image. You can also get access to the services by running cubectl get services and you can see those services running right here. And finally it's time to test out the application. Mini cube thankfully provides us with a very simple way to access your service and that is by running mini cube service and then you have to provide the name to your service and that name was provided for us right here when we ran cubectl get services in this case it's referring to the kubernetes demo API service so copy whatever you have right here and run minicube service and then the service name.
If you do it correctly, you'll immediately see that Kubernetes will open up a service for you in your default browser. Thankfully, it did it for me as well. I'll zoom it out just a bit. And you can see that our server is now live.
If I zoom it out even more, I want you to pay attention to one thing, and that is the pod Kubernetes demo API. And then it has a specific ID. Now, if you reload it a couple of times, oh, it looks like I'll have to pretty print it every time. Or I can be smart and just install a JSON viewer pro extension from the Chrome web store and add it to my Chrome or Arc, which would give me a more beautiful tree view of the data.
So, if you now reload it a couple of times, you can see that the last part of the pod ID will change, which essentially means that you're making requests to two different servers. This simple pod change shows that Kubernetes can automatically replace, replicate, and rebalance workloads across the cluster, letting the system scale up or down without intervention. So if one container or pod goes down for whatever reason, the other one is up here and ready to serve your users. This is huge.
So what's happening behind the scenes? Well, the API server receives your YAML file. The scheduler assigns pods to nodes. Cublet starts containers inside pods and then the service ensures that network is running to these pods.
But that's a lot of things that we had to go through. You had to create a Docker image, push it over to Docker Hub, start mini cube, do a Kubernetes deployment, get listed pods, get services, and finally test it out. a lot of actions that you would have to repeat again and again. But instead of doing that, you can simply write a bash script and execute it whenever you want to deploy your app.
So create a new file and call it deploy.sh. Let's write it together. First you can say set e, which means that we want to run this script with bash and we want to exit it automatically if it fails. Then you want to define the name of your API.
For me, this means that it is a Kubernetes demo API which is how we called it before. You can also define your username which in this case is JS mastery pro or for you it's going to be your name. And finally, you can provide your docker image which is going to be a combination of your username. So in bash you use a dollar sign to use a variable.
So forward slash usernameward slashname at latest. Then we're ready to build the docker image. And while running this script we can also put out some console logs. And in bash you do it with echo.
So you can say something like building docker image dot dot dot and then you can run docker build- t and use the dollar sign image variable which we created above and then put a dot here to build it right here. Then you want to push that image over to the docker hub. So let's say that using an echo command something like pushing image to docker hub and you can do that by saying docker push dollar sign image. Then you want to apply your kubernetes deployments and services to yaml configs.
So we can also add an echo for that saying something like applying kubernetes manifests which are basically just yaml files. So you can run cubectl apply -f and then point it over to k8s/deployment.yaml and you can duplicate it for the service.yamel file as well. Here we're applying our Kubernetes deployments in service yaml configs. Finally we want to get all the pods.
So we can say something along the lines of getting pods dot dot dot and run cubectl get pods. Then we want to do a similar thing for getting the services. So we can say getting services by running cubectl get services. And once we list those services we can get a service with the name that we have declared above.
So we can say something like echo fetching the main service and you can do it by running cubectl get services and then you can provide a name of the service. So that's a name dash service like this. And finally to test it out we can stop mini cube from running and basically stop everything else that is running. The mini cube has to be stopped by running mini cube stop.
While that is happening, open up Docker Desktop and delete the Docker images from desktop. So everything that has to do with Kubernetes demo, the most important one to delete is the one with your username before it. So just go ahead and delete it. Now you can head back over to your terminal and run mini cube start to restart this local mini cube service that allows us to run local Kubernetes deployments.
And then when it starts, we will simply run this single script instead of running all the commands that we previously ran. There we go. It is done. And now just run mpm run deploy.
Oh, but let's make sure to add this deploy script to the package json by saying deploy. And to run it, you can say sh deploy.sh. So now if you run this command you'll see that one by one it'll say first building the docker image then pushing images to docker hub then getting pods applying kubernetes manifests and finally getting the services and listing the last service and this basically tells you everything is ready to run this service. So you can copy the service name from here.
That's Kubernetes demo API service and run minicube service and then paste the name of the service. If you press enter, you'll see that it'll be running on this port and you can see the message from a new deployed app on your computer. The pod changes every now and then and your app is running in two containers and you never know from which container your request is going to be executed. Kubernetes will handle all of it for you.
And if you want to scale the app further, just head over to your deployment YAML and change the number of replicas and you can immediately scale the app within seconds by rerunning the deployment script. I know it might feel overwhelming right now, but with consistent practice, it'll all start to click. The best part is you can keep repeating and testing all these commands in Mini Cube without breaking anything. Once you feel confident you have mastered the basics, that's when you can step up and move to the cloud.
I've already covered a lot about Kubernetes in the context of DevOps here. But if you'd like me to create a dedicated deep dive video focusing solely on Kubernetes, drop a comment down below and I'll make it happen for you soon. And if you're looking for a complete resource that takes you from start to finish with plenty of real examples, deeper foundational knowledge, and a true understanding of how everything works, then my ultimate back-end course is made for you. YouTube videos will give you a solid surface level foundation, but with our courses, you'll develop the mindset of a senior developer.
So, click the link down in the description and I'll see you inside. And if the course is not out yet and you really want to dive deeper into Kubernetes, you can check out our Kubernetes reference guide and an ebook. It's a part of this new YouTube membership thing that I'm doing. So if you want to support the channel, that's a very easy way to do it.
Anyways, amazing job on learning Kubernetes in this part of the course. But now we move forward. Great job. So far, you've seen how Docker makes apps portable and how Kubernetes makes them scalable and resilient.
But here's the real question. Where do these clusters actually run? On servers, of course. And those servers could be anything from physical machines in a data center to virtual machines in AWS, GCP, or Azure.
Either way, before your first deployment, someone has to spin up compute instances, configure networking, VPCs, subnets, firewalls, and load balancers, set up storage, volumes, databases, and backups, and install runtimes and dependencies. Traditionally, all this was manual work. Click through dashboards, SSH into servers, run ad hoc scripts. That's slow, errorprone, and impossible to scale.
This is where infrastructure as code or ISC for short changes everything. ISC means managing infrastructure servers, networks and databases with code instead of manual setup. Think of it like writing blueprints for your entire infrastructure. So instead of saying, "Hey Ops team, can you create these three servers and hook them up with a load balancer?" You just write code that looks something like this.
resource AWS instance web AEI ID instance type and the count. Run this and you get exactly those three servers. Change count to five and two more are provisioned. Your infrastructure immediately becomes version control because you can track changes in git, testable so you can verify configs before deployment.
Reproducible because you can rebuild those environments instantly and sharable as you can onboard new engineers fast. So, IA is all about consistency, speed, scalability, and collaboration. And you don't need to master every provider service like AWS cloud for, Azure resource manager or so on. The industry prefers cloud agnostic tools that work anywhere.
One of those is Terraform by Hashi Cororp. You simply define infra in HCL and deploy across AWS, Azure, GCP and more with a single workflow. One script could create a Kubernetes cluster in AWS, a database in Azure, and storage in GCP. There's also Helm, a package manager for Kubernetes that turns messy YAML files into reusable configurable templates.
So if you're starting out, simply focus on Terraform as a generalpurpose ISC for all clouds, Helm for managing Kubernetes deployments, and then cloud specific tools later if you go deep on one platform. This skill set will make you valuable anywhere and keep you out of that vendor lock so Bezos can no longer control what you do. Over the last couple of years, you've built a solid DevOps foundation. You started with what DevOps really is and why it matters.
Then moved into hands-on skills that every DevOps engineer needs. Version control for smooth collaboration. CI/CD pipelines to automate testing and deployments. Docker to package and run applications consistently.
Kubernetes to orchestrate containers, scale apps, and manage clusters. And then ISC to define and deploy infrastructure reliably. With these fundamentals, you now understand how modern software goes from code to production, automated, scalable, and secure. Now, it's just practice building real projects and layering on advanced tools as you go.
And speaking of projects, let's put everything together into action. It's time to actually build and deploy a scalable API using all the DevOps practices you've learned so far. That means that this is not the end. It's where the real learning actually begins.
All right, we're finally about to jump into the big part of this video, building and deploying our production ready API. And just a quick reminder before we continue, DevOps is all about doing and not watching. So that means that you got to have the right stack of tools set up. As I mentioned before, for the database, we'll be using Neon.
So go ahead and click the link down in the description and click start for free. For security, we'll be using ArcJet. Bot detection, raid limiting, email validation, attack protection, you name it, and we get painless security. and then Warp, where we'll be running all of our commands, shipping code, and even automating tasks with AI.
If you're not using it, you'll constantly feel a step behind. And don't forget, the Pro plan is still just $1, which gives you unlimited workflows and faster builds. Once again, the link is in the description. So, if you haven't yet set these up, pause for a second, get them done, and then come back.
Once you've got all three, you'll be able to follow along seamlessly as we build and deploy the API. So now the first step is to create a new GitHub repo. You can call it acquisitions. We need to create a repo as soon we'll need to implement CI/CD pipelines.
So better to create a repo from the start. You can just click create repository and then clone it locally on your device by copying this link and cloning it locally onto your system. In this case, I'll be using WebStorm. So, you can just go ahead and click clone repository.
Paste the URL and just click clone. You can do it normally using git. Once you're there, we need to initialize a new NodeJS project. So, just run ls to make sure you're in the right repo.
I'll go ahead and expand my terminal as we'll be spending quite a lot of time within the terminal, but later on we'll be using warp. And I'll run mpm init. And you can also add the dash y to just press enter to all the default options. Just like that, you'll be able to see a new package json which is the root of our application.
Then you can install express by running mpm install express as well as environment variables. Once that is done, you'll see that you'll get a package json. And I'm currently hiding the node modules folder as I don't typically want to go into it. But it is important that we exclude it from git so it doesn't get pushed over to GitHub.
To do that, you can add a new file called.git ignore and then you can just say node_modules to exclude it from being pushed over to GitHub. After that, you want to head over into the package JSON and modify this application to use the ES6 import system, which you can do by adding an additional type property or key and setting the value to module. This refers to ES6 plus modules. Oh, look, type is already here below.
So, we just want to switch it over from CommonJS to module. Next, you want to create a new file in the root of the directory and you can call it index.js. This will be the starting point of our application. Within it, simply import express from express.
Initialize a new application by setting it equal to the call of the express library. Then set the port equal to either process.env.port if it exists or by default we can make it 3000. You can also do 8080 5,000 or any other number. Finally, we want to make the app listen on that port.
And once it starts listening, we want to simply put a console log out saying listening on port. Now to run this application, we need to add an additional script within a package.json under scripts. For now, I will remove this test script and instead of it add a dev script that when ran will run node d-watch index.js. Now this d-watch flag tells Node.js to automatically restart your program whenever a file changes in your project directory.
Very important. And now if you go ahead and run mpm rundev, you'll see that it'll say node watch index.js. GS listening on localhost 3000. Perfect.
And you can stop it from running by pressing Ctrl + C. And instead of just checking out this project locally and calling it a day by having a single file from which all of it is running, I actually want to teach you how to create a proper production level file and folder structure. So let's start by creating a new folder which you can call SRC or source. Within the source folder, we want to create a new app.js file.
Then, right next to the app, still within the source folder, we'll create another file, which is going to be called index.js. And there's going to be a third one called server.js. All three of these files will have their own purpose. The app file is all about setting up that Express application with the right middleware, whereas the server.js JS is all about running that server, implementing some logging and everything else to make sure that the server is running properly and then index is just like a starting point.
Now let's create a couple of other folders within the source folder. The first one I'll create will be called config. This is a folder for all different kinds of configurations. Then we have controllers which is also within the source folder.
As a matter of fact, every new folder we create will be within the source folder because the source is basically our entire application. Now, when speaking of controllers, that has a lot to do with the model view controller paradigm in developing backend applications. That's something we'll dive much deeper into within our backend course. Alongside controller, we also have the middleware.
So, create a new folder called middleware. Middleware are functions that are run before or after some other functions that our app does. Maybe logging functions, so whenever a request is made, you can see what happened. Or maybe authentication or verification actions to make sure that when somebody tries to perform a specific API action, the middleware checks whether that user has the permissions to do so.
After that, another folder that we'll create will be a models folder defining how our database schemas and models look like. Next, we'll also have a routes folder defining our API routes. And you can see how in my IDE, each one of these folders has their own icon because these folder names are actually a convention which a lot of developers use. After routes, we can also create services.
After services, we can create utils for utility functions that's also within the source folder. And finally, we'll have validations for all different kinds of validations within our application. Right now, these are just different empty folders and meaningless names, but as soon as we dive deeper into developing the application and we start putting actual files within them, it'll all start making so much more sense. Now, you want to move the current index.js gs express app setup that is within this outside index.js into the app.js.
So simply copy it and move it over to app.js. This is where we're setting the express application. And instead of defining the app listen and the port, we can create a new endpoint by saying app.get forward slash. So this is the home route.
We get a request and a response and we can respond something once the user triggers this endpoint or reaches it. Rest status of 200 send hello from acquisitions API or just acquisitions is enough. And then we can finally export default this app. Now we can once again copy this index.js JS and paste it over into server because here we won't have the actual app.get route but here we'll actually be listening over to the server.
So we don't have to recreate the app from express rather we just have to import the app from slashapp. So now we can see how we're connecting it together. Now if you head over to the index.js within the source you can now import.env/config. env/config to make sure that we can properly read environment variables.
And you can also import the dot /server.js. So now if you head back over to your package.json, you can modify your devcript to run source index.js instead of just index.js. And then we can delete this index.js from the root because we no longer need it. So now everything we need is within the source folder.
Primarily we're creating the express application right here within the app and then we're also listening to the server within the server file. What you can do is maybe even say http colon/ slash and then add the port and delete these three dots. Oh, and before we run it, make sure that at the end of all the imports, you add the.js extension or whatever other extension we have in React or Nex.js environments, it's no longer necessary. But here with ES6 modules in Node, you have to specify the extension.
So once you do this, you can go ahead and open up the terminal and run mpm rundev. And now it'll say listening on http colfor slash. Oh, and looks like I forgot to add localhost. But now if I add it, you can see that it auto restarts because of the watch flag.
And now you can just click on this link within your terminal and it'll open it up within your browser saying hello from acquisitions. This means that we have now created the base file and folder structure of our running express application. Congrats. Let's not forget to push it over to GitHub.
And just to stick with proper programming habits, let's go ahead and commit this. No matter how small of a commit it is, the smaller the better. So, I will rename this active terminal to app because it's going to be running our app. And I'll create another terminal right here within which we can run additional commands.
So I'll just say get add dot getit commit-m initial commit and get push. Immediately all the changes are pushed. In this lesson we'll implement a step that is very easy to skip and a lot of people on YouTube teaching these courses simply skip over it and that is setting up and installing eslint and prettier. It is always useful to have it, but even more so when you combine it with CI/CD pipelines so it always properly formats your code.
First things first, we got to install all the necessary dependencies by running mpm install eslint at eslint/js prettier eslint-config prettier to make them work together eslint-plugin-pier and dash capital d which stands for development. Only install these as development dependencies. When you install these packages, create a new file called eslint.config.js. And within it, we can paste our new eslink config.
Now, this is the config that I was building over the last couple of years, but in simple terms, it just extends the recommended JavaScript config. And then it adds some additional rules. You can find it and copy and paste it from the video kit down below. Once you add it, we can also add another file for prettier.
Oh, and make sure that it's not within the source folder, but within the root of the application. The prettier file is also within the root and it's called prettier rc. And within here, we can form an object with some settings such as whether you need or don't need semicolons. The trailing commas, that's the comma at the end where you don't actually need it, but you can have it.
whether you want to use single quotes or double quotes and so on. Feel free to pause the screen right here and type these out or you know what I'll also leave it within the video kit down below. Finally, we can add an additional file called prettier ignore and within here you can paste the files and folders that you want prettier to ignore. It's going to be node modules coverage logs drizzle logs and package log json.
Once you do that, head over into your source app.js. And right here, you should be able to see red squiggly lines telling you that we have some issues with ESLint, such as a missing semicolon, inconsistent spacing, or a missing semicolon here as well. This means that linting is working. Now, to lint across all of our pages, head over within our package.json, and then let's add a new script for linting.
We'll use this script later on in our CI/CD pipelines to ensure our code is formatted properly. So just add a new lint script and make it simply call eslint dot. Then you can also add a lint fix which will run eslint dot-fix. You can also add format which we'll use with prettier.
So it's prettier- dot. And finally, we'll have format check. And this will be equal to prettier d-check dot. Now, if you open up your app.js and open up your terminal at the same time and type mpm run lint, you'll see that we'll have 55 errors in this very small application, mostly due to indentation errors and missing semicolons.
Then to automatically fix them, simply run mpm run lint fix. And as you can see, within a single terminal command, all of these issues were fixed automatically across all files. And to also enforce prettier formatting, you can also run mpm run format. In this case, it was already good.
Or to check if formatting has been done properly, you can run mpm run format check. Perfect. All matched files use prettier code style. Wonderful.
This means that now we have all of the necessary scripts that we'll be able to later on run from our CI/CD pipelines. So what I'll do is run git add dot get commit-m implement eslint and predier and get push. Perfect. If you've been following along, you most likely already have an account on Neon.
But if not, let's create it right now by clicking the link down in the description and starting for free or simply logging in. Once you're in, create a new project. You can call it JSM_acquisitions. And you can choose the region that is closest to you and click create.
Once you're in, you can click connect and then copy this connection string. Then within your application, create a new env file in the root of your application. And let's add a comment for server configuration. So here we can paste all of the environment variables that have something to do with the server such as the port by default set to 3000, node environment by default set to development, and log level, which we can set to info.
Then we can also do a database configuration. And here you can paste the database URL and make it equal to the string that you just copied over from neon. But make sure to remove this psql at the start if you have it and also the ending string sign right here. Then we can also update our get ignore to ignore all types of different env files by sayingv dot and then asterisk.
And then it is always a good idea to also alongsidev create a newv.example file. This serves the purpose of telling people which variables they need, but it won't actually include the sensitive information. Now let's install neon by running mpm install at neon database/serverless drizzle-m. So we're installing both Neon as well as Drizzle to keep our database queries type safe.
And we also want to add one dev dependency which will be for Drizzle Kit. So as soon as this is installed, simply run mpm install-d drizzle kit. And then we are ready to configure our drizzle config by creating a new file. It's going to be in the root of our application and you can call it drizzle.config.js.
js. js. js. Start by importing env/config at the top so we can actually refer to our environment variables.
And then you'll need to export the configuration for drizzle which will include a schema which is actually a path to all of the models. So that's going to be dot /source/models/aststerisk.js. This means we will store the schemas right here. Then we can choose the output which is just going to be /drizle.
We can also do a dialect of SQL that we're using. In this case, it's going to be posgress QL. And we need to pass the DB credentials. That's going to be an object where the URL is process.env.
database URL. And now if you run that eslint fix command or just run eslint fix it'll fix all the inconsistencies within this file. But again we don't really have to worry about it because later on we'll make sure that linting is a part of our CI/CD pipeline. Now let's go ahead and set up the database by heading over into source config and create a new file within the config folder and call it database.js.
within it. You can also import. You can also import neon as well as neon config coming from at neon database/serverless as well as import drizzle coming from drizzle or in this case we can use neon http. Then we want to initialize the neon client by saying constql is equal to neon to which you need to pass the database URL.
So process envatabase URL and you'll need to initialize the drizzle by saying db is equal to drizzle to which you pass this SQL variable. And finally you export both the database and the SQL. For now, since the neon config is not used, we can remove it and bring it back later on if needed. Now, we can head back over to our package.json and update our scripts to add additional drizzle scripts.
We can add them by saying dbgenerate. That'll be drizzle-kit generate. And I will duplicate it two more times. Then we will have db migrate which will run drizzle kit migrate.
And finally DB studio which will run drizzle kit studio. And now I can show you how we can create a first model in our application. That model is going to be for users. So head over into source models and create a new file called user.mod.js.
within it you can export const users and make it equal to pg table which you need to import from drizzle rm pg core as the first variable you're going to pass the users that's the name of the table and finally then you have to pass the columns in this case we can say that a user table needs to have an ID which is going to be a serial ID and it'll act as the primary key of this table it'll also have a name that'll be a varchar which we can import from the same driorm pg core of a name and a max length of 255 and we need to make sure that it is not null. Now I will duplicate this one two three more times. For the second one we're going to be talking about the email. So we can say that email is of a varchchar email with a length of 255 not null and this one also has to be unique.
After that we're going to have a password. So that's going to be a password of a varchchar password with a length of 255 not null. And finally a roll. So I'll say roll varchar roll with a length of 50 not null.
And by default we can set the role to just a regular user. Finally, we can set a created at field which is going to be a timestamp coming from PG core and it'll default to now. So default now dot not null and I will duplicate it so we can also store the updated at field and let's not forget to import this serial at the top. Perfect.
So now we have created a users table and the way it works with posgress databases and drizzle is that now we need to generate SQL schemas using Drizzle by opening up a terminal and running mpm run db generate. Once you run that we will have gotten a new SQL migration file right here under drizzle. And here you can see that we just created a new user stable. After that, we'll need to migrate or push the changes over to Neon DB by running mpm run db migrate.
If you do that, you'll be able to see a warning, but everything should have went through successfully. So now, if you head back over to your Neon dashboard and go over to tables, you should be able to see a new users table. Perfect. This means that we have successfully set up a Neon Postgres database with Drizzle ORM.
So let's go ahead and commit it by saying get add dot get commit-m setup neon posgress with drizzle and get push. Perfect. In this lesson we'll set up logging and middleware. For that we'll use a super popular logging library that has over 24,000 stars on GitHub and it can log just about anything.
info, errors, debugging, and more. So, let's just install it by opening up our terminal and running mpmi winston. Then, we can set it up by heading over to source config. And within config, you can create a new file called logger.js.
Now, if you head back over to this GitHub repo, you'll see some documentation about how to set it up. So, you can just copy this usage part where they guide you how to create your own logger. If you paste it, you'll see that we first import it. In this case, they're using the old require.
So, what I'll do is I'll just change it over to import Winston from Winston. There we go. And once that is done, we're basically creating our own logger by calling Winston.create logger. And then we pass over some info such as the info level.
In this case, if we pass something different from our environment variables such as process.envlog level, then we'll use that else we'll just use info. But if remember this log level for now is just info anyway. Then for the format, instead of using the default JSON one, we'll actually combine a couple of things. So say combine and then we can pass over all the different formats.
I will use the timestamp format so we know when the log happened. We'll combine it with the errors by saying Winston. And I want to see the whole stack of the error. So I'll set it to true.
And then only then I want to see the whole JSON right here. Then we have the default meta which is going to be the name of our application. So I can set it to acquisitions API. And then we have transports where you define the importance level of error or higher to error.log.
So in this case we have new winston.transports file with file name error.log. So here decide where should the Winston create a new file for the error logs. I'll put them over to logs error.log with a level of error. And then for the other ones, we can just pass them over to logs slash combined.log.
Then if we're not in production, then log to the console with the format info level info message JSON stringified. So in this case, we're simply saying if the node environment is not production, then log something to the console. In this case, I'll also modify the format by saying winston.format. combine.
I want to colorize it so we can see it in colors as well as I want to keep it simple. So I'll say formats simple. I found these two properties to work the best when logging. And finally I want to export that logger by running export default logger.
So now if you head over into source and then app.js, we can now add that logger to whenever a user makes a request to forward slash. So, I'll say logger. Make sure to import it from /config logger.js.info and I'll say hello from acquisition. So now we'll be able to see it not just in the browser or the return of our API, but also from the logs.
But before we go ahead and test it out, check out this top part right here where it says /config/loger.js. There's nothing necessarily wrong with that. That is the file path of where we're importing this logger object from. But you can easily make a mistake here.
Maybe if you forget a dot or a forward slash or if you mess up the path. So this is called a relative import system. But I would much rather prefer to use the absolute import system. So let me show you how.
You know how inexjest, right? how you're importing different packages as well. They're just there. You don't have to search throughout the entire relative path.
Oh, and if you're importing logger from somewhere else, you would have to maybe go a couple of levels deep to get into that file. So, it's prone to errors. But imagine that you could just call the logger from anywhere by saying something like add logger. This would be pretty cool, right?
So, let me show you how to set it up. It all has to do by heading over into package.json. Yep. Again, you can see how DevOps has a lot to do with setting up the scripts, but this time it's not going to be the scripts, it's going to be the imports.
So, right above scripts, you can create imports, which is going to be an object. And there we can define h#config forward slash everything. So everything within the config folder, we can automatically point to that path slashsource config everything. And now I will duplicate this for every single folder that I have.
1 2 3 4 5 6 7 I don't know how many there are. But we can do the same thing for every single one. So I'll repeat it over for controllers. Then we have middleware.
Then we have the models. There's the routes services utils. And look at that. I duplicated it the exact number of times ending with validations.
So now if you go back to app.js and you want to use the absolute import system to import the logger now you would go ahead and say something like hashconfig/loger.js. Now I'll show you how Winston does all of this logging very soon. But just before we do that let's also install something known as a helmet. See helmet.js helps secure express apps with various HTTP headers.
It also has over 10k stars and is a widely recognized package. So we first have to install it by running mpmi helmet and it is a very lightweight package. So it'll get installed within a second. Then we can copy its usage right here.
Head over within the app.js and paste it. You'll see that we have some duplicates. We're already creating the app and we're just importing helmet from helmet. And then right below we initialize the app, we say app do use helmet.
In this case, helmet would be considered a middleware. And alongside helmet, we'll also set up Morgan. It's a logging middleware that'll show you details like the method, URL, status code or response time whenever somebody makes a request to our API. Basically, we use it to monitor traffic and debug requests easily, especially in development.
So, let's scroll down to its usage. First you have to install it by running mpm install morgan and then you'll have to use it. Using it is super simple. You do almost the same exact thing as before by first importing morgan coming from Morgan.
Then in this case we'll also allow our application to pass JSON objects through its requests by saying app dot use express.json and also app.use use express URL encoded extended to true. This is a built-in middleware function in express and it allows you to parse incoming requests with URL encoded payloads based on body parser. So finally we can now also use the Morgan by saying app.use Morgan combined. So both in dev and production stream and here we can define what it'll actually do.
So it'll write and then you can define a callback function. When it gets a message, it will simply return logger.info and then it'll pass the message.trim. So in this case, we're actually combining both our logging library through Winston and Morgan by passing over Morgan's messages into our logger. And while we're here, let's also set up a couple more very important pieces of middleware.
I'll open up the terminal and install them. one by one by running mpm install course. See course lets your backend decide which external domains can make requests to it. Without it, browsers will block calls from different origins like a React app on localhost 3000 calling an API on localhost 5000.
Then we also need cookie parser. Cookie parser will read cookies from incoming requests and make them available in recit.cookies. It's super useful for handling sessions, authentication, and storing small bits of user data. And finally, express.json, which we used.
This one you don't have to install. It's already built in. But basically, it parses JSON data in the request body and exposes it to you. So, you can access it within rec.
It's essential for APIs since most clients send data in a JSON format. So, let's install them and let's set them up within our app.js. You can already see how the app is growing larger. Right here after helmet, I will say app dot use and setup course.
Make sure to import it at the top by saying import course coming from course. And right here at the end, I'll also say app dot use. And we will get access to the cookie parser. Make sure to also import the cookie parser right here at the top.
from cookie dash parser like this. Now, if you reload your application or just rerun it on localhost 3000 and just make a request to it by heading over to localhost 3000. When you close it, you'll be able to immediately see a Winston log within the console where it says hello from acquisitions. That is this part right here, logger info.
It's also letting us know which service this is coming from. gives us more information about the date, the operating system, and all the other information. Oh, and also, if you head over into acquisitions logs, the folder we created not that long ago, you can also see the logs created for us by Morgan, all of the HTTP information is stored right here, so we can retrieve it whenever needed. This is super important when debugging your servers.
Perfect. And with that in mind, you have just successfully set up logging and middleware within your backend application. In this lesson, we'll get started with implementing the authentication. So, head over into our source and let's create our first group of routes.
I'll create a new file which will be called o.outes.js. And within it, you can first import express coming from express. And then we can get access to express's router functionality by saying router is equal to express.outer. Router allows you to create routes.
You can do it like this. Router.post. So you're creating a post route atward slash sign-up. And then as the second parameter you provide a handler which is a function that defines what will happen once this endpoint is reached.
So in this case we can define a new callback function that will be executed within the block of the code. You write what's going to happen but within the first two parameters you're getting access to the request and the response. The response has the send method that allows you to respond to the user that's trying to access this endpoint. So here you can tell it something like post/api/signup response.
And now I will duplicate this two more times. For the second one we will trigger the signin functionality. So I'll say coming from sign in. And for the third one I'll do sign out.
Perfect. Now for this router to work, we first have to export it by saying export default router and then we need to use it within the app.js. So now if you head a bit below right here we have the app.get get. You can also add app dot use similar to how we use the middleware, but you can also use the routers like this by saying all of the routes within this router will start with for/ API sl and then we expose this entire o routes which we can import at the top.
So now when somebody goes to for slap API slash off slashsignin they will hit this signin route right here. Alongside using this router let's also add something known as a health check by adding the app.get and it's nothing more than just another endpoint which is going to be called health. It'll once again have the request and the response and within it we'll simply say rest.st status of 200 and we'll send over a JSON object that'll have a status of okay. It'll also have a timestamp of the current date and time.
We can even put it to ISO string by saying new date. ISO string so it's in a human readable format. And finally uptime which is process.up time to define for how long has our server already been up. And alongside the health since we just exposed this new router on the O route group, we can also create another endpoint app.get which is not going to be forward slash which we have right here above.
It'll rather be forward/appi. And if somebody tries to go to forward/appi, we'll say rest.st status 200.json JSON and we'll send over a message saying something like acquisition API is running. Perfect. So now we can test all of these API routes.
So let's actually go ahead and get these routes tested. What you can do is first ensure that the server is running on localhost 3000 by running mpm rundev. And once it is you can visit it within the browser and then manually change the URL path to something like/halth. But you can only do that for get requests because what does it mean to load a website?
Think about it. It means just making a simple get request over to that endpoint. So if you want to test get routes, you can do that with the browser. But as soon as you have a post, put update or another type of a route type, then you have to use something known as an HTTP client.
There are many different clients out there. There's Postman, Insomnia, but recently I used the one that I found the simplest, HTTP. Simply Google HTTP, go to their web app. Once you're within HTTP, you can type http col//lohost and we can test it out.
You'll quickly see that we get a DNS error saying to check the URL and try again or for local networks, download the desktop app. So in this case, let's go ahead and very quickly install HTTP on our device. It'll try to open it. If you don't have it, just quickly install it.
We once again get a DNS error. But this time, if you just say col 3000, so we're hitting our local network. You can see that we indeed get back a response. This is a response in an HTML format, hello from acquisitions, because we didn't use res.json to send the response.
We just use res.end. But if you head over to forward slash API, in that case you'll see that we get back a much nicer JSON format object saying acquisitions API is running. And if you head over to forward/halth, you'll see that we get the timestamp and the uptime. Everything is working perfectly.
What this also allows us to do is to make a post request to for slash 3000 API off signin. And if you click send, you'll see that we reached the post sign-in response. So now is our time to get it implemented. So we can then test it out using this HTTP client.
So heading back over to our IDE, you can open up the terminal and install a new package called JSON web token. JSON web token or JWT for short is a compact URLsafe means of representing claims to be transferred between two parties. In simple words, we use them to ensure that our users are signed in and that they are who they claim to be. The way you can implement JWTs is by heading over to source and we can get started by creating a utility function that'll make it easier for us to use JWTs across the entire authentication process.
So create a new file called JWT.js. And within here you can import JWT from JSON web token. And let's set up our JWT secret by saying const JWT secret or underscore secret is equal to process.env.jwt secret. Or if we don't have anything within our env here by default by saying something like your secret key please change in production.
So it's very important that this is not coming from your local code. It needs to be coming over from environment variables. And you can also define another constant for how long for that JWT to expire. So JWT expires in and we can set it to 1D as in one day.
And then we can create this new JWT token which is basically just an object that has a couple of different methods on it which we will define. The first method will be called sign and this method accepts a payload and it'll try to return a signed JSON web token after it verifies that we are who we claim to be. So we can open up a new try and catch block in the catch. If there's an error, we can use the logger functionality to log that error saying something like failed to authenticate the token and then we can render the actual error and we can also throw that error within the application.
In the try, we will actually return a signed JWT JWT JWT with the payload that we passed in by verifying the secret and passing over as options when this JWT expires. A second part of this JWT config besides the sign is the verify. So after we have assigned JWT, we also have to verify it with a special token. I'll also open up a try and catch block.
In the catch, we can do the same thing that we did before. We will say logger. Fail to authenticate token and log the error and then throw that error so we can catch it. And then in the try, I will return the verified token.
So, JWT.verify token and the secret. This will only work if we have access to our apps or JWT's secret. And don't forget that we are already exporting this, so we'll be able to use it very soon. But just before we use it, let's also create helpers for the cookies.
We can do that right here within utils and create a new file called cookies.js. And following the same fashion, we can export a new object called cookies, which will have a couple of different methods attached to it. The first one will be to get the options. It's a callback function with an automatic return.
An automatic return means that we don't just put curly braces here. That's opening up a code function block, but rather we wrap it with parenthesis. And that means that we're actually returning this object. Here we can say that it is an HTTP only cookie to make it more secure.
Talking about security, we can define the environment. So in this case it'll be process.env.node env has to be equal to production. If it is then we are in the secure mode. We will also set the same site origin to strict as well as a max age of this token to be 15 * 60 * 1,000.
This is 15 minutes. So 15 * 60 seconds * 1,000 milliseconds. Let's also set up a couple more methods such as the set. How can we set the cookies?
Well, we can set them by first accepting a couple of things within parameters. So, we'll be accepting the response, the name of a cookie, the value that we want to set to it, as well as some additional options, which by default will be set to an empty object. And then we can say rest.cookie, pass the name and the value. And finally, we want to spread dot dot dot cookies.get options.
and then want to append additional options to it. If we do decide to provide some additional ones, now we want to do a similar thing with a clear. When we want to clear the cookies, we will also be accepting all of these different props. So, rest name and options.
By default, these options are equal to an empty object. And then we will say rest.cookies. Instead of calling rest.cookie, we will call rest.clear cookie with a specific name, no value in this case. and we will still be providing all of the options.
Finally, once we have set it or reset it, we want to be able to access it. So, I'll create a get method with a wreck and a name of that cookie. And we will simply return w.cookies under a specific name. Perfect.
Now, before we test this out, we now also want to install an additional package by running mpm install zod. Zod is another one of those very popular backend packages. It's actually a TypeScript first schema validation with static type inference with almost 40,000 stars. We'll use it to define schemas with strongly typed validated results.
So let's define how our signup schema should look like. I'll do it right here within validations folder by creating a new file called O.validation.js. within it we can import in curly braces z from zod and then export this schema export const signup schema is equal to z.object and here we can define what the schema needs to have. We can start with validating the name field by saying name will be z string and we can trim it.
If you want, you can also provide some additional parameters like min to define the minimum amount of characters that it should have or max something like 255 and then trim typically comes at the end. Let's also continue doing that for the email by saying email will be of Z. with a max of 255. We will lowerase it and we will trim it in case people left some extra characters.
I'll also do the password with Z dot string dot min of about six max of about 128. That's more than enough for our password. We will not lowerase it. Password can contain uppercase characters and we will not trim it.
Let's not mess with passwords. And finally, the role of a user. I'll set that to be equal to Z.enum. Enum stands for, you know, some of the options that we can choose such as either a user or admin.
And then finally, we will set it to default to user. Finally, we can also have a signin schema which will be very similar. So I'll say export const signin schema Z.Object. It'll have an email of Z.2 to lowercase.trim and it'll have a password.
So if somebody's trying to sign in, they're only using their email and password. So Z.String min one character. We basically need a password right here. Perfect.
So now we have those schemas which we're exporting so we can use them within our application. And we also have to somehow properly format all of these errors so that they can get sent over to the user. For that I'll go ahead and create another utility function within utils and I'll call it format.js. Within here we can export a new function called format validation in case we're getting many errors.
So this one will accept all of the errors and then if there is no errors or no errors. We will simply return validation failed. But if there are some errors and if it's a type of an array. So say array.is array.
What an interesting way to check whether something is actually an array. Then we will map over all of those errors by saying return error dot issues map where we get each individual issue take over its message and once we do we can join them all together by commas. Hopefully this makes sense. But if it's not an array of issues, just one validation error, we will simply pass it over.
So JSON stringify errors. So no matter how many there are, we're always going to present it in a single string separated by commas. And now we're ready to write the logic for creating the user once they sign up. We can do that within controllers.
See where within routes you define the actual endpoints. Within controllers, you define what will happen once those endpoints are reached. So create a new controller called o.controller.js. The whole goal of a controller is to export a single function that'll do the job when a specific endpoint is called.
So in this case, I will export a new function called signup that is going to be an asynchronous function that accepts a request and a response. and the next. I'll talk a bit about what this next means very soon. And then it does something.
I'll open up a try and catch block as before. So if something goes wrong, we can properly log it and handle it. First things first, I'll turn the logger on and log an error saying something like signup error so we know exactly where it happened. And then we can provide additional error messages.
And then specifically if the error dossage is equal to user with this email already exists in that case we can return some other status by saying rest status of 409 which is an exact HTTP status that says basically what that message says user with this email already exists and we'll provide more information uh to that user but otherwise we're simply going to say Hey, take this error and forward it over by using the next functionality. Next is typically used when something is considered a middleware or when a specific action will be called before or another action so that it passes the torch in a way that it'll execute some logic and then it'll pass it over to the next function in the chain. It'll make a bit more sense later on once we put the sign up where it needs to be. Okay, so now let's focus on implementing the logic of the signup.
First we want to validate the data that is coming into the form or into this endpoint by saying const validation result is equal to signup schema dot safe parse and we're going to pass the rec.body. This rec body will contain the form data that the user has typed in when trying to make a request. If no validation results success, so if something went wrong, we will return a ResNet status of 400 alongside the following JSON payload. It'll have an error of validation failed and it'll also have details within which we're going to use our format validation error utility function and to it we can say validation result dot error.
So the user will know exactly what went wrong and what they have to fix. But if everything went right, we can get access to the name, email, and the role that the user has submitted through the form by dstructuring them from the validation result data. Then within here, we'll have to call our O service to actually create an account. And then later on, we can use the logger functionality to simply give us an info message of something like user registered successfully.
And we can even render their email. So let's make sure this is a template string. Finally, we'll respond with a status of 2011, which means user created. And I'll pass an additional JSON payload of message user registered.
And we'll pass over the user information. For now, we can pass an ID of one. We're faking it alongside the user's name, email, and the role that got created. Okay, so let's test this out.
If I now head back over to my HTTP client and head over to sign up, if I make a request, we'll see just a regular signup response. That's because we haven't yet hooked up our controller to our route. So to hook it up, it couldn't be any simpler. What you need to do is just remove this callback function because we no longer need it.
And what you need to instead do is simply call the signup controller. So you're basically saying once a user goes to O API sign up call this function. So now we will no longer be receiving this rather we'll get a validation error invalid input expected object received undefined and this is perfectly fine. Imagine that we just submitted a form on the front end and it was asking us for an email, a name and a role and we basically left everything blank.
That's not how it goes. We have to get that data from the form and actually pass it through request body. So let's format. I'll say that this request body it will have a name of something like email and a value of contact atjsmastery.com.
Now if I send it, it'll say invalid input expected string received undefined invalid input expected string received undefined as well. It is referring to our other two pieces of the form and that is the name which I was also missing and finally a password. So if I pass a password of something like 1 2 3 1 2 3 you'll see that we have successfully apparently right this is just fake for now registered a new user. This is looking good but take a look at our back end.
If you take a look at the logs you can see that the application was listening and that a new post request was made. Now in this case we were not console logging the password or doing anything with it but we might as well could have because it got passed in a plain text format which means that we need to secure it and we can secure it by encrypting it. For that there's one best package that most people use and it is called brypt. So simply run mpm install bcrypt and then we'll head over into another file.
This time we'll actually create our first service. So if you head over into source services and create a new file called o-service.js. Here we will implement the logic of hashing our password. So simply say export const hash password which is equal to an asynchronous function that accepts the password in plain text and then it'll open up a try and cache block.
In the catch, as usual, it'll try to log an error saying logger. Invalid password or actually what's happening here is we have an error hashing the password which shouldn't really happen. And then we can finally throw a new error error hashing. But if everything goes right, we can try to just return the hashed password by calling the await because hashing it takes some time and is asynchronous and using the brypt library.
So brypt dot hash you just have to pass the password and a number called salt rounds. So how many rounds do you want to hash it for? Typically the default is about 10 to 12. So that's what I'll do.
And don't forget to import brypt at the top by saying import brypt from brypt. And this is it. This is a function that will now hash our password. Once we hash the password, we also have to create a new user.
So let's create it just below by saying export const create user is equal to an asynchronous function that'll accept an object which we can automatically dstructure and get its name, email, password and the role which by default will be set to user. Then we can open up a try and catch block. In the catch we will simply log the error by saying logger. And the error will be all about creating the user.
So say error creating the user and we will throw that error. And in the try we'll first see whether that user already exists in the database by saying constex existing user is equal to db do. Select from the table of users where EQ this is coming from Drizzle ORM users email matches the one of email that we're now trying to create the account for and limit it to one user. Make sure to import this DB right at the top coming from config database.js.
Also make sure to import the users model by saying import in curly braces users coming from models user modeljs. And I think we're good. Then if an existing user exists so if their length is greater than zero in that case we will throw a new error saying user already exists. But if it doesn't, we can start hashing the password and creating a new user by saying const password hash is equal to await hash password.
That's the function that we just created above. And then we can get access to this new user by saying const dstructure the array of the response and get this new user out of it. And then call await database.insert. Insert.
Insert into the users table the following values. The values of name, email, password, but not the password in the plain text format, but rather a password hash and then a role. And from this database, return me the following things. So I'll say dot returning id of users do id name of usersname email of users.mmail ro of users roll and created at of userscreated at I think you get the idea.
Oh I think I have a typo right here. So let's fix it. name of users.name and I will actually put this into multiple lines so it's much easier to look at values in one line and returning in another. Finally, once we create this new user, we can log it out by saying logger.info user with this new email created successfully and then we want to return that user from this service.
These services are like just additional utility functions that we're going to call within our controllers. So now let's head over into our ocontroller. That's within o.controller.js. Here I left some space for this o service.
And first we want to call the create user const user is equal to await o service. Oh, it looks like we forgot to export it. So head over to O service and as you can see we're exporting these services one by one. So what you can do instead of calling o service you can just simply call create user and it should autoimp import it from services o service.
To create user you can now pass everything it needs such as the name email password which now will automatically get hashed as well as the role. This password is coming from the validation data of course. And once we have the user, we can create their JWT. So con token is equal to JWT token.
Make sure to also import this dot sign pass the ID of user id email of user.mail and ro of user. Finally, we can take that token and set it to the cookies by saying cookies again import it from our utility cookies dot set. We created this method on our own and we want to set the entire response with the name of token and a value of this token we just crafted by using JWT sign. Once we do that, we're successfully logging this in.
And now we no longer have to fake this user ID. We now have a real one. User do ID name is equal to user name. Email is equal to user.mail and roll is equal to user.
Perfect. And as you know we're calling this controller right here within routes. So if you head over into routes you can see we're calling the signup. And if you make a request to this endpoint but with proper data, in this case I'll be using just a regular text element.
So we can pass a regular JSON object that looks something like this. Name of admin, email of adminjmastery.pro with a password of 1 2 3 4 5 6 and a role of admin. You can now send that request and you'll get back a 2011 saying user registered with a role of admin. And you can also create another one maybe Adrian AdrienJSM mastery pro this time with a role of user and you'll see that the ID will be incremented.
So this time it'll be saying two and for each one of these requests you can also see the response. So if you click right here you can see all the information about this response and take a look at this field called set cookie. You can see that the cookie actually contains the actual JWT. So within our application, we'll know that this user got authenticated.
Amazing job. This basically handles the majority of the authentication setup. We have the sign up and user creation. Now we also got to figure out how to do sign in and sign out which are of course essential parts of every good authentication.
So we'll do that soon. Before we dive into implementing rest of authentication features and running DevOps tasks on a realworld app, I wanted to stop for a second and show you a tool that I've been using a lot lately. It's Warp, the fastest way to build and ship applications using AI right inside a single environment. It includes a terminal, a code editor, and an agent hub.
So instead of memorizing commands or juggling through different docs, you can just type in what you want in plain English and Warp will figure out the rest. Execute the commands and just get the job done. With Warp, you can chat with any AI, all the top models including Claw, GPT5, and more. And it helps to plan architecture, explain or review your codebase.
You can also write and edit code in line with smart suggestions. You can run multiple AI agents at once to speed up the results and automate entire workflows. So typing something like undo last merge actually rolls back the changes in seconds. In short, you describe what you want and warp does the heavy lifting.
And the best part is the developer experience of having everything together. A terminal, a code editor, and agents all in one place. No need to have three separate browsers, an editor, and 10 tabs open just to get some output from AI agents. And talking about pricing, you can try it all for free.
They have a pretty generous free plan. But if you need something bigger, for a limited time, Warp is offering you, yes, you watching this video, the Pro plan for only $1, which is normally 18 bucks per month. So, click the link down in the description before it's gone and we'll use it very soon to 10x our productivity. Let's dive right in.
To get started, click the link down in the description and download Warp. Once you download and log into Warp within your device, you'll see a pretty empty screen that allows you to create a new project, open a repo, or clone it. But the real magic happens right here at the bottom. Here you have two different modes, a terminal and an agent mode.
Then you can select any AI agent you want to use for this specific task. In this case, I'll go with auto, which is cloud for sonnet since it's currently the best option for coding tasks. Then if you press a forward slash, you'll be able to see some options such as adding MCP servers, adding prompts, rules, and more. Oh, and there's also a voice input mode.
So if you're more of a vibe coder who prefers to code by speaking over typing, well, you can do that, too. Here you also have some directories. So you can switch between different repos and attach additional context from different folders. So let's cd into the repo we've been working within its acquisitions.
And immediately warp is asking us whether we want to optimize it for this codebase. And for sure I'll select optimize. It'll do that by indexing this entire codebase. And it can also create its own MD file.
So I'll say sure go ahead. As soon as we enter this repo, you can see that now it tells us the version of node we're running, where this project is located. We can see more git metadata such as the branch and how many changes we've made. And we can also attach some additional context.
Now, while it's doing its thing, I'm going to open up the warp drive on the left side right here. You can open it up by just pressing this button at the top under personal. Here you have different things such as the rules you can add, the MCP servers, and the getting started notebook. And it's not limited just to personal projects.
You can also have your entire team join you. And while I was clicking around, you can see how it actually opened different windows all within a single environment. This is the beauty of this developer experience using Warp. No longer do you have to have 10 different apps opened up.
It's just one. So, let me go ahead and create a new team that I'll be using for this project. I'll call it acquisitions since that is the name of our app. And let's start with JSM acquisitions.
Once you create it, you can start adding some workflows or notebooks right here. Or you can press this plus icon and then start with a new prompt within the video kit down below. I'll give you access to the complete prompt that you can type right here. So we can set it up in the same way.
Let's start by giving it a title of codebase architect explainer. And then we can give it a description saying that this is an AI prompt that studies any codebase and produces a clear structured explanation of its architecture and how it works. And then you can pass the prompt itself which you can find within the video kit down below. Now when you create this codebase architect explainer prompt, it'll be added to your team or to your personal project.
Then when you head back over to your terminal and type forward slash, you'll be able to see the list of your different prompts. And one of those is the codebase architect explainer. As soon as you type it, it'll automatically select it. And the only thing you have to do is simply press enter.
So no need to type in long prompts manually or scout your past chat GPT history to find them. Now we can store them all in one place and re-execute them whenever you need to. The first thing that it is doing is reading the files that we have. And as you can see, immediately it started explaining what is currently happening within our codebase.
Of course, you took the time to build it, so you already know what's happening. But of course, seeing an overview of the project structure, for example, and of all of the folders we created is always super useful. we get a complete breakdown of all of the components that form the application together and even the data flow of the application where a client makes a request. Then we have the express middleware to the route handler to the controller to zod to services and finally we return the response.
So this is perfect in case you want to study it in more detail or ask it more questions. I'm just amazed. I mean, it even gives us a sample request execution that we can send over to test this API. This is great.
And this is just one single prompt that I gave it and it immediately spat all of this back within this a bit unorthodox terminal like experience. So like it's not a typical chat and it's not a terminal either nor it's an editor but it's all combined into one and that feels so familiar to me as a developer. So let's see what else Warp can do besides just explaining our codebase and I think to truly test warp to increase our speed as developers I want to ask it to implement what was going to be the next step for me to do manually within the application. Remember, we just created a route for the signup and a signup controller, but we haven't yet implemented controllers nor services for sign in and sign out routes.
So, let's ask Warp to do it for us. Now, check this out. I will run a clear command to clear what I'm currently seeing within my terminal window. And then I'll switch over to the agent mode.
And you can immediately start typing of what you wanted to do. I'll give it some background such as you are a back-end developer working on an ExpressJS app with O features. Your job is to extend the O service and controller to support user login and logout. I think that this even might be enough.
But just to make sure that you can follow along and see the same exact output that I'm having. I took a bit of time to write a bit more detailed prompt just so I don't have to type it out manually. I'll give it to you within the video kit down below. So simply copy it and paste it right here.
I provided it with a bit more info on what it can do to make this happen and then saying that it needs to implement these two functions. So now simply press enter like you're running a terminal command in agent mode. Warp immediately started warping and told us that it'll help us extend the authentication service controller with these two additional functionalities. It'll do some things on its own but for some things it's going to ask us whether it's exactly what we want.
So for example it created this compare password function and it put it within services. This is exactly how I want it to look and this is exactly where I want it to be. So, I'll gladly accept the changes by simply pressing enter. And of course, if you want to edit something, you can do that by pressing command E or pressing the edit button and then edit it and then submit it and then it'll continue producing the code leading to the output.
Same thing right here for adding the authenticate user to the O service. In this case, it looks like it's actually applying a fix to the code that I wrote that I didn't necessarily anticipate, and that is that I forgot to put the await right here before DB select. So, this was a crazy catch by Warp. It didn't only do what I asked it to do, which is to add additional features to the O, but it actually fixed a mistake that I made on my own.
So, I'll definitely apply those changes as well. And only now it's starting to extend it. I'll press enter a couple more times. And let's see what it comes up with.
It's properly implementing the schemas as well as the two controller functions, sign in and sign out. And finally, it'll update the routes to use the new controller functions. That one should really be quick. There we go.
It removed all of these lines and simply imported sign up, sign in, and sign out and trigger them. When we reach those endpoints, it'll now read through all of those files and check the implementation. and it says perfect, I've done it. Gives me an overview of exactly what it accomplished, which code it added, and how it updated the routes, and finally, which features were implemented.
Finally, also gives me an example of how I can test it. So, let's test out the implementation. I've opened up HDPI and instead of sign up, I'll head over to sign in to see whether that works. And now I need to sign in with my email and password.
And before I send it, let's make sure that our application is running on localhost 3000. And then we got user signed in successfully, which means that the sign-in function has been implemented. And now we can also try the sign out. It actually told us what we have to do.
No body required. We just cleared the cookies by making a post request to sign out. So if I do that without passing anything within the body, it says user signed out successfully. To be honest, I'm just blown away by not even the simplicity of using it, but just by developer experience of having it all within a single environment.
And of course, since it's connected to our repo, all the changes that have been made are immediately visible within our other editor as well. That's amazing. So now, if I switch over back to the terminal, I can clear it. I can run git add dot git commit-m and say implement o and then push it all from within a single terminal like experience where 5 seconds ago I was speaking with agents.
Oh, and want to see something else? If I press right here, I can open up the project explorer and actually browse my entire application and all of the code. And I can then hover over that code to add it as additional context. and I can have the files on one side and the terminal and the agent on the other.
It really feels like a full experience. So with that in mind, authentication is now done. And in the next lesson, let me show you how we can secure it. Now that we've implemented authentication with proper logging and monitoring, it's time to make it more secure.
And for that, we'll use Arkjet. See, a backend without security, rate limiting, or bot protection isn't just unfinished, it's also unsafe. Because these exposed APIs with no safeguards are left to abuse, spam, and even DDoS attacks. All it takes is one bad actor to overwhelm your system and take it down.
Thankfully, ARJet has built-in features for Noode.js applications that protect us. ARJet Shield automatically protects your apps against most common attacks, including the top 10 most popular attacks. Then without rate limiting, a single client can flood your servers with requests and starve out real users. But with Arjet, you can limit the amount of requests that each user can make.
There's also bot protection so that you can stop automated scripts that exploit your endpoints or scrape data or brute force credentials. And also, you can protect a signup form by combining all of these things together. If you think about it, these attacks aren't edge cases. They're everyday realities.
And making your app secure is not only smart, but it is necessary. More than that, it wouldn't make sense not to make it secure as it is so simple doing that using Arjet. So, click the link down in the description and let's set it up together. Sign up for free.
You can go with GitHub. As you can see, I already have a couple of projects that I'm hosting over on ARJet. So, I'll create a new site right now. You can name it something like JSM and we're going to use the acquisitions or you can call it DevOps as well and create.
Now, immediately you're given a key that you can copy. So let's do that first and add it over to your env right below. You can call it arjet and add the arjet key equal to this key right here. And then we can follow the setup for node and express.
So just click right here and it'll give you instructions on how you can set it up within 5 minutes. We have already installed express. So what we have to do is install at arjet/node and add arjet/insspect. Now it'll be up to you whether you want to keep using your current IDE or editor or you want to switch over to warp and run everything there.
Both ways are totally fine. I'll proceed with warp just to see how it all works. So I'll clear everything and install the necessary packages. Arjet node and arjet inspect.
While that is installing, the next step is to of course set our key which we have already done and then add some configuration rules. So go ahead and copy this file from the documentation and then open up your project explorer. Within here you can head over to config and create a new file. Call it arjet.js.
Within this file you can paste what you just copied. But we don't have to set up a new app right here. We just need to set up an instance of arjet with our own rules. So that's going to be import arcjet shield detect bot and sliding window.
This is one of the raid limiting methods. And then we don't need this spoofedbot or express. While setting up our instance, we first need to pass over our key coming from process.env.archjet key. And then we can start defining the rules.
First of all, we have this shield rule which protects your app from the most common attacks such as SQL injections which is super useful in this case and I will leave it live. Then we have the bot detection rule where you can also say live or you can also use dry run to log only and then we're specifying which bots should we allow because not all bots are necessarily malicious. Maybe you want some bots within your application such as for monitoring and so on. In this case, we're allowing the search engine bots such as Google or Bing to crawl our application so we have good SEO.
This is incredibly important. And we can also turn in link previews for example for Slack or Discord. So I'll say category preview as well. Finally, instead of using a token bucket rate limiting algorithm, we're going to use a sliding window.
The way it works is you say sliding window. And then you can define the mode of that window. I'll set it to live. And then we can set the interval to 2 seconds, which will refill the sliding window every 2 seconds.
And it'll allow for a max of five requests per interval. For example, you can increase this interval to maybe 1 minute. So you allow five requests per minute. It's totally up to you.
Now, since this is just the configuration file for ArcJet, in this case, we don't necessarily need to have this request right here. We're going to do that later on from within our application or we'll add it as part of the middleware. So, I will just delete this part from here. And instead, I will simply export AJ as this new instance of the ARJet configuration that we've just created.
And then we can move over to creating security middleware by heading over to source middleware and creating our first middleware which will be called security middleware.js. Within here we can now import this instance of arcjet that we created coming from config/archjet.js and we can create this security middleware which is going to be just an asynchronous function that accepts the request the response and then the next. So we can forward it over to the next function in the chain. That's what the middleware functions are for.
And then I'll open up a new try and catch block. In the catch, we can just log the error by saying console. A rjet middleware error. And then we can actually log it right here.
And then we'll also send a reset status of 500.json JSON with the error of internal server error if something went wrong with a message saying something went wrong with security middleware. But if everything is going well here we can set up all the different limits and all the different security measures that we want Arkjet to implement. So first things first we got to figure out which user are we working with. Is that user a guest, an admin, or a regular user?
So we'll say const ro is equal to wc do user question mark. roll and by default we can set it to guest. Maybe they're unauthorized. Then I'll create two empty variables of limit and the message that we want to display.
And then I'll open up a switch statement that's going to change the limit and the message depending on the role. So if the role is set to admin in that case we're going to set the limit over to 20 requests and we'll set the message to be equal to admin request limit exceeded 20 per minute slow down. Now we can also add a break statement right here to end this case and we can duplicate it two more times below. Okay, just like this.
For the second case, we're going to have the user, we're going to limit them to 10 requests and then we'll say user limit exceeded that is about 10 per minute also slow down. And finally, the guest will be allowed five requests per minute. So this automatically tells you how extensible the security measures that you implement within your applications are. You can give specific types of users more requests.
If your API is paid, maybe you can have different tiers and then if somebody's paying more, you can actually charge more money for more requests per a specific window of time. After that we can define a new arjet client by saying ajwith rule and we'll provide a rule of sliding window and pass in a mode of live an interval of 1 minute a max which is the limit defined above and also a name of that rule which is going to be set to a template string of roll rate limit. So this is the new rule that we're applying. And we can even take it a step further by adding logging for when Arjet figures out someone is a bot.
So I'll say if decision this is very important. So if arjet decides that something is a bot and this decision is coming from client protect. So as soon as we try to protect this request cause decision is equal to await client.protect not protect this request that we're trying to make. So if this decision is denied to make that request and if the decision reason isbot obviously then they're a bot then we can use the logger functionality by importing the logger at the top.
So we can say something along the lines of import logger from hashconfig/logger.js. And we also need to import this sliding window algorithm by saying import sliding window coming from at arjet slash node. So now if we are denying our request because of a bot then we can use the logger.warn feature and we can say something like bot request blocked and then provide additional information such as the IP address of w.ip. IP user agent of rec.get user agent.
So we know which user agent tried to make that request and then the path that this request was trying to be made too. So that's going to be wreck.path. And then of course since we have declined them we can also return a rest. status of 403 with the following JSON message error of forbidden.
We are blocking you. And we can also add a message saying something like automated requests are not allowed. Perfect. It is that easy to implement bot detection.
Now we can duplicate this request down below including this logger warn and the return statement. And this time instead of checking for bots, we can check if it's denied but if the reason is shield. So this has to do with the 10 most common attacks. In this case, I'll say shield blocked request and we'll say the same thing.
Give me the IP address, give me the user agent, give me the path. And in this case, we can also try to log the method that the user is trying to make. So that can either be post, put, update, get and so on. And finally, I will do it one more time by once again copying this bot detection.
And instead of checking whether it's a bot, I'll check whether it's a rate limit. Remember the limits above. So in this case, we'll say rate limit exceeded. And we will log the same things again.
And instead of saying automated requests are not allowed for the shield blocks, we can say something like request blocked by security policy. And then for the third one, we can say something like too many requests. Finally, if we pass all of these if statements, that means that we are allowed to make a request. So we can finally just say next.
This is good. This middleware did what it's supposed to. It tried to secure the application. There's nothing to secure it from.
So go ahead and make the request. So now back within our app.js, we can add another middleware. Right here above all of our requests, I'll add the app.use Use security middleware and make sure to import it right at the top by saying import security middleware coming from hash middleware/security.m middleware.js. And I think now you get a better idea of what these middlewares are.
So these are all the different types of middlewares that we're injecting in between our requests that extend our app with some additional functionality such as this one that is applying security to our application. Now to test it out, head back over to HTTP and let's try to make a request to for/halth and we can make it a get request. So if you send it out, we get a connection refused. That's fine.
Let's not forget that we can immediately open up a new tab, make sure that we are in the right repo, and then just run mpm rundev to spin up our application. Now, it looks like I have a typo right here that is in security middleware. So, if I quickly head over to security middleware, we can fix it in one go. It is on line 27.
It looks like I had one extra curly brace. And then we also have to close this function right here after we close the catch. Now if we head back over to the config file of the arkjet, same thing here. We have one extra curly brace and back within our app app app we have to properly import security middleware and we are properly importing it but we forgot to export it from here.
So just do export default security middleware and now we are running and listening on localhost 3000 and as you can see argjet is listening. So back within our application, if you try to make a request to forward/halth, you'll see that everything is good. And now if you rapidly make requests to health, you'll see forbidden too many requests. This means that you've just successfully added rate limiting to your application.
And if you head back over within your terminal, you'll be able to see something like this. All the infos are here, but we also have different warnings from our logging system that say rate limiting exceeded. We can see the IP, the path, the service, and the user agent, in this case, HTTP. Oh, and if you head over within your ARJet dashboard, you'll see that at first it allowed a couple of requests over to forward/halth.
But then as soon as we hit the rate limit, it starts denying them, saying that the limit is a max of five. At the same time, it also checked out all the different rules that we set for the rate limiting and bot protection with specific allowances. But in this case, we did not break any bot protections. But just so you know that you are protected.
So if somebody tries to hack your application, make some malicious requests or just tries to use bots to scrape your API, ArcJet will protect you. That's it. It was super seamless to add security to our application. So let's go ahead and commit it by saying get add dot getit commit-m secure our API with arjet and push it.
Perfect. Now you know how you can secure any API that you create in the future and you can do the same thing for different frameworks such as Nex.js. In this lesson, let's dockerize our application. You've learned a lot about how Docker works within the crash course part of this course, but now we'll actually dockerize our application for local and production environments so that you can run it within any environment and it works for everybody who's running it.
We've already talked about what dockerization is. So now let's leverage AI to help us implement it within this project. In the video kit down below, I'll provide you with a special docization prompt. Simply copy it and paste it within warp and then let's go through it together.
It says you're a senior DevOps engineer. Your task is to dockerize my application that uses a neon database. The setup must work differently for development and production. Development environment is local and we want to use Neon local via Docker.
Configure docker compose to run neon local proxy alongside my application. And again, you can learn more about Neon Local right here. That's the beauty of these agents. If something is not working properly, you can just provide it access to a link so that it knows how to work with it.
Again, your prompts typically are going to be much shorter and much less precise than this. But just to ensure that we have more or less the same output that we're getting, I decided to take a bit more time writing this prompt. So, let's go ahead and run it. It says, "I'll help you dockerize your acquisitions application with neon database support.
Let me first analyze your current project structure and then create the necessary docking configuration." Then it walks us through the tasks that it created for itself. The first step will be to create a Docker file for NodeJS application. Immediately, we get back a Docker file for Node.js acquisitions application with a multi-stage build that works for both production and development. What it's doing here is creating a new nonroot user for security.
Then we're changing its ownership and exposing the port. There's even a health check right here. And then we repeat the same thing for development stage. Now you can see for development right here the command is mpm rundev.
But for production it is manual. It's just pointing to a source index.js. Instead of that we can head back over to our code, head over to package.json JSON and like we have added a dev script right here for development. We can also add a start script for production that'll simply be node slource/index.js or I think it's just source/index.js.
This way we're watching for the changes in development. But when you run it on a server, you simply want to run it once and let it run. Now we can edit this file provided by warp and simply change this over to from node source index.js gs to simply mpm, start, and apply changes. And now it'll continue doing its thing.
Now we've gotten the docker compose file, and it looks like it has the configuration for neon local, the environment, volumes, health check, network, and then the node.js application right here. It's using all of the best Docker practices to create the files that will dockerize the application for us. So for the time being, let's go ahead and accept it. We might need to make some small changes or adjustments to it later on, but for now it's perfect.
It says that it is right now on a step three out of eight. And now it created another docker compose for production. Note that in here it is using the neon cloud database whereas for development it used neon local. Neon local is a feature by neonb which allows you to use docker environments to connect to neon and manage branches automatically.
In simple words, it's a proxy service that creates a local interface to your Neon Cloud database. So, let's go ahead and accept this production database, too, or at least the configuration for it. And now, it'll create the environment configuration files. Here we got just some more ENVs.
It created them undervvelopment. So, let's go ahead and accept them. For sure, we'll have to add our own ENVs here later on anyway. And it did the same thing for ENV production.
Now it'll automatically update the package JSON with docker scripts. Now this is a lot of docker commands that we have to run manually. So in this case I won't go ahead and accept these changes since this is a DevOps course. What we'll do instead is together we'll develop a bash script that will run all of these different Docker commands in sequence so that we can automate them which is the whole goal of DevOps.
So for the time being just go ahead and cancel this file right here. And now since we canceled it we can just ask it to continue. So I'll just type continue and we can go ahead. Since I cancelled the step of updating package JSON it's trying to do it again.
So this time instead of canceling I'll go ahead and manually remove these additional commands that it added and just click done. Oh and make sure to remove the comma after the last command that you have right here. Oh and the extra curly brace as well. Perfect.
So now the only thing that we changed is adding the start script. And now we can apply the changes. As I said, we'll be implementing all of these different Docker scripts within our custom bash script. So more on that soon.
Now it'll create a simple Docker ignore file which we can accept. And like any good engineer, it'll give you a comprehensive documentation for the entire Docker setup that it just implemented. And there we go. Here's a complete docker setup.md.
So we can see all the changes in markdown. It talks a bit about development and production environment more about the prerequisites to set us all up. It told us what it did, what we still have to do by adding our env to make it work, how to start up our development environment, and exactly what it will do. Same thing for production and more on using Neon Local to run it all together.
At the end, it even provided us with a quick start checklist so we know exactly what we have to do to make it work. Let's go ahead and apply those changes and see what Warp has to say next. Oh, it looks like it even provided a quick setup script that we can run to make our process easier. I'll definitely go ahead and accept that.
It's also asking us to run it, but for now, I will just go ahead and cancel it so we can go through the changes that it implemented on our own. The next step is to get all the necessary env. The first environment variable we can get is going to come from Neon. And you can get it by heading over to the top right, pressing your profile photo, heading over to account settings, and then switching over to the API key section where you can create your own personal API key.
You can give it a name. In this case, I'll call it JSM acquisitions. And click create. Then copy it.
Head back over to your application and go to env.development. development. You should be able to see two different files, one for production, one for development. Thankfully, Warp left some nice comments right here saying that this is the development environment configuration used when running application with Docker Compose in development mode with Neon local proxy.
Okay, so we have some things that we have specified before. We also have our database configuration right here. And what you'll have to do here is put the Neon API key right here that you just copied as well as a Neon project ID and a branch. So we just got the API key.
Now to get the additional things, you can head back over to your project. Then head over to the settings. And right here you'll see the project ID. Simply copy it and paste it over here under Neon project ID.
And the last thing is the branch name or the branch ID. This one you can get if you head over to branch overview and you can copy this branch ID right here and simply override the main branch. Oh, and let's also not forget the arjet key. I believe that one was previously in just the env.
So you can just copy the arjet key from here and paste it over at the bottom. I'll call it arjet and just specify the arjet key right here. Now a cool trick or a concept in docker is that instead of specifying whole env line by line in a docker compose file you can just point it out to the respective file. So head over to docker composedev.yaml and modify it to point to enenv.development.
So here where we have our environment variables instead of that you can simply say env file and point it to env.development. development and now it'll get access to all the environment variables. This was done for neon local which I will collapse right now. And then below you have the NodeJS application and you can repeat the same thing.
So here we also have the environment and what you can do is say env env env then you can specify the path of the file by saying development. So now we have updated our environment variables for both services neon local as well as the app. And we can repeat the same thing for production. So if you head over to docker compose.pro you can also remove the environment variables and just say envouro and in this case you don't have to do it for neon local.
Oh but make sure that this says env file instead of environment. Perfect. Now, do you remember how Warp generated a set of Docker bash script for us not that long ago? We have it here, but it's pretty detailed and maybe a bit too long.
And maybe this one differs from the one that I generated for you. For that reason, I want to make sure that we have the same bash script that we can run. So, head over to the video kit down below, copy the bash script there, and paste it right here. You'll notice that this one is much shorter.
And now we can go through it together, and I can explain how it works. This is a development startup script for the acquisitions app with neon local. This script will start the application in development mode with neon local. We already covered most of these commands during the crash course part such as echo which is basically you can think of it like an alert or a console log in a bash language.
It just says what is happening. Then we have a check for the development environment variables and whether they exist. If they don't, we can just say, "Hey, this is not found." Then please copy them and then proceed. Once again, we're checking if Docker is running.
If everything is good, we're creating a new neon local directory if it doesn't already exist. And then we're adding it to get ignored if it's not already present there. Finally, we're building and starting development containers so that the neon local proxy will create an ephemeral database branch and application will run with hot reload enabled. Ephemeral means that it is a temporary data store that exists only for a short period of time and then the data will be lost, shut down or terminated.
Keep in mind the data here is not persistent. The goal here is only to hold it for some time and then application will run with hot reload enabled. We then run migrations with Drizzle to make sure to apply the latest schemas. Then we wait for the database to be ready.
We use a docker compose command and then we start a development environment. Finally, development environment, if everything went well, should have started on localhost 5173. So, let's head over to the package.json here. Let's add a command to execute our new bash script.
Remember when we had all of the other commands right here? Now, it's going to be just one. I'll call it dev docker. And it'll simply run sh setup docker.sh.
Make sure to have sh at the start or whatever the name of your sh script is. Maybe it's going to be something different. As a matter of fact, just so we all have it the same, let's actually create a new folder in the root of our application and let's call it scripts. Then move this script over to the scripts and simply rename it to dev.sh.
This will be our docker dev command. So change it here as well /cripts/dev.sh. And now before we run this command, make sure that docker desktop is running and then run mpm rundev docker. You can see that it'll start executing the commands from the bash script such as pulling the changes from neon local and then building out our entire application.
And there we go. Just like that, it successfully built the acquisitions app and then created the network and two different containers for our development environment. No issues and immediately the app is running within a Docker containerized environment. Typically, this would take hours to set up, but with proper understanding from the crash course part and a bit of help from AI, we were able to get it up and running in a couple of minutes.
And immediately we got a message that our application is listening on localhost 3000. So let's just open it up. And you can indeed see that it is running. You can visit the root route or head over to API endpoint where you get the acquisitions API is running.
Even the health check should work. Perfect. Of course, testing it with HDPI as well will do the trick. So if you try to hit a 3000, you'll get a successful response.
This is not running from our terminal or from warp terminal. This is running directly from a docker container. But now let me show you something else. Instead of just making a get request to hello acquisitions, if we head over to 3000 API sign up and try to create a new account.
So I'll head over to a text and I'll pass over all the important information such as the name. I'll go with something like Adrian and we are in JSON. So double quot strings all the way. I'll enter my email.
I'll make it a bit different this time. Contactjsmastery.com. And let's not forget about a password as well. I'll do one, two, three.
One, two, three. Oh, and I forgot to add o before the sign up. Now the reason we got this error right here, it's mentioning a failed query. But basically what it's saying is, hey, these users don't exist.
I cannot find this table or the schema for the users. And the reason for that is we have to reconfigure our database connection so that it actually points to neon local for our local development purposes. You can do that by heading over to source config database.js. And then here we'll have to do setup for neon local by checking if process.env.node env is set to development.
In that case, we'll do some further neon config which you can import from neon database serverless by fetching the endpoint that we're trying to reach. And in our case, we're setting it to well, you can see what docker config is saying. If you head over to docker compose dev under neon, you can see that its port will be 5432. So we can set the endpoint to http col/neon-local col 5432/sql.
We can also set the neon config use secure web socket and set it to false. And we can also set the neon config dot pool query via fetch and I'll set it to true. I found these values in the Neon documentation for setting up the Neon local environment. And that's it.
So now if you head back and retry the request, there we go. The user got registered, which is amazing. ID number three, adrien contact.jsmastery.com. This is great because it seems like we just created our third user and everything is connected to our original DB.
But if you head back over to Neon and reload your tables, you'll see there are only two users that we created before. So, it seems like our database is not connected. Or is it? Actually, we're connected to the local instance using Neon local docker connection so that we don't mess with production databases.
This means that all the changes that you make right here for our local environment are going to stay local and it's impossible to break anything in production exactly how it should be in real applications. Now, how would you go about actually dockerizing this for production? Well, there's another script that we can add. So if you head over to root scripts and create a new script which you can call prod.sh, you can find this script within the video kit down below.
It's very similar to the dev script almost exactly the same, but instead of using neon local, it's using a regular database connection. We won't go ahead and run this right now because it's going to work in the same way that the dev one did. But before you're running this later on, just make sure that your environment production variables are also properly set. Here you'll put your real database URL that before we kept within our originalv.
And you can also add the arjet keys, jwts, and so on. And then you're almost ready to run it. You just need to add it to your package json by saying proder. And then you're going to run this different command sh/scripts slpro.sh and you're ready for production.
I mean the fact that we implemented dockerization to our application so quickly and in such a simple way is just crazy. We just needed a good prompt and we let warp handle the rest. So I'll definitely go ahead and commit this over to GitHub right now by running git add dot getit commit-m implement dockerization and get push. Once you understand theoretical concepts and the reasons why we do things we do then it's very simple to turn it into a clear prompt with detailed steps and warp and its army of agents will do the rest.
It's that simple. You focus on architecting and AI will take care of the implementation. Now that we've dockerized our application, let's implement all the user routes and all of the CRUD functionalities regarding users. We can start by creating a new file right within source routes.
And then within routes, we can create a new file called users.outes.js. And then as with the o routes we can create a new router by saying const routouter is equal to express.outer and then we can define a router.get to get all the users. So once somebody points to this route we'll get a request and a response and we will just run the res.end get slash users. I will duplicate it three times.
And let's not forget to export this router. Now for the second one, I'll do a get request, but not to forward slash users, rather the do forward slash users slash colon id, which means that this will give us the details of a specific user. Then we can do a put request so that we can modify a user profile. And we of course have to know which user we're modifying.
So that again is going to be the ID property, but this time a put request and finally a delete request to a specific user ID. So we want to delete a specific user. Perfect. So now that we have those routes, let's head over into our app.js and alongside getting the o routes, we can also get the forward slap API slash users routes.
And that's going to refer to the user routes coming from the file we just created. Perfect. Now, we'll also need to create some additional services to fetch and create all of those users. So, head over into source services and create a new service file called users.services.js.
And we'll need to define the function that'll give us back all the users. That'll look something like this. Export const get all users is equal to an asynchronous function that will have a try and catch block. In the catch, we will of course just use the logger functionality to log the error something like error fetching all users or error getting users.
And then we can also throw this error. And then in the try we'll actually fetch all users by saying all users is equal to await db coming from database.js file dot select. So we want to select specific fields from the database. Specifically we want to get it dot from the users table or the users model.
So simply import that users model and then within the curly braces you can pass which field you want to get back from the users such as id is going to be users do ID then we can do the name and the email we can also get the role of users roll created is users created at and updated at these are all the fields that we need and once we get those users we can simply return them so I'll say return all users Perfect. In this case, it's saying that this local variable is redundant. So, you don't even have to put it in a variable. What you can just do is add a return statement right here because it's the same thing.
We're just returning the output of this DB select, which are the users. Perfect. And now we need to create a new controller for the users. So, head over to controller and create a new file called users.controller.
controller.js and let's create a controller that will fetch all the users using the service we just created. Once again, I'll create a new function export const get all users is equal to an asynchronous function that has access to a request a response and the next function I'll open up a try and catch block. In the catch, we will use the logger to just log the error as before. And then if there's an error, we can just pass it over to the next function.
But in the try, we will use the logger to console log the info that we're just trying to fetch all users. So getting users dot dot dot and then we can get all users by calling and using a weight of this users service that we created. Or you can just say get all users and make sure to import it at the top by importing get all users from services users. And maybe we can rename this controller to fetch all users not to confuse with this service that we have right here.
Once we fetch them, you can just return a JSON object with a message of successfully retrieved users. And you can pass the users object equal to all users. And you can also pass the user count which is going to be all users.length. Now it might seem like a bit of an overkill to create a service and then to use that service within a controller whereas the controller itself could just use this logic that we had here.
Like we could have just done this and that would be a bit easier to get the users. But keep in mind that as our app scales so will the controllers and the services and the routes and everything else. So allowing all of these to be separate parts and to breathe independently is very important for scalability. Controllers will handle logging, validation, and more.
And the service part will only handle the database parts. That's a clear separation of concerns, which is a must for clean code. So finally, let's head over into the routes, which once again are serving their own purpose. And the only thing you have to do here now is just fetch all users because we've already created a service and the controller for fetching them.
So you're now just saying whenever a user goes to that's going to be the API users then simply give me all the users. Now there's two ways of running this app. You can either run mpm rundev to spin it up on localhost 3000 or you can use the other command we pointed out right here and that is dev docker. So let's go ahead and run mpm rundev docker and make sure that you have your docker app actually running on your device.
Once you have it, you can run the command and it'll start the acquisitions app in a development mode. it'll build it out and do all the Docker stuff that it does. There we go. Neon local is running.
Acquisitions is up and it says that it's listening on localhost 3000. So if you head over there, you should be able to see hello from acquisitions. But if you head to localhost 3000 slapi/ users, you'll get back a JSON output with a message of successfully retrieved users. And you can see a full users array getting returned to us right here.
Perfect. Now, for all of the upcoming services and controllers, you'll have to do almost the same thing that we did with this one endpoint right now. And to be more productive, we'll use AI to speed up our process and get the job done. So, let's head back over to Warp.
Warp has a special feature called project scoped rules that allow you to create some specific rules just for this project. Think of some custom guidelines or contexts different for each project. If you open up the sidebar, you'll see rules right here and you can add global rules or you can add projectbased rules. So let's initialize a new project.
Then in your finder or file explorer, you can find the repo of your application and click open. Now it's asking us would you like the agent to index this codebase which will lead to more efficient and tailored help. I'll say yeah definitely go ahead and index it. So if you head over to codebase indexing, you'll be able to see that it has been successfully synced.
And if you open up this file, this is the warp md file which is guidance for this specific project. Now if you open up this file, you'll see that warp automatically generated some custom rules for this project specifically. It gave it all the project information and the key technologies that it needs to know when running some additional code. So, if there's some additional info that you'd want Warp to know when going over your project and when developing additional code, you can just add it right here.
For now, we're good. And now, back within Warp environment, we can pass this new prompt that'll generate all of the additional user CRUD services for us. You can find it in the video kit down below and just copy and paste it here. In simple terms, we ask it to implement all of the other CRUD services.
You don't necessarily have to be this descriptive but in this case just so we get the same output I specifically pointed out that we need a get user by ID update user and delete user functions. Then we are also implementing some validations and some additional controllers. So let's press enter and let's let warp do its thing. It nicely examined the task and split it into multiple smaller tasks and now it'll ask us for input as it is proceeding.
Now, there's this little thing right here, the two arrows that say autoimprove all agent actions for this task. And I'll turn it on because I believe that it should be able to nicely generate all the user validations, controllers, and services. So, let's let it work and I'll be back in a minute. And there we go.
In about a minute, Warp has successfully implemented the complete user crowd functionality for our Express application. And like a good guy, he even provided a comprehensive summary of what has been implemented. The user service is right here. These are three separate functions that deal directly with speaking with the database to retrieve the user, update them, and delete them.
We also have the validation to make sure what we pass into the API is correct. It fixed the authentication middleware and finally it created the user controllers which actually use the services created above and then pass over to data as API responses. Perfect. We can even see the API endpoints right here so that we can test them out back within our code.
It created a new users.services.js. If we want to be very specific, we can rename this file to user.service.js. I think I misspelled it when I was giving instructions. And make sure to also fix the imports for this service within the user controller.
It was supposed to be users.service.js. So these services alongside get all users which we implemented also include get user by ID which gets a specific user, update user and then delete user. And finally, in the controller, we have all the functions that actually use those services and return the data. And most importantly, within the routes, we're now using those three new controllers.
And each corresponds to its own endpoint. Oh, and look at that. It even left some comments so we know what's happening. For the time being, I'll just test a simple get request to see whether we can get the information for a single user.
That's the simplest way to do right now. We can just copy the ID, head over to localhost 3000 slappi slash users slash and then pass a number of your user like two and in this case we get back the authentication required no access token provided message. Now this response is exactly what we wanted. It means that our verification is working.
You cannot get user details of another user if you're not logged in. So, let's head over into our HTTP client and let's log in. So, I'll just head over to sign in and I'll sign in with my details. I think I just need my email and my password.
If I do that, you'll see that I got signed in successfully. And then if you expand these headers, under the headers, you will see a token right here. What you need to do here is copy this entire token and then pass it as a cookie header in your upcoming responses. So cookie is equal to this token you just copied.
If you do it that way and then head over to API users and you try to retrieve a specific user like the one with an ID of two and click send. Oh, let's make sure that it's a get request. Now the user got successfully retrieved and the data is back which means that this is working perfectly. So now if I wanted to delete this account I would just have to make a delete request to it.
And if I click send this is perfect. Check this out. We're getting a 403 forbidden because we're trying to delete somebody else's account and we don't have permissions to do that. This works thanks to warp adding middleware to every single one of our routes.
Check this out. Now middleware will make more sense. We always have this controller function that we're calling once we hit this endpoint like the delete right here, right? But before this function is called, it's calling two pieces of middleware.
One is called authenticate token which needs to make sure that we are authenticated and only if we are it pushes it to the next one in the line which is require ro. So in this case we're saying that we need to be an admin to delete something. If we are then we can proceed and finally then we delete it. Now I'm not sure whether I'm currently logged in with an admin account or not but let me try to delete a different account like maybe a user number one.
Nope. For all three of these, I don't have permissions to do that. If I try to call all the users, so I can see which one is the admin. But even for getting all the users, we don't have the permissions because to be able to read the details of all the users, you have to be an admin.
That makes sense. So for a second, I will just remove this function from here and remake the request just so I can see which user is the admin. Okay, so we have these three users right here. But instead of logging into one of these previous accounts, let's go ahead and create a new account that also has admin privileges.
So make a new post request to API o sign up. We don't have to pass any of the headers, but we do have to pass a name, which I will call something along the lines of I am the admin. And then the email will be adminadmin.pro. And we can pass some kind of a password.
And don't forget to add a role of admin. If you do this and send over this request, you'll be able to see that this new admin user had been registered. And in the request, we automatically got this user's token. This one is more powerful.
So, let's replace the old one as we're now logged in as the admin. And now if you try to delete a user, you can head over to API users and then maybe like user number one, we want to delete it. You would make a delete request to it with the proper headers so that the user know who is authenticated and we don't have to pass anything within the body. So now if you make a request, you'll see user deleted successfully.
Wonderful. This means that warp successfully implemented authentication and rolebased access middleware which is working perfectly once you understand how things work and once you know what you want to implement using AI to do it for you just feels like a superpower because it gets done right and it gets done fast. You might need to tweak it here and there, but more or less if you start with a proper scalable nice codebase like the one that we have right here with controllers, routes, services, utils, and more. AI agents will also be able to make a better job of implementing additional features.
So with that in mind, let's go ahead and run get add dot git commit-m implement users CRUD and get push. Perfect. This wasn't necessarily related with DevOps, but I still wanted to include a bit of functionalities within our application so that in the next lesson we can get back to DevOps this time in form of testing. And finally, we are at a part where we're going to dive into testing.
Testing is one of the crucial parts of development in general, but specifically DevOps because you want to ensure that the entire development process is well tested and predictable. So, I'll show you how to use one of the most popular testing libraries out there called Just. Believe it or not, it has almost 30 million weekly downloads and installing it couldn't be any simpler. You just run mpm install-save-devest.
So, we're adding it as a dev dependency. Oh, and we'll also add superest which provides highle abstractions for testing HTTP while still allowing you to drop down to the lower level API provided by the super agent. 7 million weekly downloads. So, let's install that as a dev dependency as well by running mpm install superest-save-dev.
Once that is done, you can head over to justestjs.io and head over to getting started. I'll turn on the dark mode and follow the first steps. After installing just, you can head down to additional configuration. And the first step right here is to generate a basic configuration file.
And we can do that by running mpm init just add latest. So just run this command and we'll have to answer a couple of questions. First, do you want to install the create just CLI? To which I'll say yes, please go ahead.
And then it'll ask you would you like to use justest when running test script in package json? I'll say yes to that. Would you like to use typescript for the configuration file? That'll be a no.
In this case, we're running a JavaScript application. Then you can choose between node and jsdom. In this case, we'll be testing a node application. Do you want just to add coverage reports?
I'll say yes to that. Which provider should be using? In this case, we'll be using v8. And do we want to automatically clear ma calls, instances, and context, and results before every test?
I'll say yes to that. And that will have generated a justestconfig.mjs. So you can just open it up by finding it right here within your project explorer. and head over into justconfig.mjs.
There's a lot of comments right here for all the different things that you might want to turn on. And there's some things that are not commented out such as clear mocks, collect coverage, coverage directory, and so on. It's a very long file, but as you can see, most of it is just commented out. One thing I want to point your attention to is this test environment variable where it says the test environment that will be used for testing.
In this case, we want to switch it over from just environment node to just node. We'll be running our tests there. Then you want to head over into package.json. And under imports, you can add an import alias for the source folder as we'll need that when writing tests.
So you can say hash src/ everything. We'll point it to /source slash everything. And another thing we'll have to do is add the test script. Right now it just says test justest, but instead we'll say test and provide some additional options such as node options is equal to d-experimental-vm modules and then we'll actually run the command.
The reason why we're doing that is so that it works with the type of node applications using the module. So, new ES6 import statements. That's why we have to provide this experimental VM modules. Great.
With that said, let's navigate over to source app.js. And then within here, we'll need to add some default middleware logic that will catch all endpoints that don't exist or are not defined. We'll use this later on in the test to check if a request has been made. It should not throw an error, but show a meaningful message.
So right below these two routers I'll say app do use and immediately render a reckon res because we don't need a path as it'll act as a catch all route. So immediately we can just return one thing from it. That'll be a res status of 404 which means it doesn't exist or could not be found. And then we'll return an error saying route not found.
Perfect. We'll use this later on within our tests. So let's go ahead and create a new test folder by heading over into our acquisitions app. We can create it in the root of our application and let's do it via terminal.
Make sure that you are currently in the acquisitions folder and then run mkder deer which is to make a directory and call it tests. Within tests you can then create a new file which you can call app.test.js. And within it we can write our first sample test. So let me teach you how we do tests in justest.
The way you approach creating tests is always describing what you're trying to do. So you can say describe and then define what you're describing. So in this case API endpoints and then you can create a callback function within it. Then you can describe again what should happen.
In this case, we want to get a forward slashhealth route and then as the output of that you say what should happen. It should return health status. And then you define a new asynchronous callback function after that and make that actual request by saying const response is equal to await request to which you pass the app and that app can be coming right at the top by importing app from hash srcapp.js JS and then once you make that request you can make a get request to forward/halth and then you can say expect a response of 200 then we know that our app is working. Another thing we can do is expect the response.body to have property of status which is set to okay.
So I think you can already get how intuitive writing just tests is. You're basically saying describe this. It should do this and we are expecting that it will do this and I will repeat this expect two more times. So let me just paste it below and indent it properly.
For the second time we're expecting the response body to have a time stamp because that's also one of the things that we're returning. Oh, in this case we're missing the okay at the end. So let's end it properly here. And finally for the third time we're expecting it to have the uptime because that's also another properties that we have there.
And now we can repeat this inner describe in case you want to add another test. This time we can say that you want to make a get request to slap ai and it should return an API message. So we're making a request to forward slash API expecting a 200 response and then we're expecting a response body to have property message which is equal to a string of acquisitions and instead of just typing it out we can head over to the app.js to see what we're actually responding. We're responding acquisitions API is running.
So this is the exact thing we want to see. Perfect. And we can do it one more time by duplicating it and saying that we are trying to get a forward slashnonexistent route and it should return 404 for nonexistent routes. So if we make a request to forward slashnonexistent, it should return a 404 and we're expecting the response body to have a property of error say something like route not found without an exclamation mark.
Perfect. And this request right here has to be imported because that's part of superest. So import request coming from superest. save it and open up your terminal or conveniently enough we're immediately within our terminal right here since we're within a warp environment.
So just run mpm run test which will run our suite of tests. There we go. There's going to be a lot of stuff right here. But the most important thing is that our tests within the app.test.js file all pass.
We get health API and non-existent all return exactly what we expected that they will return. So, three out of three passed. This will also generate the entire coverage of the whole testing. And to see it in action, you can head over to coverage LCOV report and then open up its index html in the browser.
Of course, not here. Once you do that, you'll be able to see something that looks like this, which tells you exactly how well tested your code is. The way in which we wrote tests today, even though they're minimal, is still the way it works in a real production environment. Of course, this is just the beginning.
As you continue building your application, you'll be writing more advanced tests and making sure that it's resilient against all the errors. So, if you'd like me to create a more detailed course on testing, let me know in the comments down below. Very soon, we'll implement this test as part of a CI/CD pipeline so I can show you how we can run it automatically as soon as you push to your application. That's the beauty of DevOps.
So, let's do that next. Before we jump into building the remaining features of the application, let's take a step back and set up CI/CD pipelines for linting, testing, and building our Docker image. We're not doing this just because it's a DevOps focused video. It's because in a real world workflow, you don't leave CI/CD for the very end.
The whole point of the pipelines is to catch issues early and ensure your code is reliable as you go. I've been scrolling through the CI/CD actions of JSM Pro. That's the repo behind the jsmastery.com platform. But it's not just us who are doing these actions.
If you take a look at Nex.js's official repo, you'll see that they have run almost 300,000 workflows and some are running right now like a minute ago. This means that there's always something happening within the repo. Setting up logging, writing tests, dockerizing the application, putting CI/CD pipelines in place. That way, every new feature you add automatically goes through all of these checks to make sure your application stays solid.
So, let's get that in place right now. Since in the crash course part of this course, we have gone through how CI/CD pipelines work through a hands-on demo. This time, we'll approach it a bit differently. Instead of implementing it yourself, we'll have an AI agent set up pipelines by clearly specifying what needs to be done.
So in the video kit down below, you can find this new prompt. You can copy it and paste it right here. That's the mindset you should start adopting for application development. You focus on the architecture and let AI handle the implementation.
In this case, we're asking it to study the codebase and create three GitHub action workflows. One for linting and formatting, another for testing, and a third one for Docker build and push. So press enter, and let's warp do its thing. It's asking us for a permission to create a new repo called workflows.
For sure, we can allow it to do that. And then it'll start creating these three workflows. I'll actually turn on the auto approval because I believe it should be able to do it properly. And there we go.
In less than a minute, it created all these three GitHub action workflows. One for linting, which will trigger on pushes to main and staging branches. Running tests, which will also trigger on pushes to main and staging. And finally, Docker pushes.
Now, it told us that we need some secrets to make sure these actually run. We need a Docker username, a Docker password, and a test database URL. So, let me show you how we can get those. Head over to your browser and head over to DockerHub.
Then, on the left side, you should be able to see some settings. Head over to personal access tokens and generate a new token. You can give it a description, something like JSM acquisitions and generate it. Now, while keeping this page open, head over to your GitHub repo.
And once you're there, go ahead and open up the settings. Then scroll down under security secrets and variables and search for actions. Here we'll need to add repository secrets. So click new repository secret and give it a name of docker username.
Then back within our application, you can find your username right here at the top and simply paste it right here. Make sure there's no extra spaces. Let's repeat the same thing for the docker password. So say docker password.
And for this one, I will copy this password right here and paste it there. Let's add two more. We also need to add our node environment. In this case, we'll set it to production finally.
Right. And finally, the last one is our database URL. So, just create it, call it database URL. And I believe that within our originalv file, there should be this entire database URL.
So, simply copy it and paste it right here. Now, back within our editor, you can see this new.github at GitHub folder with a workflows folder inside of it and three new actions docker build and push tests and lint and format. They're all following a proper YAML configuration and they would take us quite some time to write on our own but thankfully it's much easier using AI once you know what you want it to do. So let's test it out.
The only thing we have to do is just make a push over to the main branch. I'll do that right here by running git add.get commit-m implement cicd pipelines and GitHub actions and get push. As soon as you do this, head over to your repo and back over to the actions. And in a matter of seconds, you'll see that a new workflow has been cued.
So one by one, they will now run. Linting and formatting, testing, and then finally docker build and push. linting failed, which is completely expected as we haven't properly linted all of our files. So, it's possible that we're missing a couple of semicolons.
And the fact that we have just 10 different errors is super good across all the files. So, you can easily go ahead and make those fixes. And if you click over on lint and format check, you can see exactly what it did. So, it ran the eslint doccomand and then it figured out exactly where those issues are.
Now you can totally autofix those as well and then push again. Our second action succeeded and this one was running our tests. Remember that test.yamel file that we created not that long ago. Well, thankfully all of those tests have passed.
And at the bottom you can even see a new artifact generated through this workflow run. It's a full coverage report which you can click on and then it downloads it and then you can pull the index html to the browser so you can see the full coverage report. Pretty cool stuff, right? And finally, there's the Docker build and push.
We could inspect further why this Docker image failed, but this is a perfect chance to take a look at the file itself and maybe do some debugging. That's the point of working with AI. Sometimes, like your co-workers, it'll ship broken code. But if you're good enough, you can fix it.
Let's see. Oh, take a look here. We have our username, which is good, but the image name is acquisitions. That's not the image name we've been using so far.
If you head over to Docker, you'll know that we used Kubernetes demo API as the image name. So simply replace this one with that one and save it. And while we're here, let's also lint our repo by running mpm run lint. I believe that's the command that we had right here.
And this will give you all the issues that we have to fix. Then which other commands do we have within a package? JSON. It was lint fix.
Yep, this is exactly what I wanted. So now we can run mpm run lint fix and this should autofix most of these issues. So if you once again run mpm run lint you'll see that now we have no issues. And finally we can run mpm run format to do prettier formatting as well.
Beautiful. And now we can do another push and see what our GitHub actions say. get add dot get commit-m fix docker GitHub action and linting and get push. As soon as you do this and come back to your actions, you'll see that three new actions will instantly be cued running one after another.
So let's wait a minute and let's see what they have to say. And what do we have regarding the linting? It failed again, but this time eslint is good. It's just saying that maybe there's a bit of a formatting issue with prettier, but I'm totally okay with that for now.
The other thing I'm more concerned about is Docker build and push failing. And if we look into it, you can see that it's once again complaining about some OOTH token permissions. Unauthorized access token has insufficient scopes. Okay, so this makes me think that this token we created doesn't have the necessary permissions to do what it needs to do.
So let's go ahead and create a new one, but this time we won't make it read only. We'll give it write permissions. So I'll call it JSM acquisitions token. And this time I will make it read, write, and delete.
And we'll have to copy this password. Head over into the settings of this repo under secrets and variables and actions. And then modify the Docker password, which is more or less the Docker token. And then you can paste it right here.
It's asking me to verify and it got updated. So 30 times the charm. Let's do another push. This time we don't even have to do it from the code because we didn't change anything.
Rather we can change a readme which will trigger another push. I'll say testing CIC CD pipelines and commit and push. Now under actions, you'll see that all three will be re-triggered. And this time we're hoping for two out of three.
And there we go. You can see that all the steps of the build and push Docker image action have been completed. And this time it is green. Now, why did we even create this action in the first place?
Well, we did it so that whenever you make any changes to your codebase, we automatically regenerate and repush a new Docker image. So when you decide to add Kubernetes to this project, your Kubernetes clusters will always be pointing to the right versions of the code. So with that in mind, you've successfully added CI/CD pipelines and GitHub actions to this DevOps acquisitions API. Great work.
So what's next? Well, so far we've implemented the controllers, routes, and middleares for authentication and for the users. Not yet an acquisitions application, right? where people can buy some SAS businesses and sell them and so on.
But now it's all about repeating the same process you followed so far. Create the listings, their model, end points, let Warp generate the rest, test it, and then do the same for the deals. Check if your pipelines are running smoothly, make adjustments, test it again, and keep iterating. Somewhere along the way after completing your first MVP, try deploying with Kubernetes locally as I showed you during the crash course part of this course.
Then once you're comfortable doing that, pick a cloud provider and replicate the same setup using their clusters instead of mini cube. If you want a full final codebase with deployments, click the link down in the description. It'll give you more info, most likely pointing to jsmastery.com where I'll guide you through the rest of this course in detail. And for an even deeper dive, including self-hosting Postgress, learning cloud providers like AWS, deploying Dockerized applications, building advanced pipelines, setting up notifications, and more.
The ultimate backend course, which is not here yet, but is coming very, very soon, is exactly what you need. I'll link the weight list down in the description so you can join and know as soon as it's out. For now, I hope this video helped you understand what DevOps is and gave you the strategies you can apply to your own projects to impress recruiters and land that job. So, with that in mind, thank you so much for watching and I'll see you in the next one.
Have a wonderful
The video explains the concept of DevOps, emphasizing its practice of continuous integration (CI), where developers frequently commit code to a shared repository. This approach helps prevent integration issues, such as merge conflicts, by allowing for small, manageable changes. The presenter demonstrates how to set up a CI pipeline using GitHub Actions, automating the testing, building, and deployment processes. By implementing CI/CD, teams can increase their development speed and catch problems early, leading to improved code quality. The video concludes with an invitation to like and follow for more content on DevOps practices.
DevOps a set of practices to build test and release your code in small frequent steps one of the core practices of DevOps is continuous integration which has developers commit their code to a shared repository often on a daily basis each commit triggers an automated workflow on a CI server that can notify developers of any issues integrating their changes when a repo evolves in small steps like this it prevents what's known as merge Towel imagine Mary you're back and developer builds a new API for your product shortly after Jane your front-end developer starts work on a new UI a few months later when it comes time to merge their features we find that they're completely incompatible the build fails and we now have to spend a bunch of time and money resolving these conflicts let's go ahead and build a continuous integration pipeline now to see how it prevents issues like this here on github I have a node.js web app in order to deliver this out to my customers I need to run three commands test build and deploy I can automate this entire process in the cloud by using a CI service like github actions first I create a workflow and then I tell it to run on every push to the master branch the event triggers a job that runs on a Linux container in the cloud and we tell the container what to do as a series of steps first it checks out the code in this github repo then sets up nodejs installs my dependencies and runs my tests build and deploy commands now anytime we commit code to the master branch in this repo it will run this workflow if any of the steps fail the bad software won't be delivered to our customers and will automatically know there's an issue that needs to be addressed at the end of the day CI CD offers two main benefits it helps you automate things that would otherwise have to be done manually by developers that will increase your velocity but it also detects small problems early before they can grow into major disasters and that results in higher code quality this has been C ICD or DevOps in 100 seconds make sure to hit the like button if you want to see more short videos like this and stay tuned tomorrow for a full dead loss project using github actions thanks for watching and I will see you in the next one

The beginner's DevOps course aims to equip regular developers with fundamental DevOps concepts, guiding them toward a DevOps engineering role. It emphasizes the shift from traditional software development methods to a more iterative approach that incorporates continuous user feedback, allowing for frequent updates and improvements. Key topics include the DevOps cycle, which consists of planning, coding, testing, releasing, operating, and gathering feedback, creating a continuous loop of development. The course also highlights the importance of automation in DevOps, particularly in areas such as pull request management, deployment, and application performance monitoring, which streamline processes and enhance efficiency. Ultimately, the course prepares participants to understand and implement DevOps practices in their work, fostering a more agile and responsive development environment.
this beginner's devops course is your first step toward a devops engineering role it is taught by the ceo and co-founder of layer ci [Music] the goal of this course will be for regular developers and regular engineering practitioners to learn fundamental devops concepts so that they can go towards a devops engineering role we'll also be talking about devops broadly in the introduction but beyond that we'll primarily be talking about the engineering side of things [Music] devops is a methodology that helps engineering teams build products better by continuously integrating user feedback and if you google devops and you look for pictures you'll often see ones like this it really helps understand how devops is different than the traditional way of thinking about software development back in the day software was developed much like things would be developed in a factory so any input would be programming and then the output you'd have a product that you could put on a cd and you'd sell it to users but since the advent of the internet and of continuously updatable software it's become really easy to launch things and get user feedback and integrate that into the current product instead of making a new version of the product so websites like facebook continuously upgrade instead of requiring you to buy you know a new version of facebook unlike you know old games like simcity would require you to buy a new version of some city and that idea is really formalized by devops the sections are planning where you take a set of features that you want to build and you work with your team to make some specifications for what those features might look like you code them so developers on your team will build out these features so that they can be released and of course they're built so for a website you might take the source code and bundle it into a javascript that a user's browser could run for a video game you might make releases for various different versions that run on linux and versions that run on windows and versions that run in the browser so you take these built artifacts and you test them so testing is both automatic and manual automatic testing is usually colloquially known as continuous integration and manual testing is colloquially known as quality assurance qa qa qa and then after it's tested and you know the stakeholders have all given their feedback it's released and continuous deployment strategies releasing and deploying all happens automatically after a change is known to be good there's a lot of automation that can be done here in larger teams there's you know popular tools like spinnaker by netflix that we'll talk about in later talks but the core idea is you want to take the software and you want to send it to your users in a way that they don't notice if there's problems so if there's an experimental ui change you might show it to a few percentage of users and get their feedback before you show it broadly again a company like facebook which has billions of users even if one percent of their users complain they'll get hundreds of millions of emails the release is built and deployed so deploying means it's released to your users for a website it would mean it's publicly accessible on the internet for a cd-rom you know you'd bundle your things onto a cd and you distribute that for a mobile release you'd uh build the artifact and you'd submit it to the app store and then the app store would review it and then publish a new update that your users could download and then you operate it operating is primarily things like scaling making sure that enough resources exist for the load adding more servers as required configuring things dealing with architectural problems essentially and monitoring so as your users use your software and especially as they submit things and start jobs and create posts on your forms you want to make sure that those posts are all healthy and then finally you take all of this feedback and you put it back to the planning stage so the planning stage takes all of the user feedback takes all of the things that the operations and deployments teams learned about deploying and scaling the product and then use that to build out new features solve bugs and make new versions of the back end and new versions of the architecture and then it just continues in the cycle and this is what people mean when they say our company uses devops or our company is a tech forward or a company is digitally transformed they they mean that instead of taking a set of requirements and building one artifact which is then shipped it's a continuous cycle of taking feedback you know in these two-week scrum cycles usually and producing software that users actually want to use that they've had some say in producing devops engineering is another common part of devops so beyond just the methodology which is something that maybe the technical leaders and ceo would care about there's a subfield of devops engineering and this is usually what engineers mean when they say devops and that's usually what job postings mean when they say devops so if a job posting is asking for a devops engineer you know they're not asking for someone that can plan and deploy and code they're mostly asking for someone that can build test release deploy and monitor so the three pillars of devops engineering are pull request automation deployment automation and application performance management and we'll get into specifics about those but the idea is pull request automation helps developers build things faster and helps them understand whether their proposed change is good faster deployment automation helps you deploy your code in a way that users don't complain again facebook has lots of deployment automation because if they just threw their code out into the void every time a developer made a change there'd be hundreds of millions of complaints and application performance management is automation around making sure that things are healthy so automatically detecting downtime automatically waking someone up if you know the site goes down overnight automatically rolling back things if there's a problem and we'll get into the specifics of all these in future talks the first pillar which i mentioned was pull request automation has primarily to do with the developer feedback cycle so developers share work with each other by proposing these atomic sets of changes called pull requests and by atomic i mean they're a full feature on their own they don't require other things to run first it's like if a developer proposes a pull request they should be expecting that that change is good and as far as they can tell the change fulfills some business requirement and then what they have to do is get through some gates so organizations and pull request automation their goal is to make sure that developers can tell very quickly whether their change is good or not so for example if you're working on a website and a developer proposes a change that adds a typo that's something that can easily be automatically detected and if you set up a typogate that says no change may go in if it contains a typo that would be an easy way to make sure that developers get automatic feedback about their changes people say pull requests you know as of 2021 usually they mean git so git is a technology originally popularized by linux and it helps developers make these sets of changes and share them with each other a pull request is usually reviewed by at least one other programmer and something called a code review where the other programmer will tell you about code style will tell the proposing programmer whether there's architectural problems scaling problems subjective things that can't easily be automated but that process of review can also be greatly facilitated by a devops technology stack and devops automation can help with things like ephemeral environments and from linting and from all of these other automations that we'll get into after the code review has been done usually an engineering manager or product manager in charge of the functionality being proposed will give feedback so if you create a new button on a website you'd like the designer that designed the button and you'd like the product manager that requested the button be created both give feedback because if the button is phrased poorly if it's placed poorly if it's not mobile responsive those are all problems that would require another merge request so it would be great if the original merge request fulfilled all of the requirements the first time it was proposed and so usually non-technical people will give feedback on pull requests as necessary so so so what can be automated for a devops engineer you can automate things like automated test running per change of femoral environments automated security scanning notifications to reviewers getting the right people to review it at the right time and the end goal of all this automation is that a developer should be able to propose a change and get it merged the same day they propose the change that's a huge organizational benefit because it means that critical bugs can be very quickly fixed and merged and deployed without needing a special process and it also means that developers aren't bogged down in bureaucracy they can propose changes once they get through all the gates the change will be deployed there isn't additional special gates they need to discover so for example if the proper gates and automations have been set up a developer should be able to change a web page without having to ask everyone in the company whether this web page is used in certain workflows or not by virtue of passing the tests and passing the qa review it's assumed that the new change is good and if a problem does arise a new gate can be added to the automation so that in the future problems don't occur the second pillar is deployment automation in a famous post from 2000 the founder of stack overflow places can you make a build in one step as the second most important question for a development organization and things haven't really changed since then the efficiency of a build process isn't the only goal of deployment automation however other goals include the deployment strategies i talked about canary deployments where you want to show a feature to one user at a time starting new versions of your application without causing downtime if you have to shut off your website before upgrading it and then turning on the new version the visitors that visit the website in the middle of the upgrade will notice downtime so there's clever deployment strategies you can do to avoid that and finally rolling back versions in case something goes wrong and it's easy to overcomplicate deployments many companies have complex internal platforms for building and distributing releases broadly success in deployment automation is finding the appropriate deployment tools to fulfill business goals and configuring them in an ideal world there should be little to no custom code for deploying so off-the-shelf solutions like spinnaker and harness are are are wonderful places to start for this sort of thing finally application performance management even the best code can be hangstrong by operational errors there's a famous case where a user put a bunch of spaces at the end of their post in stack overflow and they brought down stack overflow which is a very popular developer website because stack overflow hadn't deployed their code in a way that would deal well with a bunch of white space so a bunch of space characters at the end of a post even with the best code and even with the simplest things like just a messaging board it's easy to have faults that make it to production and are only uncovered by users so application performance management ensures that metrics like how long it's taking for requests to be processed how many servers are being used all of those key health metrics are being processed and if there's a problem like if all of the requests to the landing page are suddenly taking a long time the appropriate people can be notified automatically instead of an engineer discovering on twitter that their website is down logging so as a program executes it will produce logs and the logs generally have information about the state of things it's useful to be able to map backlogs like you know a user visited the website with information about that user so what was their ip address what was their username what resource did they access and what resources were used for fulfilling that access so if they had to load something from a database the database was slow it's useful to be able to say the user had a slow experience because their request was fulfilled slowly but the request was fulfilled slowly because it was fulfilled from the database slowly so mapping these requests all the way down to their constituent components is very useful monitoring so again i mentioned the metrics and automatically alerting people but taking the logs and the metrics how slow are things how much memory is left and deciding what to do so if there's a bunch of load you might decide based on the metrics to automatically scale the number of servers so add more web servers as they're being used based on the logs if there's errors you might want to automatically file tickets for engineers to look into them and if there's a downtime you might want to call someone the person on call so that they wake up and take care of the downtime they can drop everything they can have a pager so to speak and that's alerting so alerting is when a fault is detected a sum trigger has occurred based on the metrics some number of requests are too slow things are unhealthy you know users are going to notice degraded performance someone should be notified or something should be done some action a new product shouldn't dive into devops engineering all at once so all that i've talked about are end goals for really large organizations like netflix and facebook developers would add automation as the situation required so a new startup with no users building a a a website pillars two and three are essentially useless outages won't be noticed by anyone something like a downtime won't be noticed by anyone it doesn't necessarily matter you you don't even necessarily need to run automated tests a useful stack for someone there would be something like netlife or cell or our product where you can get staging environments to collaborate with other developers but that's about as far as you care for testing-wise you just get an environment for every proposed change and you can play around with it yourself to see in a manual qa setting whether it's good or not not not a team building an app for 10 enterprise users so enterprise users are much more sensitive to downtime so test coverage and business hours alerting should be priorities on logging and log aggregation error collection there's popular tools like sentry and code cov for automated test running there's tools like bitrise and circle ci bitrise is more known for mobile testing and for alerting there's a famous tool called pagerduty that keeps track of who should be notified if there's a downtime and so during business hours you might assign someone to be the person that isn't supposed to take any meetings for the date if there's a downtime they'll drop everything and solve the problem and a social media app like reddit might be using a large combination of things so sentry for catching errors in the website elasticsearch logsdash cabana is a popular way of collecting and looking at logs a pingdom will check whether certain pages are taking too long to respond launch darkly lets you add feature flags so you can say whether a feature is enabled for some group of users or not should the new landing page be shown to users in north america or europe and terraform lets you automate the deployment process so given a set of servers and a set of things that need to run on the servers terraform will help you automatically create a plan to ensure that the right things are running in the right places and the conclusion of all of this is that devops engineering is vital for developer teams without being cognizant of its three pillars customers will have a confusing and disappointing experience you know things will go down things won't scale properly things will be slow and so it's really important to keep the three pillars in mind as you're scaling an engineering organization or if you're being hired as a devops engineer new products don't need to automate very much however as a product matures and it gets more users it's more and more important to automate devops engineering and to dedicate more resources to it [Music] we go more into code review automation let's talk about testing which is going to be really vital baseline information for when we talk about continuous integration and other code review automation topic so test driven development is a coding methodology where tests are written before the code is written and you know we're going to explain tests and test driven development in terms of coffee makers so enjoy this picture of a nice coffee maker as we continue test driven development's been around for a long time it was popularized in the early 2000s and the idea is simple but it requires knowledge of how things came to be for it to really make sense so so so historically common words in software development like quality assurance qa and unit tests have roots in factories building physical products if you were running a factory building coffee makers you would test that it worked at varying levels of completion so so so unit tests ensure individual components work on their own does the heater work does the tank hold water integration tests ensure a few components work together does the heater heat the water in the tank system end-to-end tests ensure everything works together does the coffee maker brew a cup of coffee acceptance tests after being launched sent to customers are they satisfied with the result are they confused with the button layout or breaking the coffee maker within their warranty period all of these tests have software analogies it's useful to know which components break in order to diagnose a problem but it's also useful to know that the whole system is working correctly because even if every individual component works on its own if your coffee maker doesn't heat water with its heater that's going to be a problem when it comes to making coffee that's really the idea for testing but let's get into test driven development which is the methodology built on top of testing that's become so popular in the past 10 or 20 years most developers that aren't using test driven developments have a similar workflow they'll choose something to work on based on our idea of devops it would be in the planning phase the developers would find something to work on in the planning phase they'd build it so they'd write code and they'd make a build from that code and then they test it so they'd write small scripts that made sure that their code was working correctly if you're making a function that adds two numbers you might pass it two and two and expect that the result is four and that would be a good indication that your function was working correctly so steps one and three as it turns out are very connected the tests written at the end essentially codify the specification what is success for building a coffee maker it should heat up in 5 seconds so write a test for that it should brew coffee of sufficient strength so write a test for that and so on test room and development uses the similarity of steps one and three to flip this process so first developers choose something to work on and then they write the tests before writing the code so they write tests that are currently failing because the specification isn't satisfied and then they write code until all of the specifications they wrote in step two are satisfied so they might make a testing regimen that would work if the coffee maker succeeded and then build the cheapest coffee maker which satisfies that testing regimen and the end result is the same so the software is built it's tested and it matches the specifications but it's significantly easier in a lot of cases to write code if you write the tests first because you know what you're building and it forces you to think about which things are important to work on and which things can be put into a later set of changes so this is a very quick video to discuss testing in the next video we'll talk about continuous integration which is really the devops continuation of this idea see you there [Music] so we've talked about testing where developers write scripts that make sure that their code continues working way off into the future years after they've made their code and that leads us into our discussion of ci which is really one of the big topics that people talk about in a devops context and ci stands for continuous integration it refers to developers continuously pushing small changes to a central repository numerous times per day and those changes are verified by automated computer software that runs the tests that the programmers have defined so we've gone over what tests are so let's talk about why a company would use ci ci ci well ci is really the first step in automating devops imagine the very simplest scenario a single developer is making a program that will be used by a small group of users that developer makes the original program releases it and the project slowly builds traction now imagine that developer has a critical bug a year later and they go back to the old code and they say like gee this is really bad code i've become a better programmer since a year ago i don't really understand what's going on here but that's really how development works programmers get better year after year and they have to read and understand the bad code that they wrote just a year ago and the only way to be confident making changes to that you know legacy code that might just be a year old is to have ci ci improves developer speed because new changes can be made confidently without having to worry about breaking existing functionality as long as the tests pass ci also reduces customer churn problems in the software are much less likely to occur if you have comprehensive tests that run automatically as long as you get those check marks you can be reasonably sure that the core features of your application will continue working so how would you integrate ci into your development process first let's talk about the common branch-based development process that many development teams use so first developers work on a feature branch so they'll take the files that are most current the ones shown to customers at a specific set of time they'll branch off of it so they'll make a new copy of the files to work on their their feature independently of all of the other developers working on things they'll make changes to the various components so this feature makes a change to the mobile app and to the website and then on that branch they'll push it back to the repository which is usually something like github gitlab or bitbucket and then that repository will run ci so the ci will be configured on the repository side it'll run all of the tests that the programmer has defined and then the results of those tests will be attached to the pull request and the pull request is the developer asking to take their code and to merge it into the central repository that users will be shown so you take the feature branch here and you put it at the end of all of the other commits that are being shown to users and so this commit is now the one that will be shown to users next and the next time there's a deployment the features that the programmer made will be visible to users and the best part is it doesn't cost you anything central gate repositories like github gitlab and bitbucket most have generous free tiers even for organizations minus some security and access control you know permissions features that you might need as you scale up and ci providers like lci github actions gitlab pipelines all have generous free tiers as well layer ci you know is really made for people working on on on websites that's maybe something to consider but if you're really early on in your project's lifecycle it doesn't really matter which ci provider you use of course if there's one thing to take away from the discussion of ci it's that ci is a vital tool it's really the first thing that should be automated in most pull request automation schemes because it's so easy developers should be writing these tests regardless and so if you don't run the tests automatically slowly people will break things without realizing that they're breaking them and users will notice those broken things and following best practices like feature branches and ci is a really easy way to scale a developer team with just ci a developer team can easily scale from 1 to 10 developers and at some point in there you'll have to start worrying about other pull request automation topics like the ones we'll cover in the next section [Applause] [Music] we've talked a lot about theory but let's get practical for a little bit just to round out our understanding of how these devops concepts work let's look at what setting up ci looks like for an actual repository this is the live chat example it's an open source version of slack that's used as a demo repository throughout layer ci's internal documentation let's say for this open source version of slack we'd like to run tests every time a developer proposed changes so that in the pull requests tab we'd be able to know whether a change was good in particular let's say a developer was changing the color of the website in the main website after you log in the top bar and sidebar are purple perhaps a customer has requested that the color be blue instead if we asked a developer and our team to make this change they would go to the necessary design file and edit the color in this case there are two colors to change if the developer opened this pull request it'd be very difficult for us to review their change without a ci system all we can see is the file change and the description of the commit so we can see that they've edited main.css and that they've changed these color values but it's very hard to understand the ramifications of this and it's especially hard to understand whether this will have negative side effects for our existing users especially for changes that are less trivial than just changing a color for this request if i was asked to review it i would have to pull these changes onto my local developer machine run the script locally and then evaluate the changes locally or i could ask the developer to set up a screen sharing session and then they could walk me through the changes both of these add a lot of friction to the development process it'd be better if i could evaluate their changes without needing any involvement at all entirely through a web interface that's how continuous integration helps continuous integration allows developers to set up comprehensive tests so that if something doesn't work anymore after a proposed change it says right in the pull request let's close this change for now and look at the repository to understand how to set up ci in this repository one of the services is called cypress and it's an end-to-end testing service it contains several configurations and these configurations interact with the page with a fake browser for example this test enters a username and password and then logs in and then ensures that the user is actually logged in this test goes to the message area enters a random message and ensures that the message has actually been submitted that it's viewable in the remaining chat area with enough end-to-end tests you can be reasonably confident that a chat system like this one continues working so we'd like to run these tests every time a developer proposes a change to do so we'll have to install a plugin into github set up the server to run after every pull request and run this test against the new server to do that let's set up layer cr for our use cases it's easy to just install it directly onto our github account we can now install it onto our github repository and now it's listed here this means that we've successfully installed layer ci onto this repository however nothing will happen yet because there are no configuration files we need to set up a configuration file for this repository that will start the whole stack and then run the tests in cyprus as required let's do that now because our repository is docker compose based let's use the docker compose example as a starting point here we're going to install docker which is a containerization technology we'll talk more about containers versus virtual machines later on in these sets of talks we install docker compose which is again a way of running multiple containers at the same time these these concepts will become clear later on in this talk we copy the repository files into the testrunner we build all of the services we start all of the services and then we deploy the pipeline let's skip deploying for now we'll talk about that in the deployment section of this devops course and after all the services are started let's run tests luckily i've already pre-set up a script for this so i can copy my configuration so to recap what this configuration will do do do is install the necessary software in this case docker and docker compose copy the repository files build all of the microservices start them all locally within the test runner and then run our tests against them so now that we've installed layer ci onto our repository all we have to do is add this configuration and we'll have setup ci for it so let's click add file we'll name it layer file this is how layer ci's configuration files are named other ci providers will have different file names of course we'll copy our configuration and we'll commit the file so now that we've set up ci we can see that there's a dot next to the commit name and that dot turns into a check mark when the tests have passed this means that every time a developer pushes new code in our source code management tool they'll get a success metric namely whether the tests have passed or not automatically they won't have to run the test themselves and the reviewer won't have to trust that the original developer has actually tested that the change works so let's go back to our original proposed change of changing the colors in production from blue to purple here we're going to make our change and reopen the pull request but because we've configured a ci provider for it we'll be able to see that the tests are running automatically directly in the pull request view itself now when our developer asks us for a review it'll be much easier for us to be able to tell whether the change has negatively affected our customers workflows in particular because we've configured cypress and layer ci to check that logging in and posting messages still work we'll know that for this change even though many files might have been changed the core workflows still work which gives us a degree of confidence that nothing terribly bad has happened with the code so we can look at the file change for our first idea of what the developer has done and then we can view what the ci is doing so if we open the relevant pipeline we'll see that the tests are in progress of running the new version of the application has been built and started within the ci runner and the tests are running one by one here it's tested that you can post chat messages within our alternative slacks chat page the landing page loads and logging in works correctly so now within our pull request view we'll be able to see a big check mark here which shows that all of the relevant ci checks have passed and then you can even automate within github or other source code management platforms that certain checks must pass entirely so you can automate that all ci checks must pass before a change could be merged let's make sure that developers are never reviewing code that's so obviously broken that it's breaking your tests and you don't only have to run end-to-end tests here you can also run linters unit tests and other versions of tests which we talk about throughout this series of talks and now that i'm happy with the change i've reviewed the files and i see that the ci has passed i can merge it with a great deal more confidence than if i didn't have this automation in place that's it for setting up ci in an applied setting let's get back to theory for a little bit [Music] continuing on the topic of testing and continuous integration let's talk about code coverage so code coverage quantitatively measures how comprehensive the tests for a codebase are you might think that you have enough tests to find all of the common bugs and to really check all of the functionality of your app but it's hard to put a number on it unless you're measuring code coverage this is what a code coverage graph looks like from a popular tool each of these squares represents a file and the color represents how many tests are covering that file so bright green means 100 of the file is tested and bright red means none of the file is tested so that would be a priority of a file that should either be tested or excluded from the measurement so let's say you're taking over an existing code base it's relatively large at 100 000 lines of code over the years it's been adopted by a couple hundred users and you're expected to maintain it and add features without harming those users so the first place you look at is the unit tests which we discussed earlier but they weren't really prioritized by the previous maintainers so there's a mismatch of libraries and naming conventions and it's kind of hard to tell which tests are testing which files and which files need to be tested and before you write any new features you'd like an objective way to measure how sensitive certain parts of the codebase are to being changed if something has very comprehensive tests you'll be much less scared to make changes and add features that touch that part of the code than if there's a part of the code that doesn't have tests so this is where code coverage really shines you've got a complicated code base that has existing users and you'd like to enforce that tests are written so that things aren't broken in an objective way so getting into the first code of this whole series let's look at this javascript function which i will make bigger so this is a very simple function if not a bit contrived it takes a number and it defines a few variables it loops up to that number pushing strings into a results list and then every 50 elements it pushes a special string into the results list so this whole function is 10 lines of code but not all 10 lines are equal so so so really there's three kinds of lines in a program like this there's the syntax lines like these closing ones that don't actually have any code in them they're simply syntactic constructs for the programmer's benefit they don't you know it doesn't even make sense to test these because how would you test that a semicolon existed or not there's logic lines like this one which actually have side effects and by side effects i mean that these lines if you remove them would change the behavior of the program and there's branch lines like this one which change the flow of the program so for loops and if statements in programming are used as constructs that change the order of the the the commands that run so this if statement if it evaluates to true would run this line and if it didn't evaluate to true it wouldn't run this line so to reiterate the three kinds of lines are syntactical ones that don't do anything the the the actual logic ones that have effects and the branch ones that change which lines of code execute and code coverage is usually defined as line coverage so it's the ratio of the non-syntax lines which are executed by tests over the total number of non-syntax lines so again consider this test if you expect the function should work with the input 2 and you manually calculate what the function should return for the input this would be a unit test for your function but since you're only executing it on the input 2 this if statement which requires an input of at least 50 to execute i wouldn't run so you'd be testing this line it would execute this line it would execute and this line which would also execute so you'd be executing five out of six lines and indeed that would be 83 test coverage though just the single test gets us most of the way to understanding our function and understanding its problems a related concept is called branch coverage so instead of measuring how many lines of code it measures groups of lines in our example above there's only two branches there is the main branch there's the body of the for loop and there's actually a third branch called the if statement body so here this line will always execute the body of the for loop will only execute if i is less than n so here you need n to be greater than or equal to 1 for these lines to execute and this line will only execute if i greater than or equal to 49. and so branch coverage would be how many individual branches out of these three are evaluated to true by a test so you'd like to know how many of all of the branches are tested and this is useful because if this line of code executes then this line of code will always execute so treating them both as individual things that need to be tested doesn't really mean as much as taking the bodies of these statements as things that need to be tested and if you measured the test with branch coverage you'd see that two of the three branches are evaluated during the test so when should you care about this line coverage in branch coverage we've already discussed one scenario where you've inherited an existing code base however it's important in many different situations in general you should measure and optimize for code coverage if any of the following are true so your product has users and those users might leave if they're affected by bugs in which case it's important to measure code coverage because it lets you work with your team to improve the code coverage and reduce the number of bugs you're working with developers that aren't immediately trustworthy like contractors or interns that you're you know bringing them into your code base they need to make changes in some fixed time scale like a format internship so they can't immediately become experts in the entire code base and you'd like them to be able to make changes without worrying too much about things breaking or if you're working in a very large code base with many individually testable components here code coverage analysis can complement test driven development which we talked about in the previous talk to make sure that everyone on the team is generally working on important things and that the things they make won't break in the future so it's a common mistake in code review automation to make things too rigid before the product has enough users if you force developers to get 100 branch coverage so to write two to five unit tests for every function it's going to make them much slower at developing features that users will actually notice remember that tests are never viewed by users so the only thing that users care about is the stability of the system so if you have an mvp or if you have a product that doesn't have very many active users yet it might not be worth it to measure or optimize for branch coverage until those users care a lot about stability and by writing unit tests and other types of tests an important thing to keep in mind is that developers are solidifying the implementations of features that they might have to throw out out out if you build a feature and it ends up not being something that your users actually want it's always a better idea to throw out that feature than build it long term so if a developer builds a feature and writes many tests for it to improve the code coverage of that feature they'll be much more likely not to throw it out because they'll feel a sense of ownership and they'll feel a sense of sunk cost in having built this feature and made it good so to speak so it's important not to over optimize for these things before they're important and it's a subjective idea but really you'll notice when your users start complaining about stability so organizationally there are some common policies related to code coverage the first one is useful when you inherit a code base and the policy is that code coverage must not decrease this one is one of the easiest ones to automate it's especially useful if you're taking over an existing code base as i mentioned and the idea is that code coverage ratio should never decrease if the current code has 75 of its lines tested and your new change introduces 40 lines of code at least 30 of those lines will need to be tested otherwise your changes code coverage would be less than 75 30 out of 40 and you'd be decreasing the average code coverage as with most code coverage policies this will increase stability so there'll be less bugs because things will be better tested at the expense of developer speed so developers will have to make some complicated tests and they might spend a lot of time making testing infrastructure so features will be shipped less quickly if you make this sort of policy and if you enforce it with a code review automation unfortunate side effect of this policy is that changes that would be harder to test such as integrations will be less likely to be worked on by developers so developers are incentivized by their paycheck and by their manager to ship features quickly to make many features per scrum cycle and so if certain features are harder to test because they require internet connectivity or connect to third-party apis those features will be harder to make and harder to test and so developers will be less likely to make them regardless of whether they're important to the users or not so it might be useful to have an exemptions policy in place for things like third-party integrations if your organization decides to go for this code coverage must not decrease policy another useful policy is code owners for test files if you've used code coverage automation to keep code while tested it's often beneficial to define code owners for the tests themselves this means that developers can change implementation details without formal reviewers but logic changes so the tests define what success means for a function or for an algorithm then changing the tests for a new implementation would need to be approved by a senior developer or manager in github with an engineering manager a github code owner's file might contain this which means dotspec.js is a common javascript testing naming convention and at engineering manager username means if if there's a file called code owners which contains this then the engineering manager will need to approve any change which changes a test which is probably a good policy so if you're working in a large code base with test driven development especially or if you're hiring interns or contractors or if your users are especially sensitive to bugs and you're afraid that they'll have a bad experience if the even small bugs make it to them it might be in your team's best interest to install a code coverage measurement tool and at the time of writing these are the three most common ones in the open source world a code cov coveralls and code climate [Music] so we've talked about testing and we've talked about continuous integration and those are really like the initial things that are set up in a devops coder view automation pipeline but the problem is that it requires the developers to be on board and of course developers are probably busy building features and might not necessarily want to to to make tests or improve test coverage so let's talk about linting which is something that approximates testing but doesn't need the developers to spend any time linters are programs that look at a program's source code and find problems automatically they're a common feature of pull request automation because they ensure that obvious bugs do not make it to production obvious here in quotes so an example of linting let's again look at a javascript program a very simple one you should understand even if you don't know javascript it defines a variable var x equals five it defines a function but continues after the open bracket which is you know generally considered by practice it uses let for the second variable and defines it with the same name as the first one so this is just confusing and you know it wouldn't be called good code a code reviewer would mention this in a code review and then it says while x is less than 100 console log x and then it closes the while loop on this line and it messes up the indent these three lines should be indented for consistency and then it closes the function finally you should realize that this while loop goes forever x isn't incremented in the body of the while loop so just by looking at the code statically without running any environment or looking at the code with a browser even you can tell that this loop will run forever and that's probably something that programmer didn't intend so so so much of this feedback could be automated a set of rules like don't shadow variables never name a variable in an inner scope that has the same name as a variable in an outer scope could be applied to each proposed change so that human reviewers would not have to waste effort leaving code style comments tools that maintain and run such lists are called linters relevantly another class of code review feedback has to do with code style it's easy for coder viewers to waste time pointing out stylistic choices like tabs versus bases or camelcase versus pothole case these discussions bring no value to end users you know your customers don't care what case your code is written in and ultimately they just serve to cause resentment and miss deadlines within engineering teams if a review takes an extra couple hours because of comments like this that's a couple hours that the programmer could have been focusing their attention on another feature so engineering organizations should eventually adopt to maintain a global style guide but in most cases just starting with something like the google style guide which is open source and available at this link is a great starting point these guides often come with linter configurations which help everything stay stylistically similar and some programming languages like python and go come with their own style guides and automation like pep 8 in the case of python that will make it easy for developers using those programming languages to stay in a unified style an organizational thing you can do for code style is to knit or which stands for nitpicking instead of blocking at the code review stage if there's review feedback that uh you know code style review feedback it might be better for coder viewers to leave small review comments called mitts so they'd say knit full colon shouldn't be styled this way this is great because it allows the reviewers to merge something with a few pieces of feedback so that hours don't have to be spent on a small piece of refactoring that could be done at a later stage at a later point in time once the style guide is adopted it's possible to configure tools to automatically format code to follow the style guide such tools are called autoformatters in the programming language go which we use at layer ci a command such as the following would use the standard formatter the one that comes with go to clean up all of the source files in the repository so we'd use the gnu find command find the files that have a go extension and we'd exec go format on them and this will take all of the source files and then format them with our style guide so that they all pass the style guide and of course if your ci system is running tests automatically every time your code is pushed the code could be automatically linted as well programmers shouldn't have to wait for a human reviewer to tell them whether the code is linted and styled appropriately in most cases it's cheap and convenient to run linting and formatting automatically with an sci system so an easy solution is is is you get another check mark to get something set up quickly it's a good start to make lint act the same as running a unit test in ci so add an x if the code isn't linted properly and then the developer can very quickly get stylistic feedback without needing to talk to another human or wasting their reviewers time for getting this sort of feedback and a ci configuration that might look like this so so so copy the project files run the lending script and then if the linking script fails the whole pipeline would fail this approach stops reviewers from the picking style it passed the linter is a perfectly reasonable response to an overly zealous code reviewer so even simple automation like this can improve the development speed of entire development teams it also stops reviewers from having to give style feedback at all if all of the checks for coder view pass like it passes all of the linters then the commit is stylistically okay the reviewer might still leave some feedback for future reference but they shouldn't be a blocking commits getting to production because of small stylistic choices that aren't even in the lyncher a better long-term solution is to set up a commit back bot which is a common idea that happens all over the place in code review automation but in this specific example it might look like this so you'd say if the code is not linted run eslint with the dash fix flag which again goes through all of the source files eslint is the linter for javascript so this would go through all of the source files for each of them it would apply the linting rules and it would fix any stylistic errors and then it would create a commit and an additional you know set of file changes on top of what the developer is proposing and it would create a new branch with the suffix linted and it would push to that branch so that a developer pushes unlimited code the bot would automatically create a commit which linted everything and it would create a new branch so that if the developer's code was known to be good the reviewer could simply merge the linted branch instead of the developer's original one and then we failed the pipeline with the lint failed this means that the unlimited version can't be merged but the linted one assuming all the feedback that isn't linted related could be merged so we'd have two branches the one the developer's proposing and the limited one the coder viewer would look at the one that wasn't linted they'd say whether it was good or not like the logic of the commit was good and if it was good then the reviewer in github could merge this branch instead of the one they were asked to review this branch would be the same as the original one with an additional commit on top of it so some examples of linters for many programming languages javascript the standard as of 2021 is eslint typescript also now uses eslint python uses pylint and flake8 c plus is much more subjective but a common choice is google cpplint from the google style guide mentioned above go comes with a formatter called go format which acts somewhat like a linter although there's additional libraries available for rules beyond that java has check style and find bugs maybe older options but there's a lot of choices for languages like java and ruby has rubocop and pronto we've seen users commonly use and java javascript c-sharp and many other languages can be linted with sonar cube which is a popular static analysis framework that is commonly used at larger enterprises but it has an open source version it is a good place to start for 10 developer teams that would like to set up static analysis and finally there's a startup called deep source that we've talked to startup to startup and they're doing all sorts of interesting stuff with static analysis as well static analysis is just the practice of looking at source code without running it and finding bugs so i'd encourage you to look at deep source as well so in comparison to most other code automation tools linters are exceptionally easy to set up any team with more than one developer should almost immediately set up a linter to catch obvious bugs like infinite loops just by looking at the code the linter would be able to tell you whether there was a common programmatic error like an infinite loop automatic linting comes standard with many code editors so it would be wise to teach developers how to configure their code editors to use the existing linting rules that your team has set up in the ci automation so that the developers don't have to wait to push their code to get this feedback they can get the yellow squigglies directly in their editor and in teams working on earlier products linters can help avoid writing unit tests at all instead of relying on a test suite you can rely often on a static analysis to find common bugs like the code not compiling at all or infinite loops or stylistic problems this helps small teams before their product as many users get feedback without needing to lock things in with tests all right so that's it for linting and code style we'll see in the next video [Music] let's finish up our discussion of code review automation by talking about ephemeral environments which are really the latest and greatest when it comes to doing code reviews and helping developers get their changes merged ephemeral environments are temporary environments that contain a self-contained version of the entire application generally for every feature branch they're often spun up by a slack bot or automatically on every commit using devops platforms like layer ci itself or heroku temporary environments are overtaking traditional ci platforms as the most valuable devops coder view experience because these environments are made on every change all of the stakeholders not just developers but the product people and the designers can review a change without needing to set up a developer environment or asking to screen share with the developer that proposed it so for a more concrete example let's say a developer is changing something on a website so they're changing you know the front end or the back end or you know some component of the website and they'd like to get feedback on their proposed change so a coder viewer would look at the code and they might not understand what the visual ramifications of that change are but within ephemeral environment within the code review view itself the reviewer would just have to click that button there i'll zoom in so within github this is what the reviewer would see they'd see the description the code change but also a button to view the ephemeral environment and when they click that button it wakes up up up a version of the website specifically with this proposed change in it so that the reviewer can actually take a look at things and see whether the changes visually and workflow wise working well in general ephemeral environments lie halfway between development environments and staging environments at the extreme staging is entirely replaced by thermal environments and something called continuous staging benefits of ephemeral environments well the most common reason to adopt an ephemeral environment workflow is that it is that it accelerates the software development life cycle developers can review the results of changes visually instead of needing to exclusively give feedback on the code change itself additionally developers can share their work with non-technical collaborators such as designers as easily as sharing a link to the proposed version so you could post a slack message like this saying could you go to this link and give me feedback instead of needing to set up a zoom call to share your screen to get the other person to look at your proposed changes the hardest part of setting up ephemeral environments are dealing with state so dealing with things like databases and microservices by their nature you know ephemeral environments are temporary they're isolated from production environments and really only last as long as a pull request does a reviewer should be able to delete a resource in a review so they should be able to see if you know deleting a user still works without fear of that affecting the production environment so in the early implementation of ephemeral environments it might make sense to connect to api servers with read-only permissions to a staging database so if you're using aws you might have an iam role that has read-only access to the database but in that case you wouldn't be able to sign up to the service for example because that would require a database right the end goal should be to have a fresh copy of the database for every commit so every time a developer proposes a change they get a new database specifically for their environment that they can do whatever they want and an ideal ephemeral database has three attributes it's pre-populated so it contains representative anonymized data the past security audits all pii personally identifiable information must be scrubbed from databases used in ephemeral environments it should be undoable so if in the course of a review data is deleted it should be easy to reset the database to its original state this is also crucial for running destructive end-to-end tests which we'll get into later and it should be migrated the database should use the schema currently used in production it's not very useful to know if something's working with an old version of the schema one of the most common classes of problems uncovered by female environments are broken or non-performant database migrations another hard problem to solve with ephemeral environments is the life cycle so when would you create them and when you destroy them a classic approach is to title life cycle of a pull request to the life cycle of an ephemeral environment so if the developer opens a pull request create an environment for them keep it running 24 7 until the developer deletes the environment the biggest factor i consider there is cost if each ephemeral environment costs 10 percent of production so it's 10 cheaper and you have 30 open pull requests you'd be quadrupling your monthly costs so you know that's a an expensive developer tool another approach is to create a chat op spot that allows creating new environments for a specific branch with a specific timeout so for example the user type slash prbot create in the github issue description that could create an environment or in slack the user could do the same thing this requires the environment to be provisioned at the time that it's required which can be slow and uh it's again hard to tell when to delete these the best approach is to create an ephemeral environment for every change so similar to the pr workflow but hibernate them as they're provisioned um there's only a few providers that do this so one is heroku which will with heroku review app can turn on and off environments and the other one is layer ci uh shameless plug i suppose so as users use the environments in layer ci they'll be hibernated and on and off you can automate this yourself with memory snapshotting but it's somewhat involved so this might be something that's better left to using a third party for and back to that idea of continuous staging the idea is to merge staging ephemeral environments in a ci pipeline altogether so this is kind of what layer ci itself primarily sells to our users as your ephemeral environments become more powerful and easier to create they approach and overtake many aspects of traditional continuous integration pipelines so if you can set up the website and the backend and the database then it's relatively easy to run tests because tests are usually much easier to run than the entire back end at its logical conclusion this concept becomes continuous staging where ci cd and ephemeral environments form a single ci cd flow where a single base sets up all of the requirements for everything and then that forks off into the unit tests but also the server but also the review environment but also the linter which everything comes from that common base um if you're going to make them yourself you should probably budget about a month per month of time it took to set up your environment so if your production environment has many different microservices and has many different databases it'll be relatively difficult to set up an environmental environment flow large companies like facebook have set this up for their internal pull requests but they have entire developer teams infrastructure software engineers that do this so if you're a smaller company you might want to stick to a hosted service again like layer ci instead of making it yourself up to maybe when you have about 20 developers and to avoid having to micromanage starting and stopping environments it's easiest to use the hosted provider if you're doing just front-end development some popular choices are versal and netlify but if you're doing full stack deployment really the only choices available right now are layer ci itself and heroku review apps there are some options available in many source code platforms like git lab has a environments feature but it's not really truly an ephemeral environments feature so you should explore all of those options to make an informed decision so that was thermal environments and that concludes our discussion of code review automation [Applause] [Music] [Applause] [Music] because pull request automation is such a core part of devops engineering let's do another applied tutorial here in this example we'll be setting up ephemeral environments the same way we talked about before using a hosted platform for the sake of simplicity so because we've already set up ci for this repository we already have our layer file which is our ci configuration however many ci providers including layer ci heroku and others can set up ephemeral environments which are small production deployments you can use to evaluate the changes live as a reviewer again let's say we're changing the color this time back from blue to purple and we'd like someone to be able to efficiently review our change not just by looking at the test results but also by looking at the femoral environment to run manual qa you might see see see in this case it's actually very easy to set up let's go to our web microservice let's create a new file here we'll make another layer file so that they run in parallel we'll say from our base layer file we'll say expose website and we'll expose the website running inside the runner itself layer ci has this exposed website directive but many other providers have similar functionality that you can set up and and and let's jump right to creating a pull request for it so here our coder viewer would not only see the test results as you can see those are here the initial layer file let's look at the actual graph to understand better what's going on on on here we have our tests running in the main layer file the main layer file has again built all of the services started all of the services and now it's running our cypress tests the same way it did in the ci chapter but after those cypress tests run we'll have a second environment which is inheriting from the first and that second environment will have a clickable link that can be used for manual qa so let's see that here the snapshot is done being taken of the tests which means that the ephemeral environment can start being built and now you can see that it's built a staging server button and you can connect to it here so in our actual pull request now that all of the tests and ci services have passed we can click the ephemeral environment button as soon as it appears we could click the main layer file details we can click the services web ephemeral environment and we can click view website and what this does is it wakes up the pipeline which we initially set up to run our tests but it forwards the internet visible link to the web server inside so here we've created a fresh environment specifically for this test and we can see that the test has run and sent a message and we can evaluate this change so we can test that creating channels the works for example and that in the test channel it's still possible to set messages this means that you don't need 100 test coverage to be able to understand the nuance of a change for every pull request you'll be able to spin up a new environment automatically and then wake up that environment when a review needs to be completed and now that we're satisfied that the environment works correctly we can merge the pull request and from now on all changes which edit the website can be manually queued so the reviewer can check that things work but also a qa team or a designer or a product manager might be able to check that the change actually changes what it's supposed to that's it for our thermal environments let's get back to theory [Music] welcome to devops academy deployment in this one we'll be talking about foundational concepts and primarily when you talk about deploying you're talking about vms and you're talking about containers uh and containers are often also known as docker so let's talk about the difference between those two before we talk about deploying anything people talk about devops deployments they're usually talking about deploying to linux a large portion of all deployments are the linux servers and containers are really only defined in terms of linux in production as of right now so with all that in mind let's talk about linux in the abstract so so so what linux really helps you do is take care of four things when you're writing programs it takes care of memory so programs need memory to do things memory is also known as ram and since you only have a finite amount of it uh linux itself needs to figure out which programs will get which sections of memory so which ram sticks will have which programs running on them linux also takes care of processors so if you're running two things in parallel linux will make sure that the right amount of processors are dedicated to both if you're if you've ever run very computationally intensive tasks on a laptop you might notice that your browser gets laggy that's because it's not getting enough processor time so if you're running production workloads linux needs to make sure that every program is getting its fair share of processor time to run the actual program there's disk so linux takes the files if all programs and allocate space on the disk for them you might have multiple disks and you might have both spinning disks and solid state drives you might even have discs shared across networks so linux takes care of all of that and make sure that the right files are on the right disks and that programs have access to those files and finally there's devices so even beyond disk memory and cpu there's things like gpu so for machine learning you see gpu often and things like network cards which you use for connecting to the internet linux needs to take these individual resources and allocate them to processes so if you have five processes trying to connect to the internet at the same time but only one network card linux needs to make sure that the right messages are sent to the right websites upstream and the responses are sent to the right programs downstream so in a diagram this is what that would look like so here we have three programs chrome notepad and spotify and they're all running in linux so this is assuming you have a linux a server running these three programs and here you have the four shared resources so chrome asks for cpu and linux will allocate some of the cpu time to chrome and it'll also allocate some to notepad and some to spotify and similarly for all the other shared resources so this is great but there's too much sharing going on and what i mean by that is that programs know about each other so if you had a program that expected a file at home calling file.text then it could create that file but another program could delete or read that file so files could be read across programs and that means those programs can communicate between each other which isn't always what you want so so so for example programmers often use different versions of python python is a popular programming language and there's two popular versions used one is python 2 and one is python 3 but they're both called python so if the file at user bin python is a python 2 executable and you try to run a python 3 program with it then that program would error because you'd be using the wrong version of python to run it however some of your programs might need python 2 and some of them might be python 3. so here there's crosstalk between programs in that they're both reading user bin python but they expect there to be different files there so that's what i mean by programs over share sometimes they need different versions of files at the same place and so you can't really run both programs at the same time similarly two web servers might listen to port 80 that's how websites allow you to connect to them so if you're running two web servers that both expect port 80 to be open the first one will start correctly and the second one will crash saying that port 80 is already used these sorts of problems of sharing resources is really where virtual machines and containers shine they allow you to separate resources like files and ports between programs so that programs can't step on each other's feet so here if you were running your three programs in a container it would look remarkably similar so chrome would be running but it would be running within a container and that container would be talking to linux which would then allocate the container resources and similarly for the other programs now this might not make sense yet but let's talk about what actually happens when you put something in a container like this so what happens when there's a container between a program and linux the big change is that each program will get its own version of shared resources like files and network ports the container running chrome might create a file at uh tilde slash chrome cache while the container running notepad could read that file and see that it didn't exist they'd get different copies of all of the system's files so that they couldn't talk amongst each other or have conflicting python versions similarly if you had two web servers running that both expected to be able to open port 80 one would be able to open port 80 in their container and the other would be able to open port 80 in their container so you could have two programs both thinking that they were the only program listening on port 80 but really they'd be isolated within their own containers so in linux containers work by creating namespaces which are a linux feature that group shared resources together if you had five processes running together within a docker container they'd still be running within linux itself but they would not see the other processes the ones on the main linux machine itself so within the container if you ran ps aux aux aux and you counted how many lines of output there were yes aux is how you see the running commands in a linux machine you might see 10 and that means that there's 10 processes visible to you within the container but within linux so within the container up here if you said how many processes were running it would say there's 10 processes but within linux itself you'd see hundreds of processes running including the 10 from this container so the containers are kind of sandboxed or namespaced into a single group of processes where the processes can't see the files outside of the container or the processes or the network ports outside of the container they only see the ports within this container so essentially what's happening is the programs are asking what are the contents of userlib python in our example before and instead of answering truthfully linux is answering with the contents of another file so the container says what is user lit python and then docker if you were using docker for your containers would respond with the contents of this file var lib docker overlay fs1 user libpython which is a totally separate file in the global system so each container would have its own view of the files this little deception allows programs to run in parallel because linux would be would respond with different files for each container one container could have python pointing out a python 2 executable and one container can have python pointing out a python 3 executable so if that's how containers work then how do vms work and how are they different well vms are very similar to emulators if you've ever seen someone running an older video game on a modern computer they're using a vm so the idea for containers was to provide fake linux within the container they don't really know they're running with it within a container they see files but the files are simply pointing at a different place within the real linux installation the idea for vms is to produce fake versions one level below that so p produce fake versions of the cpu ram disk and devices the vm equivalent of docker is called a hypervisor it's the program which is in charge of creating the vms so when a vm is running something it corresponds to an instance of the hypervisor within linux the hypervisor might lie to the vm and say there's one ssd attached so there's one drive attached and it has 50 gigabytes of capacity but then when the vm writes to that drive it would instead go to a file it wouldn't go to a real drive and then on the host it might be this file so when the vm itself is writing to the file it's actually going to this file which is very similar to the deception of matching files directly that the container had but there's some practical differences the first is that vms are very powerful you could use them to run other operating systems such as mac os or windows and different hardware configurations you can emulate a gamecube or an apple ii within a linux hypervisor in containers it's the processes that are being lied to they must still have been the sort of thing that would run within linux itself but in vms there's a nested operating system that generally doesn't know it's not talking to the real hardware when the os writes things to its drive for example those rights are sent to a file in linux instead of a physical drive so when the process writes to the the the operating system within the vm that operating system sends the right to a drive or what it thinks is a drive but that drive goes through linux and linux actually maps it to a file various benchmarks show that cpus and vms are about 10 to 20 percent slower than containers vms also usually use 50 to 100 more storage because they need all of the things that an operating system would need duplicate containers don't need all of the files they only need the application files and finally vms use about 200 megabytes more memory for the operating system itself again containers don't need all of the operating system because it's the processes that are being lied to so vms use more memory they're slower and they need more storage so given these performance benefits it looks like containers are almost always a better choice and in most cases they are however there's a few cases where vms are a better choice again vms mean virtual machines if you're running untrusted so user-supplied code it's difficult to be confident that they can't escape a container this has gotten better in recent years but it's long been a contentious point virtual machines are much older and much more mature so if you're running untrusted code usually it's a good idea to put that within a container if you're running a windows or mac os script so you're running a script that only runs in another operating system you'd need to use a vm for similar reasons or if you're running an old video game that doesn't run in linux and you'd like to run it on a linux computer you need a vm and vice versa if you're using vms and other operating systems if you'd like to run a linux program in windows you'd usually have to use a vm to run it and finally you can emulate hardware devices like graphics cards with a vm so if you're testing that your graphics card works correctly you could emulate the response that it would give and then test that the operating system is working as expected so that's the big difference between vms and containers and these are really the two things that you often deploy so let's go on to actual deployment strategies in the next talk i'll see you there [Music] let's keep talking about deployments so rolling deployments are one of the most popular deployment strategies and we'll talk about the pros and cons of different deployment strategies throughout this section only deployments themselves work by starting a new version of the application sending traffic to the new version to make sure everything's okay and then shutting off the old version and repeating that until all versions of the old version are versions of the new version i realize i've said version many times so let's look at pictures which will help illustrate the point this is the mirn app mirn stands for mongodb nodejs react and express.js here the user's web browser connects to both a front end and a back end where front end is the stuff that the user sees and back end is the services that provide connections to the database so if you log in you're connecting to the back end if you're just viewing the landing page you're connecting to the front end let's say your app has enough traffic that users will notice if it goes down for a little while how would you push a new version of the application without causing downtime this is where rolling deployments come in in in the high-level algorithm for a rolling deployment looks like this so you create an instance of the new version of the back end say you wait until it's up so you keep trying to connect to it until you get a response that's satisfactory and then you delete an old version and route the traffic to the new version if any instances of the old version still exist uh go back to step one and repeat in our myrn example we'd initially see three instances of the initial version and one instance of the new version and we'd repeat the process until we had three instances of the new version in one instance of the initial version so here all of the versions are the back end and then we add a new version of the new back end and we turn off a version of the old back end and we keep repeating that so as time goes on the red ones replace the pink ones and then after a few loops of this the only ones remaining are red ones we've added a red one removed the pink one added a red one removed a pink one and where red is the newest version of the application so what are the benefits of rolling deployments over other ways of deploying things well they're well supported rolling deployments are relatively straightforward to implement in most cases they're natively supported and several orchestrators if you've heard of kubernetes for example kubernetes helps you with this aws amazon elastic beanstalk also supports rolling deployments they don't have huge bursts so in another deployment strategy which we'll talk about if you had three versions of the back end you'd need to start six in total to deploy the new version and then you turn off the old three so it doubles for the duration of the deployments the amount of things running which might be difficult if you have a finite number of servers for example it's also not uncommon for services like databases to limit the amount of connections so if you had six versions of the back end connecting to the database now that might be too much load on the database so that could cause problems and rolling deployments are easily reverted if in the course of an upgrade you notice problems it's usually easy to reverse the rolling deployment by just going in the opposite direction removing a red adding a pink you can go in the opposite direction as well to roll back which is an important characteristic of deploying because things always go wrong the downsides of rolling deployments are they can be slow to run so if you have 100 replicas and you're replacing one at a time and it takes 20 seconds it would take 2 000 seconds to replace all of the versions which is quite a long time for a deployment this can be mitigated by increasing the number of services being turned on and showed off at a time which is sometimes called a burst limit or a rolling deployment size the other problem is api compatibility which is the biggest problem of rolling deployments so if you add a new version of an api endpoint to your back end and consume it in your front end then since you're not switching them both at the same time you might have version one of your back end serving a request for version two of your front end and then that api wouldn't exist so there'd be errors visible to the user for the duration of the deployment this can be medicated with complicated routing techniques but it's generally better to make apis backwards compatible so make version 2 of the front end be compatible with version 1 of the back end end end so rolling deployments are relatively simple to understand and generally well supported if your user's mind when there's downtime it's an excellent first step to deploy using a rolling deployment strategy the key programming consideration is to ensure that services can consume both the old version and the new version of services apis if this contract is violated users might see errors for the duration of the deployment let's talk more about deployment strategies and we'll go into blue-green deployments next [Music] another deployment strategy people often see are blue-green deployments to set up a blue-green deployment teams need to disambiguate which services will be consistently deployed and which services will be shared across versions of the application i'll explain a little bit more of what i mean by that in the next section a database server would be a shared resource multiple versions of the app would connect to the server at the same time and a standard deployment would generally not upgrade or modify the database in our mirn example all of the other services are cluster resources new versions of them would be deployed on every prod push so so so in a blue green deployment strategy where you're upgrading the javascript or the mirn app this is what that would look like so there's a blue version and a green version of the application where each is a fully standalone stack but where each connects to a shared database and the database is not part of blue or green it's a shared resource used by both blue green deployments are so called because they maintain two separate clusters one named blue and one named green out of convention if the current version of the application is deployed to blue we'd deploy the new version to green and use it as a staging environment to ensure that the new version of the app works correctly before sending users to it it it after we're confident that the new version of the software works correctly we'd move over production load from blue to green and then repeat the cycle in the opposite direction so here we started with users being sent to blue which contains version one of the application and then we're investigating that version two works and after we're certain that version two works we'll route users to version two and then the version one is unused and we can shut it off and replace it with version three make sure it works and then switch user traffic over to it over and over again on the benefits side blue green deployments are conceptually very easy to understand to set them up you just have to create two identical production environments and send requests to either one or the other which is relatively simple with services like amazon elastic load balancing they're also quite powerful longer running tasks like downloads can continue running in the old version of the application after traffic is switched over to the new version so if a user has an established connection to green and you've switched everyone else over to blue but that connection can continue finishing whatever it was doing so if you're watching a video and you'd like to download it entirely to the user which might take minutes that can continue going even during a prod push additionally blue green deployments can be extended to many different workflows which we'll discuss there's a few notable drawbacks to blue green deployments it's difficult to deploy a hotfix for example to revert a change because the old cluster might be running longer running tasks and unavailable to switch to so if you have version 1 of the application you switch over to version 2 you realize version 2 is having problems you might want to push a version 3 very quickly which addresses those problems but version 1 would be the only place you could deploy version 3. so you wouldn't be able to do that it's also finicky to transfer load between the clusters if resources auto scale which we'll talk about later on and load is transferred all at once the new cluster might not have enough resources allocated to serve the surge of requests because requests went all at once to peak production load and finally if one cluster modifies a shared service like adding a column to a table in the database it may affect the other cluster despite it not being the live one so here are some common extensions to blue green deployments as i mentioned they are very extensible and many teams set up advanced workflows around blue-green deployments to improve stability and deployment velocity the first idea is a natural extension of blueprint deployments which i call rainbow deployments but i don't think there's a standard term for them instead of only having two clusters some teams keep an arbitrary number of clusters so blue green red yellow so on this is useful when you're running very long running tasks if you're working on a distributed web scraper and your scraping tasks take days for example you might need your clusters to last until the last job is finished to ensure things continue working as expected so with a rainbow deployment you'd keep all of the clusters that are still processing tasks around or if you're doing something like video encoding for long videos you don't want to shut off the cluster that's in the middle of encoding a long video because that work would have to be redone in a rainbow deployment old clusters would only be shut off after all of their long-running jobs are done processing some teams rely heavily on manual qa and don't use continuous deployment they're often building desktop or mobile apps which need to be published on longer release cycles so if example.com is being routed to the blue cluster it would be relatively simple to deploy a new version of the application to the green cluster and point new.example.com to that and with this setup the new version of the app could be tested against the production database in the very environment that will soon become production such tests are often called acceptance tests because they're happening in production with production data with nothing like no privileged access to the code base so for a game you might have the new release available or the apis for the new release available and have your qa testers test that and after the qa testers give the go-ahead you can point the game client to the new version and then switch the labels of the two another useful add-on to blue green deployments and really deployments in general is called the canary deployment so if the new version of your app contains subjective changes such as editing the ui it might be ill-advised to push them to all users at once facebook has billions of users so if even one percent of their users complain about a change that would be overwhelming amounts of feedback the changes may break users workflows and need to be modified or rolled back in response to user feedback so in the context of a blue green deployment a canary deployment would be to to to an extension which routes maybe five percent of user traffic to the new version of the application and check that those users don't have negative feedback before switching the rest of the users over so if blue was version one green was version two we'd have ninety five percent going to version one five percent going to version two we'd wait to see if anyone on version two complained if not then we'd route everyone to version two and we'd shut off version one and then put version three in that one so blue green deployments are powerful and extensible deployment strategy that works well with teams that are deploying a few times per day the strategy only really starts being problematic and continuous to plan with scenarios where there's many services being deployed many times per day all right let's keep talking about deployment and i'll see you in the next talk [Applause] [Music] continuous deployment can sound daunting but it's not actually as difficult as it might seem in many cases let's take a look back at our mern example and how it's deployed so so so in our readme we've helpfully added this little line which is how we're currently deploying to production if we look at our hosted version slank which is hosted at this domain we can see that the color is still purple despite having changed the color to blue in the previous video the reason that it's still purple is that we haven't production pushed we haven't pushed the new version of the code which contains the blue color and oftentimes requiring human intervention to deploy is simply infeasible especially as products scale so to deploy let's run the deployment process manually first and then let's talk about how to automate it with a continuous deployment system so here we'll use a terminal and simply run the command directly from the readme this developer computer comes with the ssh key required to deploy otherwise it would be difficult to disseminate this ssh key to all developers which needed the ability to deploy new versions of code here we can see that it's using docker and docker-composed rebuild we'll talk more about how to set up a docker file later on and now if we refresh the page we can see that the deployment has created a new version of the application which is blue so it's picked up the color change which was merged in the previous commit so continuous deployment we'd like it to run on merges to the main branch we don't want to deploy feature branches before they've been reviewed for that we can set up a very simple configuration we could write this configuration file in any directory but let's write it in the api directory for now so we'll create another layer file we'll inherit from the testing layer file to make sure that the deployment runs after tests have passed and will only run the deployment if the branch is the main branch however if it is the main branch we'd like to set up a secret and use that secret for our ssh key and then use that ssh key to run the script let's do that now and it helpfully gives us the directives we need to expose the ssh key let's add those so now we're exposing the ssh key which is used to authenticate with the production machine within the ci process itself one other thing we need to do is change the ownership to be more restrictive this is required for ssh but it might not be required for other deployment processes so now that we have our ssh key within the ci server and these steps are running after tests have passed all we have to do is copy our command and run it as if it was part of a ci process all this configuration does is wait for tests to pass check that the branch is the main branch and then use the ssh key to deploy a new version of the application let's create a new pull request with these changes and see how that looks we can see that as before the ephemeral environment and ci services are being built but this api service is also being built the api being the directory which contains our continuous deployment process let's take a look at what the pipeline actually looks like in structure so here we can see that the application has been built successfully and is being started just as in our regular ci without cd process so we're running our continuous integration but not our continuous deployment step in this layer file and we can see the tests are running as usual the test running process requires starting a fake browser so this takes around 30 seconds and then after the tests pass we'll see that the deployment process runs so the tests lead to the second level graph these are usually called build stages in a ci cd system so here we can see that the step was skipped because the branch was not the main branch which is exactly what we wanted however now if we merge this pull request we'll create a new merge branch on the main branch and we'll run the ci process once again here and because this is the main branch the deployment process itself will be running so let's take a look at what that looks like we're simply loading the environment to run the command in right now and here we can see that the deployment is running within ci itself so instead of needing to run it as an individual developer you can simply run this ssh command within ci and this idea of deploying automatically from a ci process is called continuous deployment so let's work through that whole process end to end once just to make sure that it's clear on the deployment automation side of things so let's change the color again for the main landing page just to make sure that it's visible if a change gets pushed correctly and again we'll change the two colors and we'll create a new pull request and now our reviewer will have a lot of information about whether this change is good or not so so so the reviewer will be able to see both the file changed so they'll see all we've done is change a few colors they'll be able to look at the ci process itself so they'll be able to see that tests are running so in particular that the application builds starts successfully tests run against it they'll be able to look at an ephemeral environment within minutes of me creating this new change and and and if they approve the change it'll be shown to users in a short period of time this whole process will only take about a minute with the longest part being these automated browser tests one by one these steps should become green again this is the base this is the ephemeral environment this is the continuous deployment process and this is the aggregate status this is the one that the administrators of github might mark as required so that only if all of the checks pass can the commit be merged and shown to users so here we can see that everything is passed let's take a look at the ephemeral environment just to double check that the color is the one we want we can see that from the ephemeral environment we've changed the color to be this rose-ish red perhaps this is the color that was desired so we'll say that this is correct and the test has passed and successfully posted a message so we know that the functionality of the application has continued to work after this change after we merge it the the the end to end test deploy process will run for this merge commit and if we take a look at that we'll see that because we merged to the main branch the deployment is already running in production we're creating a production build and in a short period of time the production server should have the latest version of our application running on it so here it's restarting the production instance and the snapshot is being taken so everything has succeeded we've successfully prod pushed if we go to our website it is now the shade of red that we've changed and that's what an end-to-end cicd ephemeral environment pipeline generally looks like at a very high level all right so let's talk more about the plymouth automation in the next section [Music] so we've talked about deployment strategies but that's not the only thing in deployment deployment strategies help you reduce downtime and deploy in a way that doesn't affect your users but another key consideration for deployment is making sure that there's enough resources for your containers or vms vms vms so that if there's a large burst of users your application doesn't go down so so so let's say you're building a ci system this hits close to home because i of course work at layer ci a ci company your users would push code you'd have to spin up runners to run tests against that code and you'd see bursts of traffic during your users business hours and you'd see significantly less traffic outside of those business hours for a peak load of 10 000 concurrent ci runs you'd need at least 10 000 runners provisioned however at night outside of peak hours you you wouldn't really need all 10 000 runners most of them would sit idle so your usage might look like this which is also indicative of a lot of applications your lowest point is maybe 500 runners required and your highest point is 10 000 runners required so you need 20 times more workers from the highest points in the day to the lowest points in the day in an ideal world you'd be able to create or destroy these runners as necessary during peak hours you'd be able to create new ones and in off-peak hours you'd be able to destroy them that's the idea for auto-scaling it's only possible to create and destroy workers because of cloud providers at their enormous scale it's possible to offer servers for cheap on small one-hour leases the most popular technology at the time of this post or this video is aws ec2 spot instances which act exactly like cloud-hosted vms but with large discounts if you provision them for short periods of time another popular technology for auto scaling is kubernetes horizontal pod auto scaling which sounds daunting but since many providers provide kubernetes out of the box you can just assume that if you're using kubernetes in containers you'll get auto scaling if you configure it correctly just to illustrate if you're using microsoft's azure as your cloud provider there's resources for auto scaling vms and for containers if you're using aws there's again resources for vms and containers and if you're using google cloud there's resources for vms and containers auto scaling is usually discussed on the timeline of one hour chunks of work if you took the concept of auto scaling and took it to its limit you'd get serverless define resources that are quickly started and use them on the timeline of milliseconds so 1 to 100 milliseconds for example a web server might not need to exist at all until a visitor requests a page instead it could be spun up specifically for that request serve the page and then shut back down that's exactly the idea for serverless it's almost like taking auto scaling so provisioning resources as they're required and doing it very quickly on very small time intervals serverless is primarily used for services that are somewhat fast to start and stateless you wouldn't run something like a ci job or ci run within a serverless framework but you might run something like a web server or notification service auto scaling is primarily used for services that are slower to start or require state you'd likely run a ci job within an auto-scaled vm or container and not within a serverless container as of 2021 the distinction between the models is becoming quite blurred serverless containers are becoming popular and they often run for upwards of an hour serverless containers act exactly like containers but they're created and turned off in a serverless manner so in response to a trigger within a few years it's likely that serverless and auto scaling will converge into a single unified interface so i'm excited about that as that's going to be the future of deployment and that ends our discussion of auto scaling and serverless i'll see you in the next talk [Music] another key concept in deployment automation is service discovery a database might be at one ip address so 10.1.1.1.6 chosen arbitrarily while the web server would be at another ip address 10.1.1.28080 and they'd have to discover each other because the web server needs to talk to the database and the database might have calls to the web server things get even more complicated as you add more copies of your web server or add entirely new services again let's consider the mirn app from elsewhere in the academy devops series so you have a web browser the user themselves is visiting your website they're connecting to your front end and they're connecting to your backend making api calls and your backend is connecting to a database here there's three services that need to be discovered the browser needs to learn that example.com corresponds to the front end and example.com api corresponds to the backend and the backend needs to learn that the database is at 10.111.1.3 for example so the backend needs to know the ip address and port of the database and the browser needs to know the ip address and port of the back end and the front end in the very simplest configuration everything is manually configured the back end and front end are at static ips and given host names within dns a domain name system it's the mapping of example.com to an ip address on the internet and the end is configured to connect to mongodb at a specific port so your dns configuration this is the cloudflare configuration page which is a dns provider would look like this so if the user visits example.com send them to this ip address and if they visit api.example.com send them to that ip address so this is all manually configured and we've just manually put the ip addresses in this and then within the back end we'd read an environment variable which is a dictionary of key value pairs that are easily set when you're deploying things so so so you'd say connect to the environment variable specifying the mongodb port and then connect to port 27017 which is the default mongodb port and then when you're starting the back end you just have to specify the ip address that mongodb is running at this configuration is completely fine for simple products it's difficult to mess up it's relatively secure and it doesn't overcomplicate things you can go pretty far with a simple configuration most products could launch an mvp without any service discovery at all but you'll know that you need to start caring about complicating your service discovery when you see one of the following so you need zero downtime deployments you can't hard code things like this if you want to do rolling deployments because you can't easily automate where the arrows point to you can't automatically change the ip address if you're doing such a simple deployment strategy for example if you have more than a couple micro services it's going to get hard to remember where they all are and if you're deploying to several environments like if you have a developer environment a staging environment an ephemeral environment and production environment that all have different ip addresses it's going to get pretty unwieldy to set the ip addresses all over the place so let's focus on zero downtime deployments because they're illustrative of the broader problem before that though let's talk about reverse proxies which are another crucial system design and devops concept the idea for a zero downtime deployment is simple as we've seen you start a new version of the back end and front end you wait till they're up and then you shut off the old version of the back end in front end so this happens in both rolling and blue green deployments however it's difficult to update the ip addresses in dns itself if our rolling deployments require changing these values directly in dns that wouldn't work very well for various reasons in particular dns can take a long time to propagate users in other countries then the united states for example might take days to see the new ip address and they'd still be trying to connect to the old version the solution is to add a web server that acts as the gateway to the front end and back end we'd be able to change where it points to without changing the dns configuration itself so web servers like these are called reverse proxies and they're really crucial for setting up zero downtime deployments and for service discovery itself so so so taking our mirn app and adding this level of complexity the user's web browser would instead connect to the reverse proxy so so so the the the user would ask the dns system where is example.com the dns system would respond with oh it's here the ip address of the reverse proxy and then the reverse proxy would take the user's request and send it to the appropriate say v1 fret end or back end depending on what the user asked to connect to and then from there everything else would be the same so if you're running a deployment like a rolling deployment the proxy could choose which of v1 or v2 of the front end or back-end to send the user's request to and that would just be by changing a configuration file and then after your deployment is done you could turn off version 1 and the reverse proxy could route traffic entirely to version 2.
a straightforward approach is to store the service ips in a hash table so implicitly in the process of writing a deployment we assumed that our reverse proxy would be able to know the ips of the new versions of our apps which is exactly the statement of service discovery instead of needing to manually tell our reverse proxy where the front end and backhand live so where is the ip address of version 2 of our back end it would be convenient if we could automate it when the new versions come online they can update the value for the key back end and front end with their own ips in this hash table and then the reverse proxy could watch for changes to the table and use that for routing decisions for a very concrete example which is about as close as we're going to get to code in this setup videos let's look at this nginx configuration nginx is a very popular reverse proxy and it's very commonly used in large tech companies and it lets you define where various host names go if you pointed example.com to the nginx reverse proxy again in the picture this would be nginx the user thinks they're connecting to your website but they'd be sending their request to nginx askingforexample.com and nginx would take their example and forward it to your actual front end so nginx just has to learn where the ip for your front end is and that's what this configuration would do so we're telling nginx directly take this key from this file and then use conf d which reads from a hash table and updates a configuration file and then send the user there so so so all you need is a key value store which has a key for where the front end ip is the current front-end version and then to run your rolling deployment you'd start a new front-end version check that it was alive and then you just change the key in the hash table to point to the new one and then conf d would pick up that change replace this value with the new ip of version two of the front end and then reload engine x which would change the arrow to the new version of the front end like this that was a lot to deal with so let's back up a bit all you'd need to do is update your front end to set the key in the hash table for ips front end to be the front ends ip and then make your back end do the same for the back end location and that way when the new version of the application starts it would update the key in the table and then nginx would start routing users to the new version of the application this is what proxy passing means in nginx so you see this proxy pass directive but this is all very complicated it's just an illustrative point of if you were to implement this yourself how would you do it the most common thing used in industry is service discovery by using dns itself so dns we thought of before as the slow protocol that might take days to propagate changes across the network but you can run dns locally and that's the industry standard so let's talk about dns a little bit the idea for dns is just to map hostnames to ips when you visit lyrici.com for example the global dns system will first map the name layerci.com to the addresses at the time of this video 104.21 79.86 and 172.67.169.106 which are just arbitrary computers connected to the internet and you can use the dig command on a website to see where those addresses are so this is saying for the key layerci.com the values are these two and usually when people mention dns they mean the global service so visiting websites on the internet however as i mentioned it's possible to run dns internally it would be ideal if in our nginx configuration we could specify http full colon slash frontend and then have frontend resolve to the ip of our frontend service that way we wouldn't have to change anything except for the dns configuration that's exactly how dns based service discovery works you configure your services to query a server you control for dns queries and then this so instead of saying mongodb full colon slash process n of mongodb you just say mongodb full colon where is a key in the key value pairs in the dns that you control of course it's not trivial to deploy your own dns server in practice though there are popular options like core dns the most likely thing you do is use a cloud provider or kubernetes internal solutions so the end result you'd get is something like this the user's web browser would connect to nginx thinking it was the website nginx would ask the dns provider where is the api right now the cloud provider would respond with this is the ip address given the deployment so blue green or rolling deployment this is what we currently want users to visit when they want to visit the api and then this would correspond to version one or version two of the backend and then the proxy would forward the request there the request would be fulfilled and it would go back to the proxy and then back to the user so the conclusion of all of this is that service discovery is tricky but vitally important as a foundational building block for these deployment strategies and for deployment automation in general if you configure service discovery in an appropriate manner for your deployments so dns based in a kubernetes cluster for example it makes significantly easier for developers to have microservices that talk to each other instead of having a developer have to write connect to mongodb at and then deal with where mongodb actually is they can simply say connect the mongodb at mongodb vocolon and then you as the devops platform engineer can configure where that always points to the right place the right ip address by decoupling the application logic from the deployment logic you'll help the developers on your team build faster and you'll be able to deploy more easily so that's it for deployment let's go on to the next and final pillar which is application performance management [Music] there aren't that many general topics in application performance management so this section will be a little bit shorter we'll go into more detail in future sections in the devops academy but just for this introductory video series let's talk about two core concepts the first of which is log aggregation and it's a way of collecting and tagging application logs from many different services and to a single dashboard that can easily be searched one of the first systems that have to be built out in an application performance management system is log aggregation just as a reminder application performance management is the part of the devops lifecycle where things have been built and deployed and you need to make sure that they're continuously working so they have enough resources allocated to them and errors aren't being shown to users in most production deployments there are many related events that emit logs across services at google a single search might hit five different services before being returned to the user if you got unexpected search results that might mean a logic problem in any of the five services and log aggregation helps companies like google diagnose problems in production they've built a single dashboard where they can map every request to unique id so if you search something your search will get a unique id and then every time that search is passing through a different service that service will connect that id to what they're currently doing this is the essence of a good log aggregation platform efficiently collect logs from everywhere that emits them and make them easily searchable in the case of a fault again this is our mirn app the user's web browser connects to a backend and a frontend and the backend then connects to a database if the user told us the page turned all white and printed an error message we would be hard-pressed to diagnose the problem with our current stack the user would need to manually send us the error and we'd need to match it with relevant logs in the other three services let's take a look at elk a popular open source log aggregation stack named after its three components elasticsearch logstash and kibana if we installed it in our mirn app we'd get three new services so the user's web browser again would connect to our front-end and back-end the back-end would connect to and all of these services the browser the front-end the back-end and would all send logs to log-stash and then the way that these three components work the components of elk elasticsearch logsdash and kibana is that all of the other services send logs to logstash logstash takes these logs which are text emitted by the application for example the the web browser when you visit a web page the web page might log this visitor access this page at this time and that's an example of a log message those logs would be sent to logstash which would extract things from them so for that log message user did thing at time it would extract the time and extract the message and extract the user and include those all as tags so the message would be an object of tags and message so that you could search them easily you could say find all of the requests made by a specific user the logstash doesn't store things itself it stores things in elasticsearch which is a efficient database for querying text and elasticsearch exposes the results as kibana and kibana is a web server that connects to elasticsearch and allows administrators as the devops person or other people on your team the on-call engineer to view the logs in production whenever there's a major fault so so so you as the administrator would connect to kibana kibana would query elasticsearch for logs matching whatever you wanted you could say hey gabana in the search bar i want to find errors and kibana would say elasticsearch find the messages which contain the string error and then elasticsearch would return results that had been populated by logstash and logstash would have been sent those results from all of the other services if you visited a webpage this might be the sort of log that is emitted and it might be processed into an object like this so it has a formatted date and a simple time format that's the same for all all all messages emitted by all different services you'd have a service which service submitted the log and you'd have the message the actual content of the log and the processor logstash itself would often be connected to the internet so that javascript in the browser can catch errors and send them to logstash although there are additional services like sentry that might be better suited for that how would we use elk to diagnose a production problem well let's say a user says i saw error code one two three four five six seven when i tried to do this with elk setup we'd have to go to kibana enter one two three four five six seven in the search bar press enter and then that would show us the logs that corresponded to that and one of the logs might say internal server error returning one two three four five six seven and we'd see that the service that emitted that log was backend and we'd see what time that log was emitted at so we could go to the time in that log and we could look at the messages above and below it in the back end and then we could see a better picture of what happened for the user's request and we'd be able to repeat this process going to other services until we found what actually caused the problem for the user the final piece of the puzzle is ensuring that logs are only visible to administrators as logs can contain sensitive information like tokens it's important that only authenticated users can access them you wouldn't want to expose kibana to the internet without some way of authenticating my favorite way of doing this is to add a reverse proxy like nginx again our friend nginx and then have the auth request mechanism check that the user is logged in so in our backend we could add something like this which simply returns a successful status if the user visits example.com authrequest and they're an admin it would return a successful status and if they're not admin it would return an unauthorized status and then we could configure nginx again as mentioned in previous videos to have these location blocks the slash private location would connect to slash auth and then we could make sure that if this was logs for example that the user was logged in because with this auth request directive if the user visits logs and they're not an administrator they wouldn't be able to access them alternatively elasticsearch itself is run by a company called elastic and they have a paid version which contains something called xpak which facilitates this as well so you can go for either a reverse proxy which authenticates users or the paid version of the application as an aside you can use log aggregation as an extra test so in your ci pipelines where you want to tell if code is good or not you can repurpose your log aggregation stack to ensure that no warnings or errors occur while the tests run if your end to end test looks like this so you're starting your stack you're starting your logging stack you're running your tests with npm run test you could add an extra step which queries elasticsearch for logs matching error and you could make sure that there are no logs that printed error and then even if all of your tests pass if there's an error going on that error might be important despite all the tests passing so this adds a free extra check to your ci stack and there's a few examples of log aggregation platforms there's elasticsearch logsdash cabana which we talked about there's fluentd is another popular open source choice there's datadog which is a very commonly used at larger enterprises it's a hosted offering and there's log dna which is another hosted offering and those cloud providers also provide logging facilities like aws cloudwatch logs so log aggregation is a key tool for diagnosing problems in production it's relatively simple to install a turnkey solution like elk or cloudwatch and it makes diagnosing and triaging problems in production significantly easier that's it for log aggregation i'll see you in the next talk [Music] the last topic we're going to talk about is metric aggregation metrics are simply data points that tell you how healthy production is so as you can see on the screen things like cpu usage memory usage disk i o file system fullness are all important production metrics that you might care about if log aggregation is the first tool to set up for production monitoring metrics monitoring would be the second they're both indispensable for finding production faults and debugging performance and stability problems log aggregation primarily deals with text logs or textual of course in contrast metric aggregation deals with numbers how long did something take is memory being used it's frighteningly difficult to understand what's going on in a production system netflix for example measures 2.5 billion different time series to monitor the health of their production deployments success for metric monitoring is being able to automatically notify the necessary teams when something goes wrong in production let's keep looking at open source implementations of devops tools to keep things general prometheus a tool originally deployed at soundcloud is one of the most popular metric servers and this is what it looks like similarly structured to elk inputs are sent to the retrieval things like nodes would send how much disk usage they have to the prometheus server but also how long services are taking elk itself would parse numbers out of logs and send them to prometheus and then prometheus figures out what to get services from using service discovery from the previous video and then it takes those and it stores it in a time series database equivalent for numbers what elasticsearch is for text and then that's stored on the prometheus server node itself and then finally there's a front end so other services can query prometheus to do things one thing you might want to do is if there's something terribly wrong like your website is down you might want to connect to page duty or email someone or send someone a text message with twilio the on-call engineer and tell them that something is wrong but you might also want to query metrics to get a view like this one and that's what prom ql is used for so grafana is the view that dark view with the graphs and it's common way of viewing these time series but you can make your own and you can make apis and there's many other front ends that connect to prometheus the diagram above is daunting but it's quite similar to the architecture that we discussed for log aggregation frameworks there's four key components like i mentioned the time series database actually stores the measurements retrieval the alert manager and the web ui so the sorts of metrics we collect well there's a lot of subjectivity about which metrics are important based on what your product does and what your users are but here's a few ideas for what you'd store in something like prometheus so request fulfillment times these are very useful for understanding when systems are getting overloaded or if a newly pushed change has negatively impact performance fulfillment times are often parsed out of logs using a regular expression for example or taken out of a field in a database for a website or rest api a common request fulfillment time would be time to response for websites and rest apis a common request fulfillment time would be time to response that way slow web pages could be discovered and identified in production a related metric that is very indicative of problems is request counts if there's a huge spike in requests per second it's very likely that at least a few production systems will have trouble scaling watching request counts can also be used to detect and mitigate attacks like denial of service attacks which are when attackers send many malicious requests to services in production the last common metric across many types of companies is server resources here's a few examples so the database size and maximum database size if you have two terabytes of disk for your database and your 1.5 terabytes in you might want to alert someone to increase the amount of disk available to the database or delete things that are being unused web server memory so if your web server is taking a lot of requests per second and doing a lot of processing it might require more memory so if it runs out of memory it would crash and your users wouldn't be able to access your website anymore network throughput so if you're downloading many things or uploading many things you can saturate your network and that would also cause degraded performance and and and a final one is tls certificate expiry time so this lock in the browser that uses pls certificates to say whether the browser is secure or not are used all over the place internally and these cause problems if they're not measured and they're not alerted for so for example google voice had an outage in 2021 google of all companies wasn't measuring when their tls certificates would expire and that caused an outage a few months ago so production faults very rarely look like no users can access anything they're often a gradual ramp certain api is taking longer and longer and then eventually everything breaks quartile analysis is an easy way to pare down production time statistics into something actionable a website might measure how long it takes for websites to fully load their landing page to notice when there's a very obvious production issue so with quartile analysis you'd split request times into many different buckets how long did the slowest one percent of users take how long did the slowest five percent of users take how long did the slowest 25 of users take so if your landing page is slower when users are logged in then logged out just by visiting without a logged in user you might not notice that the web page is very slow but users that are logged in would show up in the one percent of requests bucket and you'd see that those users are having a bad degraded experience for one example stackoverflow.com itself was notified of an outage because their landing page was taking a long time to respond to requests due to a specific post that was published to stack overflow for metrics analysis there's many common production tools there's prometheus and grafana as we mentioned there's datadog again not only log aggregation but metrics aggregation as well there's new relic which is i would say maybe the old reliable option and there's again a cloud providers provide their own versions of this there's aws cloud watch metrics google cloud monitoring and azure monitor metrics that's it for application performance management thanks for watching [Music] you

In this video, the speaker outlines a comprehensive roadmap for those looking to enter or advance in the field of DevOps. The roadmap includes essential skills such as Linux fundamentals, networking concepts, Git for version control, and programming languages, with a strong emphasis on Python. The speaker recommends focusing on cloud providers like AWS, containerization with Docker, and CI/CD practices using Jenkins, along with orchestration tools like Kubernetes. Additionally, the video covers configuration management with Ansible, infrastructure as code using Terraform, and monitoring with Prometheus and Grafana. By dedicating 3 to 5 hours daily, viewers can expect to acquire these skills within 10 to 14 months, with supplementary resources available in the description for further learning.
if you're looking to break into devops or want to level up your skills you're in the right place today I'm sharing the complete devops road map I'll walk you through the essential skills you need the tools I personally recommend and how much time you should spend on each assuming you dedicate 3 to 5 hours of studying every day this road map should take you about 10 to 14 months to complete let's Jump Right In first off we have Linux fundamentals Linux is the backbone of servers and Dev vment environments as a devops engineer you'll be setting up and maintaining the infrastructure where applications run most servers use Linux so getting comfortable with it especially the command line is crucial I recommend starting with learning bash which is the most commonly used shell and scripting language in Linux spend about 2 to 3 weeks on this make sure to learn basic Linux commands for working with the file system permissions and ownership processes and signals as well as managing packages next you need to learn networking Concepts networking is all about how computers communicate with each other think IP addresses and protocols you need to understand how data moves around security and troubleshoot network issues to get hands-on experience I recommend using wihar dedicate around two weeks on this make sure to learn Concepts like OSI and tcpip models IP addressing and subnetting DNS and DHCP networking protocols like HTTP https FTP and SSH firewalls and security groups and basic Network troubleshooting using tools like Ping trace route and net stat now let's talk about git git is a version control system that lets you track changes in your code and collaborate with others it's essential for working on projects with a team and managing your code effectively spend one to two weeks getting comfortable with Git make sure to learn basic git commands like clone commit push and pull branching and merging resolving merge conf working with remote repositories and so on after that you should dive into programming languages programming languages like python Ruby and go are used to automate tasks and manage configurations while there are several other languages I personally recommend python for its Simplicity powerful libraries and versatility dedicate four to 6 weeks to build a solid foundation in Python make sure to Learn Python syntax and data structures like lists dictionaries sets and topples modules and packages learn how to write and execute Python scripts work with files handle errors write automation scripts and so on by the way to help you on this journey I've created a free supplementary PDF that breaks down the specific Concepts you need to learn for each skill it's a great resource to review your progress find gaps in your knowledge and prepare for interviews you can find the link in the description box also I have a bunch of tutorials on this channel and complete courses on my website if you're looking for structured learning again links are in the description box moving on let's talk about Cloud providers Cloud providers like AWS Azure and Google Cloud platform offer a range of services for building and deploying applications if you're just starting out I recommend focusing on one cloud provider and AWS is a great choice because it's the most widely used spend about 4 to 6 weeks on this make sure to learn how to launch configure and manage virtual servers store and manage data get familiar with is managing users groups and roles and how to set up and manage isolated networks next up is containerization containerization is all about packaging an application and its dependencies into a container to ensure it runs the same everywhere Docker is the go-to tool for this spend about 3 to four weeks getting comfortable with Docker learn how to create Docker images get familiar with starting stopping and managing containers learn how to write Docker files explore how to define and run multicontainer applications using Docker compos and so on now let's dive into continuous integration and deployment or cicd cicd automates the integration and deployment of code changes allowing for frequent and reliable releases genkins is a powerful tool for setting up cicd pipelines but other popular tools include gitlab cicd Circle CI and Travis C if you're starting out just focus on Jenkins for its versatility and strong Community Support dedicate 3 to four weeks on this make sure to understand how to create and manage Jenkins pipelines get familiar with writing Jenkins files learn how to integrate automated tests into your pipelines understand how to automate the build process for your applications explore how to automate the deployment of your applications to various environments and so on moving forward let's discuss orchestration and management orchestration tools like kubernetes and Helm help automate the deployment scaling and management of containerized applications these tools are essential for managing complex applications in production start with kubernetes and spend about four to 6 weeks on it make sure to learn about the overall architecture including the master node and worker nodes and how they interact understand the key components such as pods services and deployments get familiar with managing resources learn how to scale your applications as well as the networking model in kubernetes next we have networking and infrastructure services this involves setting up and managing services like reverse Proxes forward Proxes caching servers firewalls and load balancers I recommend using engine X for handling reverse Proxes and load balancing give this about 3 to 4 weeks of your time learn how to set up and configure engine X as a reverse proxy understand how to configure it to act as a forward proxy explore caching strategies to improve the performance and how to configure firewalls and security groups now let's talk about configuration management configuration management tools like anible puppet and Chef automate the deployment configuration and management of servers and applications if you're starting out just focus on anible due to its Simplicity and Powerful features spend 3 to four weeks on this learn how to write anible playbooks understand how to use roles and modules learn to manage variables and templates and so on moving on let's discuss infrastructure as code or IAC IAC involves managing and provisioning Computing infrastructure through machine readable configuration files popular tools include terraform AWS cloud formation and palumi if you're starting out just focus on terraform for its flexibility and widespread use dedicate 3 to four weeks to build a solid foundation in terraform understand the basic concepts like providers and resources get familiar with writing terraform configuration files learn how to use terraform modules as well as advanced concepts such as workspaces and remote State finally let's talk about monitoring and logging monitoring and login tools such as Prometheus Graff elk stack and fluent D track the performance and health of your applications and infrastructure if you're starting out just focus on Prometheus and grafana spend about 3 to four weeks on these tools learn the architecture and data model of Prometheus get familiar with collecting metrics from various sources learn how to write queries to extract and analyze metrics data understand how to set up alerts and so on so if you dedicate 3 to 5 hours every day you can follow this road map and pick up all the skills you need to become a devops engineer in about 10 to 14 months if you have any questions please let me know in the comments below and I'll do my best to answer you right here or in my future videos If you enjoyed this video please give it a like And subscribe for more useful content thanks for watching

In this video, the host explains the concept of DevOps, which is a combination of practices, tools, and cultural philosophies aimed at automating and integrating software development and IT operations. He emphasizes that in small teams, individuals often take on multiple roles, which can blur the lines of traditional job titles like DevOps engineer. The process of DevOps is depicted as a continuous loop, starting from planning and coding to building, testing, releasing, and deploying software, with feedback from users driving the cycle back to planning. The host also highlights the importance of Continuous Integration and Continuous Deployment (CI/CD) in this process, showcasing tools like TeamCity that facilitate these practices. Overall, the video aims to demystify DevOps and provide a clear understanding of its workflow and significance in software development.
what the heck is devops I swear every single time I used to hear this term I'll just be like a deer in headlights like wait a second you're trying to tell me that you have specific people who code then specific people who test then specific people who deploy and maintain the pipelines and then you have specific people who interact with the endusers and gather you know bug reports bug fixes and feature requests and things of that nature I I do all of those things so what does that make me am I a devops engineer now am I just is that part of the full stack development process I I didn't know I was like please explain this to me like I'm five because it's I don't get it I work in a small team we all wear all of the hats we all do everything well supposedly that methodology is called devops and devops is exactly what we're going to be discussing today all right hey my name is far welcome back so devops by definition is a set of practices tools and a cultural philosophy that automate and integrate the processes between software development and it operations teams hence the term devops or as I like to Define it it's how developers operate because again if you're working by yourself or working a part of a small team you do all of these things so you've probably seen this before and it actually starts right here at plan this is where you crack open jira or aana or utrack and plan out your project the reason this is an infinity symbol though even though it does start right here is because once we go through coding and building and testing and release and deploy this is cicd and operating and monitoring this is you know obviously everything with the end users well you get the feedback and based on that feedback you go back to the planning phase and coding those and building those and testing those and you get the idea with that feedback being of course you know bugs that were missed or feature requests or what have you it is quite literally a never ending Loop which is is is is good in a way that well I guess you'll always have a job if it's a never ending Loop so that's a good thing right anyway um once it's all planned out you move on to the coding phase and this isn't just about slinging code though although that is a big part of it it's where the build of your entire pipeline that is used throughout this entire process really begins you're utilizing git for Version Control in the form of GitHub or gitlab or bit buug it so when you inevitably break your code base you have previous versions of it to revert back to it's okay we've all been there maybe more than one time uh that's neither here nor there though and of course in these platforms like GitHub have pool requests built in and code review tools to review set pool requests and merch and yeah like previously mentioned obviously you are coding in this code section using IDs and code editors like anything in the jet brain Suite their cicd product team City pipelines is actually the sponsor of today's video at least a portion of it so but that's neither here nor there we'll get to that in a sec after coding we hit the build phase because well when we push our code to our verse control system before it actually deploys well it's all it's got to build properly so our code gets compiled or if we're talking about interpreted languages like JavaScript it's where our code gets prepared for execution execution I'd like to execute JavaScript in a different definition of the word anyway uh sorry about that uh this is where tools like Gradle and Maven and and PM come into play this is where they do the heavy lifting they build the software automated test kick in here too unit test integration test System test you name it this is where all that's happening the idea is to ensure that the code base every last piece of it works as expected and works together wait did you not write tests during the code phase oh you thought this test was where you write test no no no no no code section is where you write tests this is different this is for when we have everything deployed to the testing Branch for the quabity ash team to test the actual application as it sits quab quab Ash you right test in the code the build runs those automated tests ensuring that it passes in order to you know pass the build and this is quab as so they the quabity as quality assurance team acts as if they're a real user going going through the motion of how your application is intended to work as well as how it's not necessarily intended to work they throw everything in the kitchen sink at it to see what they can break they try to break it they find bugs maybe there's a a workflow that's a little bit weird or not a workflow but like a flow like this button this button this button this button where it doesn't do what it's supposed to do anyway if it ain't working right they'll let you know which is the whole point of them and because because you want them to find the issues before like the actual end user finds the issues and you know how we talked about devops being the Automation and integration between teams the development team and the IT operations team and you know the test quality assurance team is also in there so somewhere well this is the first real example of that it's really been all Dev team so far Dev team plans it they code it they build it and then you know again those are the written tests as well but then I mean you do test it in a way like you can have like three different servers that this app is running on you can have development server the testing server and then the production server so maybe you're testing it a bit on development server but you know in theory once once everything is successfully built in your automated test run you have to come back here and plan whatever feedback you get from over here so you test it a bit make sure nothing crazy going wrong but then once it's over on the testing server so like the testing Branch would then deploy to the testing server using cicd that is where quality control the quality assurance team would then test it and give you all that feedback so basically right now as a Dev team you're passing the Baton over to the um qu quabity ashz team and then again you're looking back and seeing the Baton coming from the it operations team for feedback from your users from um you know performance metrics and things of that nature from your uh code review tool or whatever term sonar Cube and those types of things that report code smells and things of that nature all of that like like you're back to planning you do it all over again and now after testing we go to release but it's actually difficult to talk about really anything from build test release to deploy without talking about continuous integration and continuous deployment that's where the sponsor team City pipelines comes into play because they have a new approach to cicd that when they say offers blade amazing fast pipelines to optimize your development flow they ain't lying plus it is very very pretty but we'll build an actual pipeline here in a second let me show you kind of how it all works within our devops cicd so the pipeline will be utilized for the development team for the QA team for the release and for deployment which this is production and you can kind of see it over here just pretend that there's a testing Branch right here this would be your G flow your Fe teacher Branch to your development Branch to your testing Branch to your release Branch to your master branch which is your production branch and that's deploy right here so the way it works is that when you code and you're working on a feature based on a task that you had already planned out will you create a feature Branch off the development Branch right here and in that feature Branch you build out that feature and then once it's all good you will submit a pull request for a cod viiew to be merged back into the development Branch just like all of your other team members so all of this needs to ensure that it integrates together properly and builds properly and that is what continuous integration does and that is building the code and you also on the development branch have it deployed to a development server so you as the software engineer can see how everything works together in the actual application running on a server and not just locally or in your container and then once all said and done and it's ready for test you will then merge that code from the development Branch to this you know again imaginary QA or testing branch which will then utilize cicd again to build run all the tests make sure it's all successful and then deploy it so that the quality assurance team can actually run it on the QA server and then the same thing once it's all said done will happen once it's merged over to the release Branch where beta testers or what have you will test it out and then the same thing will happen once it gets merged over to the master Branch or the production branch and that's this deploy right here so every single step of the way right here from test to release to deploy is effectively the same just refining the process throughout so let's take a look at how it actually works in the real world utilizing the cicd tool team City pipelines after signing up to the free beta using the link in the description I can connect my GitHub account to team city which will populate all of my repositories here and actually let's make this dark mode real quick so we don't blind ourselves and I need a pipeline for this HTML and Java project right here so I'm going to create it and if you're a yaml pro or utilizing docs that use yaml you can do all of that here that's convenient and useful but I'm going to use the visual editor because it's uh pretty and easy to use first I am going to build a backend so I'm going to name this build backend very clever and this is a maven project so what we're going to do is utilize what team City pipelines has integrated and that is like I said before they're self-tuning if you will they have very intelligent features throughout this entire platform and as you can see right here we can convert to a maven build step and that's exactly what I want to do we can run it in Docker utilize autocomplete or you can paste in your own Docker file here back to parallel test we can actually easily run these in three batches four batches five batches to make everything faster without changing any code and whatever you you want to run it on Windows Mac OS Linux you can do that here but that's all preference case dependent let's build the actual pipeline We'll add three new jobs quality gate backend deploy and build frontend setting the dependencies for each to ensure it's linear path and that it can only deploy once everything is successfully built and we can see it running here alongside any prevalent information how it's passing what's running at the time the build log or we can just say hey I know this going pass so let me just come over here and place some 20 48 all right I'm actually going to zoom out a little bit there the build is successful and team City pipelines actually gives us smart optimization features after the build telling us where we can optimize our pipeline like this I'm doing the same exact build where I reuse the jobs which as you can see saved 95% of the original duration because it's reusing what we've already built and that's that for more information click on the link in the description where you can also try it out for free and beta is one of the first users ever of Team City pipelines so we've gone through the testing branch and server the release branch and server and the production branch and server and now that it's deployed we're passing the Baton over to the it operations team so that way they can operate and monitor the application and well technically technically that's not necessarily true technically I mean we got a little bit of ahead of ourselves they do typically oversee the deployment to prod but that's whatever it somewhere around here is where that baton is getting past the it operations team they operate by keeping the lights on any outages that occur they have to handle often times not single-handedly they'll have to work with the dev team if it's on their side of things they also manage performance like load balancing and resource allocation but it's not just about keeping the lights on and and making sure everything's working as it should they also monitor the application's health the server performance and resource usage they must track how users interact with the application to see if there are any pain points and using that data they identify you know areas for improvement or issues that the user is facing they analyze logs and again ensure that everything's running smoothly it it it provides realtime feedback on how the application is performing in the wild yeah that was the uh monitor section of this and then right here it should really say feedback because all of this you then have to provide feedback back to the dev team so that they can plan it properly and thus completes the loop the infinity symbol so this feedback will be user feedback operational feedback analytical data and that's the end in a way it's not like I said it is an infinity symbol so you're always working because that feedback then again goes back to the planning phase to jot down new feature request bug fixes and performance improvements and start coding again and building again and testing again in well you get the idea this infinity loop of plan code build test release deploy operate Monitor and feedback is devops it keeps the development and operational processes in constant motion adapting and improving with each cycle that's it devops in a nutshell again I'm Forest I hope you enjoyed this video enough to subscribe to the channel or maybe just enough to like the video share it with a friend if you think they need to learn a little bit more about devops don't worry we we're not if you were sent this video we're not insulting you we're helping you if you did any of that I'd greatly appreciate it I do really genuinely hope that this video helped that's why I make this content if not well sorry you wasted your time until next time y'all have a good one

In this video, the creator explains the concept of DevOps, emphasizing its importance in the application release process. DevOps addresses challenges such as miscommunication and lack of collaboration between development and operations teams, which can lead to delays and errors in deploying applications. The video outlines the continuous delivery cycle, where improvements to applications are made and deployed rapidly while maintaining high quality. It also touches on the role of DevOps engineers and how the introduction of DevSecOps highlights the need for security in the release process. Overall, the video aims to clarify the purpose of DevOps and its role in streamlining software development and deployment.
if you know my videos you know that i cover various devops tools and concepts on this channel but to address the main question what exactly is devops and that's what we're going to focus on in this video first we'll see why is devops even needed in the application release process and what are the challenges in this process that devops solves of course we will talk about what devops concept actually is we will also see the devops as a separate role and how it evolved as well as what are the tasks and responsibilities of a devops engineer and finally we will briefly talk about sre and how sre fits in the whole devops process well devops is a relatively new concept which has been gaining a lot of popularity and taking over the traditional way of software development devops term itself is so broad and includes so many things that it became difficult to exactly define it and clearly set the boundaries of devops compared to other it fields so it's encompassing a lot of things the simplest definition is that devops is an intersection of development and operations but where do boundaries of devops start and end which part of development is not devops or what part of operations is not devops and why was there even a need for something between development and operations development and operations are two main components in the whole application release process so let's look in detail at this release process starting from the very beginning whenever we're developing an application we always have the same process of delivering that application to the end users so this is the main goal no matter if you use waterfall or agile or whatever approach at its core you create an application and you want to deliver it to your end users so that they can use it so let's say you have a great idea about a cool application you define its functionality or in other words what features it will have you coded you tested and now that you have a tested application you want to actually deploy it on a public server and let users access it for that you build and package your application in some kind of executable form so that it can run you configure the public server with all the needed stuff like installing any tools the application needs and deploy your application there you configure firewall rules to allow access to the application on the server and you have launched users can start using it so that's the simplified basis of any application release but that's not the end of the journey while in use you of course have to check in on your application is everything running fine are users experiencing any issues maybe there are bugs in the application that you didn't catch when testing also can application handle high user loads etc so after launching it you have to actually make sure that your application is accessible and usable by end users and if there are any issues for users of course you should fix them now that was the initial launch of your application but the application development is not done yet if you see users like your application you would want to make it even cooler add new features maybe optimize the performance by getting better servers or making your application faster and so on so you still have a lot of things to do and every time you improve your application either the code itself or the server configuration you want to make this improvement accessible to the end users immediately so after the initial launch you do multiple updates to your application and to keep track of these updates you version those changes there are many ways to version changes to the application one common way of versioning is with three numbers one for major changes like you replace the framework you use for coding another one for minor changes like you edit one small feature and one for quick small changes or maybe small bug fixes and you do that over and over again you have an idea of improvement you implement it in code you test it build and package it you deploy it and once released you observe it in the production to see whether there are any new improvement possibilities or any issues that need to be fixed right away so this gives you a process of continuous delivery of changes an endless cycle of improvements to your application and devops is about making this process of continuous delivery fast and with minimal errors and bugs so with devops improvements get created and delivered to users fast but also those improvements are of high quality and well tested and that is a big challenge quickly delivering high quality code now let's see what are exactly the challenges that teams may face during this process and which devops tries to solve during this whole release process we have roadblocks and frictions that slow down the process make it too much effort and allow errors to slip through all the way to production now what are the frictions and roadblocks in the release process first and the most important challenge is miscommunication and lack of collaboration between developers and operations so releasing application has two main parts you code the application you deploy and run the application developers are responsible for coding operations are responsible for running the application and between these two there might be a gap of i wrote an application but i can't run it or i'm running the application but i don't know how it works so developers would code without considering where or how the code will be deployed while operations would try to deploy without really understanding what and why they are deploying or how the application even works and this would result in miscommunications between these two developers finish coding but the deployment guide for the operations team is not good enough or well documented enough so operations team struggles deploying it so release takes longer or developers finish coding but the feature cannot be deployed because it has a lot of issues so the operations throws it back with improvement suggestions this kind of miscommunication could cause stretching the release periods for days and weeks and in complex badly maintained projects maybe even month so between the developer is done with the feature and operation starts deploying it there is no clearly defined automated process of handover it's based on a complex bureaucratic process of what checklists need to be completed and what needs to be documented and who needs to manually approve what for the release and so on so no streamlines or automated processes here apart from miscommunications between development and operations in a traditional setup where one team is only responsible for development and other team only for operations these two have seemingly different incentives that make it hard for them to work together developers want to push out new features fast that's their incentive while operations want to make sure those changes don't break anything because operations are incentivized to maintain stability in production their main focus is to make sure the application is available doesn't crash doesn't show 500 errors to the users and so on this means that operations need to resist the speed of release and check all the aspects of a new release to make sure it's 100 safe which again slows down the process especially considering that operations don't really understand the code or the application so it's even more effort for them to evaluate this new release so for example let's say developers developed a new feature which was released but this feature consumes so much resources in the production environment that the servers got overloaded and the application crashed now operations team needs to fix that so because it's the operations who needs to put out the fires when something like this goes wrong developers may not be as careful as operations about the changes they release and again focus on releasing new features as fast as possible without really thinking so much about stability so even though the main common goal of everyone in a company should be to deliver high quality applications to the end users fast in practice the more immediate goals are for each role to do their job and developers job is to quickly create new features and push them out operations job is to maintain the system stability and resist new changes being pushed out and this gives us a conflict of interest so this kind of setup naturally makes it difficult for those two to collaborate another showstopper when releasing a feature is security just like operations team carefully evaluates and changes to make sure they won't affect system stability security team will evaluate any changes to make sure they don't affect systems security and in a traditional setup this is the same manual bureaucratic process as operations which takes days or weeks and slows down the release process and as i mentioned devops is about removing any roadblocks that slow down the process so it includes this one as well however even though this is part of the devops solution there was a separate term created for that called devsecops in order to highlight and just remind the teams of the importance of security because it somehow got left out i actually have a separate dedicated video on devsecops which you can also check out if you're interested now adding to the list of show stoppers is application testing in many projects there are separate teams or roles for testers who test the application changes on different levels like testing just the feature testing the whole application testing on multiple environments etc and often these tests are done manually when teams cannot totally rely only on their automated tests and only after manual testing is done can the change be released and even though this may not be done by development or operations role but rather a separate tester role this is an important part of the release process and may also slow it down considerably as i mentioned many of the tasks during the release process like testing security checks deployment etc used to be done manually for example operations would do most of the operations tasks manually either by directly executing commands on the servers to install tools configure stuff do patches or have scripts or small programs they execute but in both cases this is manual work so application release tasks are not automated so we're manually deploying the application manually preparing the deployment environment creating infrastructure configuring servers etc manually configuring jenkins jobs for example manually configuring access to the servers to jenkins build to all the tools etc and this manual work is slow and more error prone because of human error plus with manual work you have a disadvantage that knowledge sharing is very difficult because people who do the tasks would have to document it and others would have to read it it's also very intransparent because it's hard to trace who executed what when and finally when infrastructure configuration and so on was done manually if something happens to the infrastructure it may be really hard to recover and replicate the exact state fast you would have to remember exactly what was done on the servers in which order to get to that previous infrastructure state so you see the main characteristic of all these issues is that they all slow down the release cycle and create roadblocks on the way and you also see in case of security and testing that devops may even go over only development or only operations responsibilities and tasks and that's why to understand devops instead of focusing on the name and what it means we're focusing on what it tries to achieve devops tries to remove all these roadblocks and things that slow down the release process whatever that may be and instead of manual inefficient processes helps create fully automated streamlined processes for release cycles and this can be done step by step removing one roadblock at a time until you have a fully optimized and automated device process that makes your application release super easy there are many companies who have optimized the process to the level that they can release multiple times a day of course not every project needs multiple releases a day but having this kind of streamlined release process is obviously beneficial for everyone so how does devops help achieve this and solve all these challenges well by the official definition and this was the original idea of devops devops defines a combination of cultural philosophies practices and tools for doing that so devops is not just one set of tools or one specific concept it's a combination of anything that creates the process of releasing the software fast and with high quality and the main part of the concept was that developers and operations people should work together more often talk to each other more often and collaborate better to achieve that but actually this definition is too broad and too high level and makes it hard to imagine how it works in practice so it's just not specific enough so naturally different companies implemented devops in different ways so the actual implementation of devops looked pretty different from company to company but since companies started adopting it gradually it got a more concrete form with some of the common patterns across many companies and one of these patterns was that devops evolved into an actual role called a devops engineer where either developers are doing devops as a job next to development or operations are doing it or someone is doing devops exclusively as their only job and a set of technologies that were used to implement the devops principles became devops technologies which now devops engineers would need to learn and i understand that many people are resisting the idea of devops engineer and the creators of the devops concept didn't see it used this way but the reality is often different from the theory we see that concept was adjusted and bent to meet the needs of the end goal and devops engineer role is what came out of it and that devops role is responsible for creating a streamlined release process without any roadblocks slowing down the release and that's why in the center of devops is the well-known continuous integration continuous delivery process so let's see exactly what makes up a fully streamlined cicd pipeline and generally what are the tools and concepts you need to learn as a devops engineer what tasks and responsibilities it has as well as where is the line and boundaries of devops from development and from operations it all starts with the application developers team will program an application with any technology stack different programming languages build tools etc and they will of course have a code repository to work on the code in a team one of the most popular ones today is git git git now you as a devops engineer will not be programming the application but you need to understand the concepts of how developers work which git workflow they are using also how the application is configured to talk to other services or databases as well as concepts of automated testing and so on now that application needs to be deployed on a server so that eventually users can access it right that's why we're developing it so we need some kind of an infrastructure on-premise servers or cloud servers and these servers need to be created and configured to run our application again you as a devops engineer may be responsible for preparing the infrastructure to run the application and since most of the servers where applications are running are linux servers you need knowledge of linux and you need to be comfortable using command line interface because you will be doing most of the stuff on the server using command line interface so knowing basic linux commands installing different tools and software on servers understanding linux file system basics of how to administer a server how to ssh into the server and so on you also need to know basics of networking and security for example to configure firewalls to secure the application but also open some ports to make application accessible from outside as well as understand how ip addresses ports and dns works however to draw a line here between it operations and devops you don't have to have advanced super operating system or networking and security skills and be able to administer the servers from start to finish there are own professions like network and system administrators security engineers and so on that really specialize in one of these areas so your job is to understand the concepts and know all this to the extent that you're able to prepare the server to run your application but not to completely take over managing the servers and whole infrastructure nowadays as containers have become the new standard you will probably be running your application as containers on a server this means you need to generally understand concepts of virtualization and containers and also be able to manage containerized applications on a server one of the most popular container technologies today is docker so you definitely need to learn it great so now we have developers who are creating new features and bug fixes on one side and we have infrastructure or servers which are managed and configured to run this application the question now is how to get these features and bug fixes from development team to the servers to make it available to the end users so how do we release the new application versions basically and that's where the main tasks and responsibilities of devops comes in with devops the question is not just how we do this in any possible way but how we do this continuously and in an efficient fast and automated way so first of all when the feature or bug fix is done we need to run the tests and package the application as an artifact like jar file or zip etc so that we can deploy it that's where build tools and package manager tools come in some of the examples are maven and gradle for java applications for example npm npm npm for javascript applications and so on so you need to understand how this process of packaging testing applications work as i mentioned containers are being adopted by more and more companies as a new standard so you will probably be building docker images from your application as a next step this image must be saved somewhere right in an image repository so docker artifact repository on nexus or docker hub etc will be used here so you need to understand how to create and manage artifact repositories as well and of course you don't want to do any of this manually instead you want one pipeline that does all of these in sequential steps so you need build automation and one of the most popular build automation tools is jenkins of course you need to connect this pipeline with git repository to get the code so this is part of continuous integration process where code changes from the code repository get continuously tested and you want to deploy that new feature or bug fix to the server after it's tested built and packaged which is part of continuous deployment process where code changes get deployed continuously on a deployment server and there could be some additional steps in this pipeline like sending notification to team about the pipeline state or handling failed deployment etc but this flow represents the core of the cicd pipeline and the cicd pipeline happens to be at the heart of the devops tasks and responsibilities so as a devops engineer you should be able to configure the complete ci cd pipeline for your application and that pipeline should be continuous that's why the unofficial logo of devops is an infinite cycle because the application improvement is infinite new features and bug fixes get added all the time that need to be deployed now let's go back to the infrastructure where our application is running nowadays many companies are using virtual infrastructure on the cloud instead of creating and managing their own physical infrastructure these are infrastructure as a service platforms like aws google cloud azure linux etc one obvious reason for that is to save costs of setting up your own infrastructure but these platforms also manage a lot of stuff for you making it much easier to manage your infrastructure there so for example using a ui you can create your network configure firewalls route tables and all parts of your infrastructure through services and features that these platforms provide however many of these features and services are platform specific so you need to learn them to manage infrastructure there so if your applications will run on aws you need to learn the aws and its services now aws is pretty complex but again you don't have to learn all the services that it offers you just need to know those concepts and services that you need to deploy and run your specific application on the aws infrastructure now our application will run as a container right because we're building docker images and containers need to be managed for smaller applications docker compose is enough to manage them but if you have a lot more containers like in case of big micro services you need a more powerful container orchestration tool to do the job most popular of which is kubernetes so you need to understand how kubernetes works and be able to administer and manage the cluster as well as deploy applications in it now kubernetes is a powerful but also a very complex tool so it's usually a lot of effort to set up and manage multiple kubernetes clusters for different teams in a company so before moving on i want to give a shout out to our sponsor loft which is a platform that helps you build self-service kubernetes clusters easily platform teams can deploy loft connect clusters and then let engineers create isolated development in ci city environments on demand whenever they need them so it puts developers in charge and gives them direct self-service access to kubernetes one of the great features and benefits of loft is that that loft can save you more than 70 percent of the cloud costs by automatically putting virtual clusters to sleep when nobody is using them and automatically waking them up again once engineers interact with it if you want to learn more about how loft works i actually did a separate video on it for the devops tool of the month series now love has a lot of other great use cases for working with kubernetes so if you want to try it out yourself for my followers loft actually provides six months free for their paid subscription for the first 500 people so check out my special link and use my promo code for that now back to our devops roadmap now when you have all these maybe thousands of containers running in kubernetes on hundreds of servers how do you track performance of your individual applications or whether everything runs successfully whether your infrastructure has any problems and what's more important how do you know in real time if your users are experiencing any problems one of your responsibilities as a devops engineer may be to set up monitoring for your running application the underlying kubernetes cluster and the servers on which the cluster is running so you need to know a monitoring tool like prometheus or nagios etc now let's say this is our production environment well in your project you will of course need development and testing or staging environments as well to properly test your application before deploying it to the production so you need that same deployment environment multiple times creating and maintaining that infrastructure for one environment already takes a lot of time and is very error prone so we don't want to do it manually three times as i said before we want to automate as much as possible so how do we automate this process creating the infrastructure as well as configuring it to run your application and then deploying your application on that configured infrastructure can be done using a combination of two types of infrastructure as code tools infrastructure provisioning tool like terraform for example and configuration management tool like insibol or chef etc so you as a devops engineer should know one of these tools to make your own work more efficient as well as make your environments more transparent so you know exactly in which state it is and easy to replicate and easy to recover in addition since you are closely working with developers and system administrators to also automate some of the tasks for them you would most probably need to write scripts maybe small applications to automate tasks like doing backups system monitoring tasks cron jobs network management and so on in order to be able to do that you need to know a scripting language this could be an operating system specific scripting language like bash or powershell or what's even more demanded a more powerful and flexible language like python ruby or golink which are also operating system independent again here you just need to learn one of these languages and python without a doubt is the most popular and demanded one in today's devops space easy to learn easy to read and very flexible python has libraries for most of the databases operating system tasks as well as for different cloud platforms now with this automation tools and languages you write all of these automation logic as code like creating managing configuring infrastructure that's why the name infrastructure is code now how do you manage your code just like the application code you manage this also using version control like git so as a devops engineer you also need to learn git so at this point you may be thinking how many of these tools do i need to learn do i need to learn multiple tools in each category also which ones should i learn because there are so many of them well you should learn one tool in each category one that's the most popular and most widely used because once you understand the concepts well building on that knowledge and using an alternative tool will be much easier if for example you need to use another tool in your company or project now you may be thinking these are a lot of things to learn and it may be hard to know where to start or what to learn first or what resources to use and so on well there are many resources out there to learn individual devops technologies but ideally you want to follow a well-structured step-by-step roadmap and more importantly learn how to use these technologies together in combination because that's what devops engineers do they use and integrate multiple technologies together to create devops processes and of course you want to learn all these with actual real-life project examples to know how it will look like in a real job and very few courses and learning resources offer this and that's exactly why we created a complete devops bootcamp with a clear structure and lots of hands-on projects so if you're thinking about becoming a devops engineer or slowly transitioning into devops you should definitely check out our devops bootcamp in the video description to get a full picture of devops i want to mention one more concept which is sre or site reliability engineering and how it fits into devops in this video we learned that there are two definitions of devops the original definition which is more high level and more broad and doesn't specify how exactly devops should be implemented and a more practical one which evolved over time with its own devops engineer role which is what you learned in our devops bootcamp so when we compare devops with sre it's important to know which definition of devops we're using for this comparison so with the first broader definition of devops devops is a more high-level concept that defines what needs to be done to achieve the automated streamlined release process while sre is more specific about how to exactly implement this process and how to implement devops principles so many people would say that sre is a specific implementation of the devops concepts but as we saw devops itself also became more practical with its own role and specific technologies and ways to implement it so what's the comparison here well in many companies devops implementation this practical devops implementation became more focused and concentrated on the speed of delivery for the application changes and of course even though it's part of the devil's principles to not only release fast but release quality code many devops teams in practice again seemed to optimize more for the speed than reliability so as a great complementary part of devops sre emerged with the same principles and goals in mind which is release quality code fast but as the name suggests more focused on reliability and keeping systems stable while allowing for fast changes so sre is its own role with its own set of tools for making systems reliable so these two were kind of parallel developments and are now often seen as two sides of the same coin and it's not uncommon for teams to have both devops engineer and sre helping implement the devops principles so this was just a short look at sre to understand it in comparison to devops but since i have received many questions about what sre is i will release its own follow-up video on sre in the next weeks to explain in more detail like how sre works in practice what are the tasks and responsibilities of a site reliability engineer and so on so be sure to subscribe to my channel and activate the notification bell to be notified when i release the video and for devops i hope i could clarify all your questions about it if not leave a comment with a question and i will try to answer them with that thank you for watching and see you in the next video

The video discusses the evolving landscape of DevOps, emphasizing that it is more of a mindset than a specific job role. It highlights the shift from managing large, complex systems to utilizing simpler, serverless architectures like AWS Lambda, yet paradoxically, costs have increased. The speaker critiques the current state of cloud infrastructure management, pointing out that much of it remains poorly documented and overly complex, with many teams and tools leading to inefficiencies and confusion. They also touch on issues like security, monitoring, and the challenges of maintaining operational stability in a cloud environment, often attributing outages to misconfigurations or misunderstandings. Overall, the speaker suggests that despite advancements, many organizations still struggle with fundamental DevOps principles, leading to a chaotic and blame-filled environment.
We do cow engineering of course every terraform applies engineering. So yeah devops it is really a devops is mindset. 15 years ago we had to maintain a big java stack on a big compute cluster running on big machine big data center with big ops team. Now our back end is five line go functional running on AWS lambda.
Somehow we're paying more. DevOps is asking the question what if we bring best practices and software engineering to infrastructure and never answer it. Deops is not job. Deops is not a job.
It's a mindset of propagating errors in automated ways. DevOps is a mindset. You build it, you run it. Now you're bad at building and running it.
That's why we have dedicated DevOps person and engineering team, separate platform engineering team, separate S sur team, separate on callore team, separate developer experience team, separate dev sec psychops team. What happens in the cloud stays in cloud because you cannot reproduce outside of cloud. Blue green deploy blue is broken green is worse. Poly cloud means three invoices on one S3 bucket.
Hybrid cloud means signing in with Azure RD to AWS. Most outages are caused by colon shift and Yammer file. I did it. 5% of our systems is infrastructure as code.
95% is infrastructure as PowerPoint. Cloud is only means to an end and goal is for cloud vendors to get rich. Deops has huge vocabulary. 28 different words for blame.
Most of the time somebody was playing with firewall again. It wasn't me. It's probably DNS, not CSS. It is probably DNS.
Maybe it is a DNS. I don't even know who this was. But here's a root access somehow. Terraform edit three lines get 600 line.
My Terraform file contains whole war and peace. Nobody nobody noticed. Of course, we have immutable infra. I only touch three times every week.
I am one Argo CD drift before losing sanity. And I have seen this quarter's cloud builder. I have PhD in tracking value files all 16 of them for uh production in Europe. Some of the infrastructure on US East one the other in Frankfurt in case there is political conflict.
Our policy has called temporarily disable OPA.sh. We have gamified feature flag matrix quick hot fixing cloud CLI and then server starts burning telemetry this telemetry that we pay more for ingress of locks than service uptime not pets ECR of token expired do not let the cloud know you are in a rush cloud can smell a fear every time says up. I asked up compared to what? I like to set Prometheus alert threshold CPU over 80% or if moon is in Gemini do on call job.
I'm not crazy. Sure. Let me interrupt everything I'm doing right now to help you notify but don't escalate to me. Most of the time I mer depend about PRS nobody asked for the deployed finished.
Look at this. We push the readmi. I trust the color green like I trust terraform apply that said no changes. Terraform stage f of big or diff open the ticket on itself.
Health chart requires eight spaces but corporate lint rules only allow two. We do platform engineering instead of Heroku. It is just like Heroku but slower, more expensive and 2000 line handbook. Yes.
Yes. Docker and everything, but we still run unsele for 30 minutes. We push compute to the edge to send bandwidth. Of course, now locks are shipped with FedEx.
Infrastructure is code with palumi and then server starts burning. What is the secret? Have you have we not sent the secret? Do you know get lock is B 64?
I can get you easily. Security. Security. We do not need security.
Our bone file is 80 megaby. Which attacker scrolls that far? Our secrets are rotate so secretly we don't know which one secrets all secrets none back to secrets all sock to binder secret than a code base secret of no is a hiring free ad that means on call for all times we do everything no ops no uh sq and no accounting but we have simple streamlined uh pipeline we have two source control systems three deployment frameworks three uh plus CI engines two artifact registries 17 CLIs very easy but you learn all of this on day one of on boarding it's the best developer experience only three wise five SDKs uh understanding how to issue Jira ticket prop learning how to close a Jira ticket in time it is almost click of a button still nobody knows state of cube I likes to give a false sense of security with a load test success in a staging Just adding one tag. What is going on?
Why is production down? This was not ingress of staging I configured. No, no, no. So it went straight to prod.
I thought this ingress configuration was not used. Ah, nobody will notice today. Telemetry is down anyway. If Graphana chart flickered yellow while long was watching, did the latency truly spike?
What is black color? What do you mean Graphana down? Where is Graphana hosted? It's probably DNS.
In this video, the presenter introduces Azure DevOps, a comprehensive platform designed to streamline the software development and deployment lifecycle. Azure DevOps, previously known as Team Foundation Server and Visual Studio Team Services, offers various features that support DevOps practices, such as Azure Boards for project management, Azure Repositories for code hosting, and Azure Pipelines for continuous integration and deployment. The platform facilitates collaboration among team members and automates processes to enhance efficiency and code quality. The video also touches on comparing Azure DevOps with alternative tools, emphasizing the importance of understanding different workflows like Agile and Scrum in software development. Overall, Azure DevOps serves as a one-stop solution for engineers looking to implement effective DevOps practices in their projects.
so in this video we will learn about one of the popular devops platforms called azure devops we will see what it is and what you can do with azure devops platform how to use it for your software development projects and generally how is this relevant for you as an engineer we will see different features and use cases of azure devops how it all works and how you can implement the whole software development and deployment lifecycle with it we will also review the azure devops architecture and how it works in the background and finally we will also compare it with alternative tools and talk a bit about which of these tools you need to learn for your career with so many alternative options so let's get started so first of all what is azure devops as the name suggests it is a devops platform it is a software as a service offering which was created to basically be a one-stop shop for implementing all your devops processes for your project and it had many names before it became known as azure devops it was called team foundation server then visual studio team services so it had a bunch of other names before azure devops because it extended from existing services and tools so it kind of got names of these tools and even though it was for the same purpose of implementing the devops processes at that time devops was still practiced by a smaller group of projects so that's why the name devops never actually came up in the name of the platform itself however since devops became more mainstream and as it is now used in in in lots of projects worldwide it was actually renamed to azure devops which is pretty smart because devops is already a popular term everybody knows what it is so just by the name you know that it's a platform for devops but it still sounds too general because what is a devops platform devops is many things right so what is a platform for devops and to answer that question let's look at what azure devops is exactly and how it helps in implementing devops processes well devops as i said is many things it is a combination of concepts and tools and basically anything that makes developing and releasing applications fast in an automated way and with high quality possible so a project needs to implement devops practices in order to achieve an efficient workflow if you want to go more in detail about devops and learn it in more depth all its tools and concepts etc i actually have a separate video on that but shortly explained it's to make the software development lifecycle as efficient as possible by fully or mostly automating it and azure devops is basically a technological implementation of that devops process which covers the whole software development lifecycle and it has features for each part of this lifecycle so let's go through the steps or parts of that software development lifecycle and see how the various azure devops features map to those parts now what does a software development lifecycle include it's not just developing the application or writing the code it actually starts before you have written a single line of code because before coding any feature or an improvement needs to be planned first right mostly by a product manager so the first step is to define what we are developing and why are we developing it or in other words what's the business value behind it and there are several ways of defining the workflow of how the project team will work on the application which roles they have within the team how they will divide and split the tasks etc two of the most popular workflows are agile and scrum many modern projects use one of these approaches for their development so once you have created a project in azure devops for your application the first feature you will probably use here will be azure boards and depending on which workflow you use for your projects in your company generally like agile scrum or even some basic workflow you can choose the corresponding board for this project because as i said azure devops or any other similar platform is basically just a tool that gives you various features to implement whatever workflows you have in your company so on azure boards you can create tickets or tasks for features improvements or fixes for your applications as part of that agile or scrum processes you can assign it to people to work on and you can also track progress of those features or improvements while they are being developed now developers need to take that planned task and actually develop it right in that process they may have questions about the task so azure boards can be used for communicating between the developers testers product owner etc within the task description plus it can be used to have an overview and transparency over the status of the feature as it is being developed who is working on it what stage it is in what's its progress status has it been deployed already etc now the application code that developers are creating is also part of that life cycle actually the main part of it an azure repository feature is what you can use in order to host that code now of course you know the popular code repositories like github gitlab bitbucket etc which are all based on git and that's basically an alternative to those platforms so editor repository also supports git which is the most popular version control tool so developers can host their code in azure repository and push their changes to it however the code repositories have actually evolved and became much more feature reached and just hosting code is one of the many features that they provide so azure repository also it's not just for hosting the code as part of the devops life cycle developers collaborate and work together to develop high quality code so in the repository as part of the git workflow you have features such as pull requests branches various collaboration features and so on so when developer starts a task they create a temporary branch when done they create a pull request and other developers can review and comment on the pull request they can communicate and collaborate until the pull request is good enough to be merged into the main branch now this is what's called a git workflow so basically how your team decides to work on the code and to make sure that the quality of code is very good and there are many git workflows or the way teams use git and all its features and different companies may use different approaches or different workflows but the key point here is that with azure repository you have the tool that enables you to implement whatever git workflow you choose to work with plus note that the repository and branches and the pull requests are all linked back to the feature task so you see the activity and status of development there as well now once the feature is developed and pull request is approved and merged into the main branch it needs to be released right that's the reason we're developing the feature in the first place so we can release it and the end users can use it so in order to release our code changes we first need to test it and package it into an artifact which is a deliverable that we can then deploy on the end environment and again devops is all about automating things and workflows so that it's fast and efficient so this process of testing and building the application is done by an automated ci or continuous integration process and for building the ci pipeline azure has what's called azure pipelines section pipelines can be written in yemo which means you can have your pipeline script as part of your code the main building blocks of azure build pipelines are steps for example if we want to test and package the application we may have steps to run tests package application build an image push that image to an image repository so that later it can be deployed so each step will execute a certain command to run the test to package the application build a docker image and so on and this is an example pipeline for building a.net application which is a common type of application built on azure devops platform since asp.net is also part of the microsoft technology stack in the first two steps in this pipeline we test and build the application with net commands and then build the image with a docker command and as you see we execute commands in script attribute however we have another option for executing step commands instead of scripting it directly in yemo ourselves so in addition to writing the scripts yourself you can use what's called a task instead so what is the task and how does it work in azure devops you have loads of tasks already available to choose from for different use cases and they can be selected and configured using a ui you can select the tasks directly from the list of available tasks on the right side of the pipeline's yaml editor and configure any needed parameters for the task and when you have the task configured basically you fill in and set all the parameters you can add the task back to your yaml pipeline it will be automatically converted and edit as yaml code and of course you can adjust or add any additional configuration to it so here for example if you look for asp.net task you will find one for executing various.net commands like test build etc and once configured you can add the test task in place of the script you can do the same for docker you can search for docker tasks and find the one with build and push commands and add that task to your yaml pipeline and this obviously can be convenient in many use cases because you don't have to know the commands exactly you don't even have to know or memorize the exact syntax for the pipeline and you also don't have to script the steps from scratch so this basically gives you a simple um an easier high level approach to adding steps to your pipeline now this is a very simple scenario of a pipeline with one single job that has all the steps but in practice we often have more complex scenarios where we would need multiple jobs in a single pipeline let's say we want to execute the test step on two different operating systems we want to test the application on linux and windows before we build it or let's say we test and deploy our application on linux machine but we need a database for our application which must run on a windows machine for this use case we would need two separate jobs now i'm mentioning jobs but we haven't seen a job defined in our simple pipeline yet so what is a job exactly well all these steps actually belong to one job and can be defined like this so a job is basically a group of multiple steps however when we have only one job in our pipeline we don't need to explicitly define it that's why we could skip this in a simple pipeline but when we have multiple jobs we need to define them within jobs attribute so we have multiple jobs each with multiple steps and now we can actually execute each job so all the steps within the job on a different environment also called an agent so agent is a machine that will execute the tasks or the steps of the pipeline like running the test building an image etc and an agent is selected from an agent pool like pool of windows machines or linux machines or mac os machines etc and that's why we have a pull attribute in the job to define what kind of machine we want to dedicate for that job and as you see inside the pool we can define if the end image that specifies what kind of operating system we want and you can also specify what version of that operating system you want to run that step or that job another very common use case for multiple jobs would be if we have a set of steps that can run in parallel so that the build overall is faster this could be running multiple tasks that can run at the same time testing different parts of the application so they don't have to wait for each other to complete they can all run at once so by creating multiple jobs for all these tests you can actually run them in parallel on different environments so overall the main task of this build pipeline is to test the code changes and if everything is fine produce an artifact that we can deploy before moving on i want to give a shout out to polumi who made this video possible polomi is a universal infrastructure as koto and the cool thing about polomi is that you can use your familiar programming languages tools and engineering practices to deploy and manage your cloud infrastructure you can use polami for any cloud but for azure specifically it has the most complete infrastructure as code support for the azure platform and is the only one with guaranteed same day support thanks to as your native provider polomi can easily integrate into any cicd platform for azure devops they actually build a task extension that lets you easily use polumi in your ci cd pipelines it can be used with azure pipeline's wizard ui or the yaml configuration if you want to learn more about polomi i actually have a separate video on it where you can see fully how it works in practice with that let's move on to azure artifacts now traditionally depending on the application programming language the artifact produced will be different could be a jar or war file for a java application a new ga file for net a zip file tar file etc and for storing this kind of artifacts you actually have another feature in azure devops called azure artifacts and azure artifacts actually currently supports three types of artifacts which are maven packages nuka packages and npm packages so if you're developing and building your application with any of these tools then you can store the artifacts produced in the build pipeline in the azure artifacts however in the modern software development we usually don't produce such artifacts anymore to deploy them instead we create docker images is artifacts so no matter what language you use use use what tools you use the artifact is always the same which is a container image so if you have 10 microservices all in different languages you can still produce the same container image type of artifacts and images actually need a dedicated type of repository so if your build pipeline produces docker images you will connect your azure devops to some docker registry like docker hub azure container registry etc and basically store your images in that repository now let's say we successfully built our application into a docker image we pushed it to a docker repository and now it's time to deploy it to the end environment this would be the next stage of the pipeline which is also called the cd or continuous deployment or continuous delivery if you're not totally new to devops you already know that at the heart of devops there is the ci cd pipeline which is ideally the fully automated process of taking the code changes and deploying it all the way to the production by testing and validating all parts of those changing from is the application functioning is it secure etc and in that process we have these two main parts which is build stage and the deploy stage again we haven't defined a stage in the pipeline yet since we only had one stage with all the build jobs when we have multiple stages however we need to configure that as well so in order to create a complete ci cd pipeline we'll have the stages in our yaml pipeline script for building and for deploying the application and by the way we can use a specific type of job in the deploy stage which is called deployment which is specifically meant for deploy job and has some features for that purpose for example it doesn't check out the code like job type does etc now when we are deploying the new application version usually we don't directly deploy to the production instead we deploy to intermediate environments we test it extensively and gradually promote it to the production when we're almost 100 sure everything is fine common is to have development testing and production environments so we can have all these as separate stages after the build stage deployed to development deployed to testing deployed to production now the code for deployment to different environments will be pretty much the same except for a couple of parameters so how can we avoid repeating the pipeline configuration code in this case or maybe we have multiple applications that all have the same pipeline logic so we don't want to write the same pipeline configuration for each application in our company instead ideally we want to write that logic once properly and then reuse it for all the applications that may need it in azure devops pipelines yaml syntax we can actually put any code that is repeated and extract it in what's called a template which is a separate file and can be referenced in the pipeline using template attribute and it can even be configured with parameters so it's like a reusable piece of configuration that you can reference in different pipelines so you can split your entire pipeline into multiple individual files and these files can even be stored and managed in a dedicated separate repository and as i said all the pipelines can reference them and by the way you can have a template for a job a step or stage so for any of these levels and you can also have templates within the templates creating a hierarchy like this now when you have multiple environments for multiple applications it may become difficult to have an overview of what version of what branch is deployed where or when the code was last deployed to a specific environment and so on and that's where the environment feature comes in which is part of azure pipelines we can create environments in azure devops which will map to the actual deployment environments and then you can configure in your pipeline which of these azure devops environments you want to deploy to so you kind of have this abstraction there and once the application gets deployed to these various environments you can actually view the deployment history per environment so this can actually be some additional valuable ui feature that gives you a better overview of your deployments plus the deployment status can also be linked back to the original ticket so you have that additional information for the feature or improvement to which stages or environments it has been deployed to already which again can be pretty convenient now that deployment process or deployment part of the pipeline which as i said is called cd or continuous deployment on azure devops can also be built as a separate pipeline called release pipeline interesting to note that many ci cd platforms like jenkins gitlab csd etc they have one pipeline for the whole process so we have one file and one ui unit for both in this case it will be split into separate ci and cd pipelines so the way it works is that you select a build pipeline that produces an artifact or you choose the already built artifact location or source and you create a release pipeline for that artifact note that release pipelines in azure devops can only be created using the ui so you have no yaml file for that however the pipeline structure itself is the same you can create steps by choosing from available tasks and also have multiple stages like deployment to development testing and production so with release pipelines you say when this build pipeline completes and successfully creates the docker image artifacts for example trigger this release pipeline so this way you chain them but as i quickly mentioned as the artifact source you can actually use not only the build pipeline output but also already built artifact from various sources now generally it's usually a better idea to always have one ci cd pipeline defined in yemel instead of splitting that into two plus you have all the benefits of scripting your pipeline and making use of the reusable templates etc so the release pipelines is probably for more specific use cases maybe when you want to deploy existing artifacts from the artifact repository directly but as i said usually you should have one pipeline for the complete cicd process now an important part of an application release process is testing and you need to extensively test your code changes before deploying it to production and of course the more complex the application the more tests you need so in azure devops you actually have a dedicated section for tests and here you can actually create a unified central view of all the test cases or many of your test cases that need to be checked before giving a green light to production deployment and here you can create manual test cases or plans so when a new feature is being released a tester can go through these steps and test the application but this could also be automated tests which will be executed as part of the ci cd process and the test reports from the pipelines can be published and viewed here and the main advantage of this is that you have own centralized place with an overview of all the test plans whenever releasing your application whether these are automated tests that were run in the pipeline or manual tests from developers product owners testers etc and again you can see the results of those test executions in your feature descriptions to decide whether you can release the changes or not and you can even view and run the test cases related to a feature directly from the convent board now the pipelines execute tasks like running tests building an image etc and as i mentioned you can execute these tasks on different machines with different operating systems so where are those machines exactly and how do we get access to them to run our tasks and which machines and which environment do we get to answer this question let's look at the azure devops architecture on a high level at the core we have what's called the azure devops services a software as a service or the managed online solution from azure and that's the main part where configurations are made pipelines and repositories are created and stored etc so these are all dedicated machines for those things but the pipeline tasks themselves run on separate machines called agents which are connected to the azure devops services platform now now now who manages these agent machines well azure offers managed agents as well so you can let microsoft actually manage the whole setup for you including the main service which holds the configuration plus the machines that actually execute the pipelines however in practice many companies need control over these machines plus they want to remain flexible and save costs maybe they have these machines on premise or even on another cloud platform so they want to make use of this so you have an option to configure your own agents and connect them to the azure devops platform or you can even have a mixture of both and this is actually pretty similar architecture to what other similar platforms like eclipse icd etc look like so nothing really extraordinary here and since this is a managed service of course you have to pay for these services and using for these resources but azure devops does have a free tier to get started with that basically includes a certain amount of free resources that you can use to get started with including using managed agents for your pipeline jobs great so till now we actually saw various features of azure devops that map to different parts of the application development life cycle starting from planning the task all the way to developing and deploying it to the end environment now throughout these processes we actually have tasks that we execute on other platforms for example when we build and push an image that needs to be pushed or stored in an external image repository right which is outside of azure devops or when we deploy to a remote server it will be on some cloud platform like azure aws or even on-premise or maybe we deploy to kubernetes cluster etc plus we may have the pipeline connected to the external code repository in github instead of using the azure repository so for all these tasks azure devops needs to connect to those platforms right and normally you have credentials like username and password or access token from these platforms that you need to make available in azure devops so that it can connect and authenticate itself with those platforms now for those use cases in azure devops you have what's called service connections feature which makes managing access to external platforms much easier first of all it's less configuration effort because you don't have to create these credentials in the respective surveys and then replicate in azure devops instead the credentials are created automatically when azure devops connects to those services and second advantage is that it's more secure actually because service connections use short-lived credentials which as i said gets generated on the fly when the connection is established so you don't have to worry about rotating or invalidating credentials and so on and the service connections can be created in the project settings section so you have a separate section for administering the project here you can manage settings for all the features like boards repositories pipelines test plans and artifacts plus as i mentioned you can use self-hosted agents to run your pipelines and this is also where admins can configure these agents as well now after learning all the various features of azure devops and what the azure devops platform even is you're probably wondering if this is so great why aren't all the projects using it or is it that great and what is the difference from other similar platforms like aws or gitlab etc and which one are you supposed to learn should you become an expert in azure devops and ignore all other tools so let's look at comparison with similar tools and answer the question about which one to learn first let's compare it with traditional ci cd tools like jenkins or modern ones like argo cd circle ci etc the main difference here is that these are exclusively ci cd tools right so jenkins circle ci etc they're specifically built to create and manage cicd processes but azure devops actually strives to be the complete devops platform not only the ci cd so any feature you need for covering the whole devops process including the ci cd is in one place which can be extremely convenient as i said because in devops you need multiple tools for different parts of the process like jenkins for build code repository jira board artifact repository etc which means you need to integrate these tools together so you have an effort in putting all these tools together like connecting git repository with jenkins connecting jenkins with jira to update status of feature tasks etc so when you use a platform that offers these services in one place obviously it's more convenient because they are already integrated and plus you get a better traceability meaning you have links between all parts of the process feature task has links to corresponding feature branch or pull requests to its pipelines maybe the artifact that was produced with the version and so on so you have a better overview because you have linked data from all features a direct comparison to azure devops is however gitlab because gitlab which started off as a git repository actually made a turn and decided to create an all-in-one devops platform as well and to be honest many of the features and use cases are pretty similar between gitlab and azure devops or generally how the things work and if you're interested i actually have a crash course as well as full course on gitlab ci cd for building complete devops processes with it you can also compare it with aws however aws is way bigger and way more encompassing than just the devops processes and here i want to mention an interesting note about comparing azure with aws and where azure devops platform actually plays a role in that as we know azure and aws are both cloud platforms where you can create and configure your complete virtual infrastructure create virtual servers and use a bunch of other services as well but while aws has all its services on one place with one account azure platform and azure devops platforms are more separated so you have two separate accounts for them and you can manage them separately and even use each platform without the other however they are both obviously microsoft products part of the same ecosystem so they have some integration so essentially they are still connected so for example the hosted runners for azure devops run on azure platform as well as the code on azure devops repositories are also hosted on azure platform and you can also integrate the azure active directory which is one of the azure services in your azure devops account so they're two separate platforms but integrated with each other for various use cases and that means when you want to deploy to azure virtual machines azure app services etc or azure kubernetes service from azure devops you basically have to connect to just like you would to any other cloud platform to deploy to it and an interesting use case in many projects many companies is that projects who use azure devops actually deploy to multiple infrastructure environments or cloud platforms so they may deploy from azure devops pipeline to azure virtual machines and aws virtual machines and that's probably the main example that may answer the question of which technology you should learn or whether you should learn azure devops and the answer is usually companies that already use azure platform or already use microsoft services and products they actually tend to use azure devops as well however in terms of cloud technologies um or cloud platforms aws is still the winner and number one in this category and on the other end in terms of the cicd tools themselves usually the open source solutions like gitlab scarcity or jenkins etc are preferred rather than using proprietary services like azure devops and very often you have a case where company already has tools and processes it has been using for years like they work with jira and jenkins and aws platform they use internal docker registry and github repository so they want and they can't just move everything to azure device so as an engineer when learning new tools one of the things you should ask yourself is when you get a job what tools you will most likely be working with based on which tools are mostly used by companies today and as i said tools like jenkins aws platform gitlab or github platforms etc in devops are still the most commonly used ones and the leaders in their own categories so you should definitely look at those tools first and since many viewers actually ask that that's the main reason why in our devops educational bootcamp we teach exactly those technologies which are the most popular and most used in each category even if there are cooler or better alternative tools for those technologies but again some companies that already use microsoft services may decide to go for azure devops or you may be in a project or interviewing for a job where you need this knowledge in which case of course you should learn and get expertise in azure devops now i hope i was able to give you clarity on what azure devops is and give you all the needed information to get started with it i will add any relevant links in the video description so you can check them out there as well as share in the comment section whether you already have experience or have worked with azure devops or what is your experience with any comparative tools and which one you would recommend and with that thank you for watching and see you in the next video

In this introductory video on DevOps, Abhishek outlines the foundational concepts of the field, emphasizing the importance of understanding what DevOps is and why it is implemented. He explains that DevOps is essentially a culture aimed at improving an organization's ability to deliver applications more efficiently, highlighting the significance of quick delivery, automation, quality assurance, monitoring, and continuous testing. Abhishek also discusses common interview questions for DevOps positions, such as how to introduce oneself and describe daily activities as a DevOps engineer, stressing the need for confidence and preparation. Overall, the video serves as a starting point for those looking to build a career in DevOps, focusing on both theoretical understanding and practical interview readiness.
hello everyone my name is Abhishek and welcome back to my channel as you all know we are going to start the devops Zero to Hero codes and today is the D1 I know you're all very excited and I'm equally excited as well so today I'm here with the first day of the course and as is the first day we'll start with the basics what we are going to learn today is we'll try to understand what is devops we'll try to see Buy devops which are you know fundamentally these are the important questions for any of the devops job interviews so let's say you are attending a devops job interview if you don't understand the concept of devops why you are using devops what actually is devops then you know the interviewer will lose you there uh during the first five minutes you know it is very essential for you to project yourself in a better way so that's why you need to understand what is devops and why you have to implement devops and after that we'll see how to introduce yourself for a devops engineering position whether it's a fresher position whether it's experience we'll talk about uh all of these things uh how do we introduce ourselves uh during an devops interview and then we'll also try to see the most asked question again during an interview is people will ask this question in different way people might ask you what are your day-to-day activities as a devops engineer or people might ask you um you know can you walk us through your day as a devops engineer what do you usually do on everyday basis so these are the four important questions uh that you have to know uh before you start with learning any devops tools or before you learn how devops will fit into your software development life cycle these are some of the questions that you have to know and you have to have the answers for for for and this not that uh because these are the questions that usually people start with the interview right whenever you give interview in a man company or any uh startup as well people would start with these basic questions so always be confident and be prepared with what you are going to answer for these questions so we'll start with one by one so we'll see what firstly we'll see what is devops then we'll move to uh see why devops has come into picture and uh we'll see how to introduce yourselves and finally the day-to-day activities okay so without wasting any time so firstly what is devops right so if you look at the textbook definitions for what is devops there are hundreds of definitions okay so if you go to amazon.com they have a definition for devops if you go to uh Red Hat they have a different definition for their devops but in general like you know what is devops we will try to understand that one okay so if you ask me devops is basically a cultural I mean it's a culture right devops is basically a practice or a culture that you are adopting in your organization like you you cannot uh call it on a specific term but in general you can say devops is a culture that you are going to follow that would increase your organization ability to deliver applications right so that is the end goal of devops so if you have to put that in one single line you can say it has a culture that improves the organizational's ability to deliver the applications okay so end of the day what any organization will do any organization would deliver their applications right so the delivery is the key factor okay so whether it's example.com whether it's amazon.com flipquart.com what is the end goal of any organization the end goal of any organization is the delivery right so let's say uh there is an organization called example.com okay so if example.com is taking 10 days okay this is just an example let's say example.com is taking 10 days to deliver their version of an application from V1 to V2 let's say they are taking 10 days okay or let's consider pubg okay so pubg is one of the widely played games let's say there is an issue in the pub J or they want to introduce a new feature of the pubg version so if they are taking 10 days to introduce this version everything is done let's say the development is done and everything uh else apart from the delivery is delivery uh point of view everything is done and if they have to hold their application for 10 days just to deliver right to deliver to the unit staging then the staging environment then finally to the production then that's not a good practice right so what should happen ideally is whenever there is a security issue or whenever there is a bug in your software like you are using your Android mobile and all of a sudden your Android mobile has some bug which has the ability for the hacker to get into your mobile phone and hack your mobile phone so what would Android do they would quickly launch a new version and they'll say everybody has to upgrade to this version or if you have enabled the auto upgrade your application would be I mean your Android would be Auto upgraded so all this process should take within like you know if it happens within hours then it is best if it happens in one or two days then it is also a good one right instead of taking 10 days if you can have the ability to deliver your new version in one or two days or couple of hours or in minutes of time that is called devops okay so devops is a process of increasing the ability to deliver your applications but is it only about delivery no okay so that would be the next thing that we have to look at so most of the times what happens is people would compare devops okay whenever even you try to learn devops mostly people talk about cicd okay if you if you're new to devops and if you don't know what is cicd that's totally fine don't have to worry about it but in general people always look at devops as cicd that is continuous integration and continuous delivery but even in my previous uh slide when I was explaining you I said devops is about improving your delivery but is it only about delivery no so devops is about improving delivery okay that is something that we talked about improving delivery but how can you improve the delivery if you have to improve the delivery let's say if you forget devops aside let's say there is a company that is manufacturing chips or let's say there is a company that is manufacturing uh some kind of biscuits so if they have to improve their delivery what is something that you have to do they have to include the automation okay so devops is always about I mean devops is also about automation okay now let's say they have automated so the chips are being manufactured in one single day okay so they reduce the manual labor and they increa they brought in new Machinery that can produce the chips in one day but is it okay is it uh perfect for the customers no what the customer would require is apart from the automation they would also look at the Quality right so if you are manufacturing the chips in one single day that's fine for me but as an end user what I'd be looking at is the quality as a manufacturer you would be looking at automation okay and devops is also about monitoring okay what is monitoring so monitoring is nothing but let's say let's take the same example so you are providing the chips you have automated the process you have also maintained the quality but how would you ensure that your quality is maintained you have to build in monitoring right so always make sure that whenever there is an issue in the quality or if there is an issue in the automation somebody has to report back to you right that is monitoring and finally there is one more important aspect that is any guesses here you have quality you have automation you have monitoring the other important aspect is testing Okay so testing is also one of the important aspect so without testing you cannot ensure quality or you cannot ensure that your automation is correct so now if we take it the new definition okay in the previous slide we call it devops as devops is the process of continuously delivering in a quick manner right that is what we talked in the previous slide but now if we talk about the new definition after learning all of these things now I can say devops is a process of improving your delivery I mean making your delivery quicker by ensuring that there is a proper automation you have ensured that the quality is in place you have ensured that you have set up proper monitoring and you have ensured that you have a continuous testing so this is the definition of devops okay so let's try to put that in uh okay let me go back let me try to put that on a paper okay for you for anybody who is just starting to understand the definition of devops what I would say is devops is a process of of of improving the the the application delivery so it uh I mean you don't have to always consider it as an application it can be anything right you can deliver an application you can deliver a script you can deliver anything okay just for your basis I just called improving the application delivery but you can also consider it as improving your script delivery or any binary or anything okay by ensuring okay devops is a process of improving the application delivery by ensuring that there is a proper Automation in place okay by ensuring that there is a quality that you have maintained continuous monitoring is a very key aspect okay monitoring is a very key aspect okay people also call it as observability so monitoring and observability are hand in hand things whenever we uh deal with or talk about uh monitoring we'll also talk about observability but for now you can think monitoring or observability and finally there is a continuous testing this is devops okay so this is a perfect Ideal World definition of devops you can modify it on your own basis but if you ask me uh during an interview what I would say is if somebody is asking me let's say Abhishek is giving an interview an interview asked me that what is divorce I would say devops is a process of improving the application delivery by ensuring there is a proper automation with a code quality that is maintained or with the application quality that is maintained and ensuring there is a continuous monitoring and continuous testing in place okay now what will you achieve with all of these things end of the day your end goal as a devops engineer should be that there should not be any manual process or during your application delivery you have to fasten up your process let's say your application is delivering in you are hired as a devops engineer okay so example.com is hiring a devops engineer what would be the goal of the CEO or the team manager of the example.com would be once it devops engine is in place what he'll expect from you is if their application is delivered in two weeks okay so what what would be the expectation from a devops engineer is he has to reduce this two weeks to one week but again by ensuring that you have all of these things in place and so this is a basic definition okay because today we are dealing with day one so I don't want to complicate the uh definition by including all of the things like you know I don't want to include the complicated terms like being Cloud native or all other things which will come in place okay while we progress to the new or the next episodes of our devops learnings we would include the concepts of being Cloud native we will include the concepts of being you know serverless but not today today you just understand these things that is more than enough okay but as we advance what I want to tell you is I'll talk about being Club native I'll talk about being a serverless or shift left so all those things will come in the next phases or in the next episodes of devops but for today I hope everybody is clear with this definition okay so for a beginner this is more and well and good to talk about devops okay so now this is about what is devops now now now if you understood what is devops and how to answer this in your interview the most important thing is to understand why devops because that would be the next question so if your interviewer is really looking for hiring a good candidate your interviewer would be asking why devops okay okay now I I'll hire you but why should I hire you or why should I hire a devops internet so for that the thing would be to understand why devops okay now let's try to understand a very simple thing okay so forget about the definition and everything so what I will try to explain you is firstly let's say uh let's assume that there is a developer okay so let's call him developer I'm not sure if the color contrast is fine okay so what this developer is doing is he is trying to write the code for his application okay so let's say the developer has developed this application now end goal is whether it can be a Android application whether it can be a static website or whether it can be a web application what would be the end goal for this developer or what would be the end goal for this uh company called example.com okay so once this developer writes the code the end goal would be the receiving end that would be the customer right so there has to be a customer who uses this application so that would be my end goal okay so developer is writing the code and customer is receiving the code so what happens in between let's say devops is not in place so let's go back to 10 years okay so before 10 years so what we are discussing now is before 10 years so what happened was before 10 years when these people were not there like the devops engineers were not there what used to happen or the process of devops was not there what used to happen is once the developer writes the code so he used to check in this uh application code because you know there will not be one single developer right there will be multiple Developers so they have to share their code somewhere so they used to put that in a central location and after that what you what used to happen was from this central location this devops engineer or uh sorry there was no devops engineer so this guy who used to be called as a system administrator or a build and release engineer what they used to do is they used to create a server okay and what they used to do is they used to deploy this application the developer has wrote the application they used to deploy this application on the server okay so let's call this as app so the app is deployed on the server and the next process would be somebody called a tester okay so who is this guy there is a guy called as a tester so tester would test this application on the server that is created by a system administrator okay then there is one more position called as a build and release engineer okay now we are talking about different different terms don't worry I'll explain each enter each and every term in a very simplified manner so that you will not be out of sync so the system administrator has created a server now the build and release engineer what we would do is that once the tester this tests this application on the server he would promote this application onto the next level so either that level can be a production level or that level can be a pre-production or somebody also called as staging environment so again once this application is well tested on the pre-prod this build and release engineer would take forward uh to the customer that would be on the production server okay so these are the different processes that used to be involved so let me try to simplify this in an easy manner okay because we are talking uh quickly you might lose me somewhere so that I would try to explain in a simplified manner what are the different terms that we called one is system administrator okay now the other thing that we also talked about is build and release engineer also there are some kind of people called server administrators okay so for one simple process all that we are talking is before 10 years okay so all that I am explaining is before 10 years so for one simple process what was the process the end idea was to deliver this application from developer laptop to to to customer there were these three different roles that were involved okay so why there were what were we developing application to production so what I told for this process there were these three people that were actively working one is the system administrator what was system administrator doing he was creating a server why server is required because you cannot test the application on your personal laptop right in an organization you might say that okay my application is working perfectly on my laptop nobody is going to listen or nobody is going to trust so end of the day you have to test it on a server so the system administrator used to create a server it can be any platform right so before 10 years there were no uh typically the cloud platforms like AWS people were not using so people were using platforms like VMware okay or openstack so these were the things that people were using or any other uh you know they used to have their own hypervisors to create like Zen for creating the servers on their bare metals because before 10 years everything was a bare metal so the system administrator created a server and then what happened is on the server somebody has to install the application right because developer has created the application on his local and he has checked in his code onto SVN or CBS or any version control system that is a centralized code Repository because everybody has to access it so the code repository developer has pushed and then the build and release engineer so now this guy has came into picture what he has done he deploys this application onto the server now to deploy this application onto the server there has to be a application server on This Server right so application server is the one that holds the application onto the server so the server administrator used to create this app server okay what is this called app server so because multiple parties were involved now further understanding purpose I just uh explained all of these rules so in a real world scenario before 10 years there were other roles as well so even if you take these three roles first simply delivering the application from your personal laptop or from the developer laptop onto the production server what was happening it was involving system administrators it was involving build and release engineers and it was also involving server administrator so the entire process was taking for example 10 days okay so the devops or the word of devops has emerged or evolved because of this very own reason that is because multiple people were involved because all of these is a manual effort okay so whenever there is a manual effort your process will be slow so to automate this entire process the word or the world of devops has emerged okay is it clear so what was happening the system administrators build and release engineers and the server administrators were working closely or working together to deliver your application from your personal laptop onto your production that is for your customer so because everything was manual and different teams were collaborating the process was taking more time for example I said 10 days but it could be one month two months or it could be also five days but the entire communication and the entire system was not effective this was 10 years old so now to improve this process what has happened everybody has moved to a New Concept called devops no I underst no I hope things are clear okay so why devops has evolved devops has evolved for this very own reason that is to improve the process of delivery so that is something that I am explaining I mean that I explained you in the second slide okay so devops is a culture why is it a culture because unlike the previous uh times unlike 10 years old there were no Mal there there are no multiple teams now so previously there are multiple teams but now there is only one single team so that's why it has to be a culture or it has to be a you know a way of working because as a devops internet tomorrow there might be a new tool that improves your efficiency so you have to adapt to it or you know you might have to uh pivot or take a change in the process of your working and if it improves your efficiency somebody comes like your CTO game and said that okay we are using this Tool uh if you introduce the other tool that we are not using our improv the our efficiency will be improved as a devops engineer you have to have that mindset to adopt to the new tool or as a devops engineer it's a culture that you are building in your organization so that's why we say devops is a culture that improves the delivery process by following all of these things that I have explained by adopting to the automation by ensuring that there is a quality in your application by ensuring that you are continuously monitoring in such cases like you know there can be a failure or there can be something that is not working as expected so that's why you also have to have monitoring and finally you have to continuously test your application by involving all of these things you improve the efficiency of your organization and that is the role of devops engineer I hope the things are clear so now you understood what is devops why devops right now the next thing that we would learn here is how to introduce yourself as a devops engineer so I've seen many people fail here okay because even when I'm taking some interviews uh when I ask people like how like you know tell me about your uh day to day activities or you know uh introduce about yourself what happens is people uh tend to not explain everything or you know uh sometimes people have an opinion that uh I should only be explaining about myself in one or two minutes no there is nothing like that okay whenever let's say you have something unique or you know you feel that you need more time like not in one to one to two minutes you can explain about yourself take your own time that's fine if you want to explain about yourself or if you want to explain what you are doing in a day-to-day uh basis that's totally fine if you take more time while explaining yourself but to explain or to introduce about yourself what you can simply say is that you know I am working as a devops engineer that is for sure from past any number of years that you want to put like you know let's say you want to you are working as a devops engineer from past four to five years because you know you cannot say that I am working as a devops engineer from last 10 years because devops itself was around like you know uh from last 10 years and it has been very popular from last seven to eight years so like if you say our organization has adopted devops 10 years back then interviewer will lose you at that point itself because that's not the truth so what you have to say is I I am a devops engineer I have overall five to six years of experience four to five years of experience in devops and before to that I was working as a system admin or people say that I was working as a build and release engineer or people also say that I was working as a server administrator it is up to you okay and even if you are coming from other backgrounds like you might be a Java developer or you might be a python developer or you might be a simply automation engineer you can also say all of those things okay but always try to put your previous experience also in place if you are a fresher you don't have to worry about all of these things you can simply say you know I just started working as a devops engineer I was passionate about learning devops or all of those things but if you are a seasoned uh software engineer or if you have experience in devops oh sorry if you have previous experience always mention your current experience in devops and also try to put whatever you're doing previously because that is really important for somebody to understand from which background are you coming into devops okay like if you are a system administrator and if you are just switching your career to devops as an interviewer I can correlate and understand okay he has some experience in servers and uh sorry servers and administrating servers so okay he can be of this use in my current organization like if you are if I am interviewing a person and if he has past experience in system administrator I can I can think of it like okay because we are using AWS his experience might be useful for me in administrating this AWS servers or he can help me in automation or migrating my existing uh physical infrastructure to uh on-prem sorry Cloud infrastructure so I can think of all these things as an interviewer so that's why whenever you are explaining someone if you have experience in something before devops always try to put that and don't try don't try to try to lie saying that I have 10 years of experience and devops that is not truth nobody is going to buy that argument from you okay so once you explain this what you are currently also I mean I have four to five years of experience in devops I'm previously coming from experience of system administrator or build and release engineer or if you just have experience in devops uh for past two to three years you can also say that after that explain about your roles and responsibilities so in the current organization I take care of automation okay you can say of these things I take care of automation I ensure that there is a quality uh that I'm maintaining for the applications I ensure that I have set up continuous monitoring and I have automated the testing process into the devops lifecycle so this is how you introduce yourself and if people are looking at uh the tools and Technologies like let's say you want to include the tools and Technologies uh before even before your introduction I mean even before you uh Deep dive into your interview like during the introduction phase people also uh talk about the tools and Technologies I don't uh really suggest that but if you want to talk about the tools and Technologies or the interviewer is asking you about the tools and Technologies you can say that you are working on the uh platforms like you know for the CI CD I'm using GitHub actions or for the deployment of application onto uh container orchestration I'm using kubernetes or you are using configuration management using ansible infrastructure automation using terraform you can explain about all of those things but for this class because I have many audience who are just learning devops today and today is the day one right so I don't want wanted to complicate and you know explain the devops definition or the introduction of devops using all of those aspects so for today you can just say these things like explain what is your current experience in devops explain where what is the background that you are coming from and then include these key factors that is the four pillars of devops that we just talked about automation quality monitoring and testing so this is how you introduce yourself in a devops job role okay so for today's class I think this is more than enough now what you will do is because you understood what is devops y develops just Google around try to understand what is devops like you know you get hundreds of blogs uh most of the times you know uh these are the things that would be repeated like the poor four pillars or options the five pillars of devops so because you completed watching this video now if you Google around you might find some new things like you know you can explore those new things uh but if you have any questions you can also post them in the comment section so that you know uh let's say you found something new in devops in the definition of devops you can put that in the comment section saying that okay Abhishek I Googled around I found this thing how do you think about this should also include this in my uh introduction we can discuss that and I can also if I find that interesting I can also talk about that in my uh next video okay so I hope you found this video uh useful so one thing that I would request everybody is we are going to do this like 40 days of devops classes from day one to day 40. I've already explained in my previous videos what is the course curriculum what is the syllabus and what are we going to talk day by day basis so if you haven't watched the previous videos go to those videos watch them first so that you understand what is the way of explanation or what is the process that I'm going to follow in this 35 40 or 45 days of devops course and finally don't forget to subscribe my channel if you haven't subscribed and if you have any friends who are looking to learn devops please try to share this video with larger audience because that is our end goal the whole purpose of keeping this course free is somebody who is interested in devops will be benefited out of this free devops course if they don't want to uh if they don't if they cannot afford to pay uh for a paid course so it should be useful for everybody to learn devops okay so I hope you like the video this is day one and tomorrow we'll come up with day two where we'll be talking about software development life cycle and what is the role of devops in software developer lifecycle and also we'll do a precap of what we learned today so that you will be in async right because before we go to day two we'll just quickly recap what we have learned uh on day two uh sorry on day one and uh if there were any questions on the comment section that I uh find or that I feel that I have to take up so that everybody will be benefited by picking up that question I'll also do that okay so I'll see in the next video thank you so much take care bye


In this video, the speaker discusses eight common mistakes people make when learning DevOps and Cloud technologies, emphasizing that these errors can lead to wasted time and money. The first mistake is focusing too much on specific tools rather than understanding the underlying concepts, which are more enduring and applicable across different platforms. The second mistake involves learning tools in isolation without understanding how they integrate into a complete system, which is crucial for practical application in real-world scenarios. The speaker also highlights the importance of building projects early in the learning process, as theoretical knowledge alone is insufficient for mastering these technologies. Lastly, he warns against the trap of pursuing certifications without practical experience, suggesting that hands-on projects are essential for truly grasping DevOps principles.
I need to tell you something that might be uncomfortable to hear. Most people learning DevOps and Cloud are making the same eight mistakes. And these mistakes are costing them years of time and even thousands of dollars. And honestly, I have made many of these mistakes myself when I was starting out.
And then I've seen it happen throughout my career with colleagues, with engineers I've mentored, and yes, with our boot camp students before they joined our program. The pattern is always the same. But the good news is every single one of these mistakes is completely avoidable if you know what to look for. So, in this video, I'm going to walk you through the eight biggest mistakes that people make when learning DevOps and Cloud.
So, let's dive in. Mistake number one, focusing on tools instead of concepts. Here's the first mistake and it's probably the most common one I see. People obsess over tools.
Docker, Kubernetes, Terraform, Jenkins, GitHub Actions, Argo CD, Flux. Every month there is a new tool. Every week someone is hyping the next shiny thing. And people panic.
Should I learn this new tool? Am I falling behind? Everyone is talking about this specific tool on LinkedIn. So, should I learn it?
Should I jump on it? And I was the same. But this is what I learned over time. Tools come and go.
Concepts, however, stay forever. Take CI/CD tools as an example. Jenkins, GitLab CI, GitHub Actions, Circle CI, Azure DevOps, Argo CD, and there are so many more options now. If you only learned one tool, memorizing the specific syntax, the specific configuration, became really good at it, you would panic when you join a company and find out they use a different one.
But if you understood the concepts of CI/CD, what a pipeline is, what stages and jobs are, how artifacts flow through the pipeline, how to handle secrets, how to integrate with Docker registries, AWS and Kubernetes, and mostly why all those concepts are important and what do they help you solve. If you have the knowledge of concepts, you can pick up any CI/CD tool in just a few days. Same with infrastructure as code. If you only memorize Terraform syntax, what happens when you join a company using Pulumi or when they're using CloudFormation?
But if you understand the concepts of declarative infrastructure, state management, you can work with any infrastructure as code tool. I hear this one constantly. I learned AWS, but my new job uses Azure. Do I need to start over?
Well, the answer is no. Cloud concepts are the same. Compute is compute, storage is storage, network is networking on any cloud provider. It's just that the buttons are in different places and they are called different names, but the underlying concepts are identical.
So here is what I finally understood. Stop chasing tools and start understanding concepts. Learn what a CI/CD pipeline actually is before you worry about Jenkins or GitLab CI or GitHub Actions. Learn the concept of infrastructure as code before you stress about whether to learn Terraform or Pulumi because once you understand the concepts, you can switch tools easily when needed and you are not intimidated by new tools appearing.
Plus, you can have intelligent conversations about architecture because you're not tied to tools, you understand the bigger picture. And finally, you can make decisions about which tool fits which use case. And here's the biggest part. Understanding concepts makes learning the tools much faster.
Mistake number two, learning DevOps tools in isolation. Now, even if you do focus on concepts, there is another related mistake that people make. They learn Docker, then they learn Kubernetes, then they learn infrastructure as code, then they learn CI/CD. Maybe even understand concepts behind each tool, but they never learn how these tools or concepts work together.
And I say this all the time. Someone will message me saying, "I know Docker and Kubernetes and Jenkins, but I'm not getting job offers. What am I doing wrong?" And when I dig deeper, I usually find out they can run Docker commands, they can deploy to Kubernetes, but they have no idea how to build an actual end-to-end pipeline that takes code from Git repository, builds a Docker image, pushes it to registry, deploys it to Kubernetes. They know the individual pieces, but they cannot connect them properly.
Why they don't get job offers? Because knowing tools in isolation does not make you valuable to companies. Companies don't need someone who knows Jenkins. They need someone who can build an end-to-end CI/CD pipeline that integrates with Docker, deploys to Kubernetes, uses Terraform for infrastructure, includes proper monitoring.
So, they need someone who can connect the dots. And honestly, I made this mistake early in my career as well. I learned each tool separately. I thought, "Okay, I know Jenkins now, so that's a check.
I know Docker now, check. Let me learn Kubernetes so that I can check that one off." But when I got to my first DevOps project, I realized that knowing them separately meant nothing. I had to learn how they fit together under pressure on the job, which was stressful and inefficient. Think of it like this.
Learning tools in isolation is like having all the ingredients for a cake, but not knowing the recipe. You have flour, eggs, sugar, but you can't bake. So, here's my advice on how to avoid this mistake. Every time you learn a new concept and tool, immediately integrate it with what you already know.
Don't just learn Docker, build a Dockerized application and deploy it with CCD pipeline. Don't just learn Terraform, use it to provision infrastructure, a real proper infrastructure on AWS. Then deploy your Kubernetes cluster on that infrastructure. Don't just learn monitoring, integrate Prometheus and Grafana into your existing projects based on real use case.
And this is how I eventually learned to think like a DevOps engineer, not by mastering individual tools, but by understanding how they work together so that I could solve actual use cases and real problems, because that's what companies actually need. Now, back to the next mistake, which is not doing projects or starting too late. So, this one is related to the second one, but it's even worse. People consume content.
They watch tutorials. They read books, blog articles. They take courses, but they never actually build anything. And again, I was guilty of this one as well.
When I was starting out, I made this exact mistake. I spent literally months watching tutorials, taking notes. I told myself, I need to learn bit more before I start building. I'm not ready yet.
And I waited way too long to actually start building projects. And you know what happened? After months of this, when I finally started building, I realized how much I didn't actually understand. All this theory I consumed, it didn't stick because I never applied it.
Because theory without practice is almost useless. You can watch 100 hours of Kubernetes tutorials, but if you never actually set up a cluster, configure services, deploy applications, and troubleshoot the issues, you will never really understand Kubernetes. Like during interviews, the hiring managers can immediately tell if you've just watched videos or you've actually done something. And I've been on both sides of the table as an interviewer myself.
When I hire DevOps engineers, I can spot someone who only has theoretical knowledge within the first 5 minutes because they can't answer questions like, "How would you troubleshoot this?" or "Why would you choose this approach over that one?" And this is what I learned the hard way. You should start building projects early, not after you finish learning everything and feel ready and confident. So, do not wait until you know enough because you will never feel like you know enough to get started building things because building things is how you get confidence and how you build the knowledge. So, when I finally figured this out, I had this one personal project that I kept building on for months.
So, every new tool I learned, I integrated it into that same project instead of starting from scratch. And that's exactly how I really understood how everything worked together. And that's actually why I built the entire DevOps boot camp, which is our most popular DevOps training program ever, around end-to-end projects because I want students to get this great overview of how everything fits together and avoid all these knowledge gaps. I didn't want anyone else to waste months like I did learning theory without applying it because the fastest way to learn is by doing, not by watching, not by reading, but actually building.
And when you start building real projects, one of the first practical challenges that you'll run into is how do I securely access and connect to my infrastructure? I have been there and this This exactly what Tailscale, the sponsor of this video, solves. Tailscale is a modern zero trust connectivity platform that uses secure peer-to-peer connections and identity-based access to make it very easy to connect from and to any device or service anywhere. So, your CI/CD pipeline can securely reach private services like databases without complex networking or managing secrets.
So, you don't need self-hosted runners just for access. Your team can SSH into servers without managing keys, and your Kubernetes clusters can connect across environments. No open ports, no firewall rules. So, make sure to check out Tailscale.
The personal plan with up to 100 devices is always free, and if you want to bring Tailscale to work, you can use code Nana for three free month on any paid plan. All the links and information is going to be in the video description. So, check it out below. Mistake number four is chasing only certifications.
Now, this one will surely resonate with many of you. So, let me tell you about the certification trap. Israel, one of our DevOps graduates, had made this exact mistake. After finishing Udemy courses and not getting interviews, he thought, "Maybe I need a certification." So, he went for certified Kubernetes administrator, so CKA certification.
He studied, he passed the exam on his first try, and then he started applying for jobs again. Still nothing. With no results. Well, he got some interviews, but he wasn't getting past the interviews.
And this is when he realized something important. I want you to hear this directly from him. The first thing I would tell anybody is do not chase after certifications at the first time. Because chasing after certification most times just keep people in the loop, like watching tutorials.
Most of the certification we see out there are just like multiple choice question like Terraform. You just need to click. Even the solution architect by AWS is just like multiple choice question. You need to click A and B.
I would like to advise them to go hands-on, understanding what you are doing, not just chasing certifications because at the end of the day certification is not going to It's not going to get through past the door, right? It can be attractive as it is currently in the market. Your certification is more or less useless if you don't have the skills. So, he hit the nail on the head.
Here's what's happening in the market right now. Companies are caring less and less about what certifications you have collected and more about whether you've actually built something that works. Now, not all certifications are equal. Some actually require you to solve actual problems under time pressure, but most of them they're multiple choice tests that you can literally just memorize and companies know this.
They have seen too many certified engineers who cannot actually do the work. They've interviewed people with impressive certifications who get stuck when they're asked to explain how they would troubleshoot a real problem or how they would build an infrastructure. So, certifications are becoming a baseline, not a differentiator. Now, before you misunderstand me, certifications are not completely useless, okay?
Anna, another graduate from our program, became a golden Cubstronaut. And that's incredibly impressive. She was actually the first person in Switzerland and the first woman in Spain to achieve this. And certifications are great for things like validating your knowledge, getting past HR filters, or showing commitment to learning, but they're terrible as your only strategy.
So, instead, this is the strategy that actually works. Build projects first, get hands-on experience, and then get certified to validate what you already know how to do. So Israel eventually got the certification. But that's not what got him hired.
What got him hired was his ability to have a technical conversation about how systems work together. His ability to explain concepts and answer questions to the hands-on projects that he added to the CV. So his understanding of why you do things a certain way was the major factor. Again, I want you to hear this from him himself.
So I asked him a question during our performance review one day I asked him that, "Why did you decide to hire me? Like what actually stood out from what I said like from other candidates?" I believe that they are This is the United Kingdom. We have different people who are very good. What he told me was that people who applies these days for jobs they're not even qualified.
They don't even know what they are doing. You can see people who doesn't know anything about DevOps just throwing in their CV. The only way for you to actually gauge their experience is to actually have a one-on-one conversation with them. And when he did, most of them don't even know anything.
That I was the only person who was able to not just explain the tools but also explain it conceptually from how they work, the missing pieces, and everything together. My knowledge on how to optimize pipeline, you know, how to set up a Kubernetes cluster, and all of that what actually stood me like what actually differentiated me from other people. Other people just say they use Jenkins to do that but I was able to explain how to optimize Jenkins flow, how to run jobs in parallel, how to have like mono repo stuff which you also said in your boot camp, how to have different microservices having different pipelines and all of that. That was what he told me.
I said, "Wow." You can actually watch the full interview I had with him here if you want to hear his full journey. So basically don't chase certifications thinking they are the golden ticket because they're only one piece of the puzzle, not the entire puzzle. Mistake number five, being cheap with your education. When I moved from Georgia to Austria in my early 20s, I was just starting out.
I had no money and I certainly did not see my time as a precious thing. I was learning programming from YouTube videos trying to save as much money as possible and I thought I was being smart by not spending money on any courses, not even the cheap ones. Now, 12 years later, whenever I want to learn a new skill, I always take a shortcut by learning from an expert so that I can shorten my learning curve and get faster to my goal. Why?
Because I finally learned that you're either paying with time or paying with money. But eventually, you are paying a price in any way. And it doesn't even have to relate to IT. I personally use this principle for every aspect of my life.
For example, last year, I started learning guitar. I could have watched free YouTube tutorials, but instead, I have a guitar teacher coming to my apartment every week because I know from experience that structured guidance gets me to my goal 10 times faster, saves me frustrations, saves me time and makes the process more enjoyable. So, let me be clear up front. It's absolutely possible to learn DevOps for free.
And as you know, at Tech With Nana, we create tons of free tutorials with extremely high quality. So, we put a lot of resources in that and they have helped thousands or sometimes hundreds of thousands of engineers to level up. So, I'm not saying it's impossible, but you need to be aware that it will take you longer, like much longer. Again, speaking from my own experience because here's what happens when you rely only on free scattered content.
You spend 10 months watching scattered tutorials, you get even more confused because different sources teach things differently. You have huge knowledge gaps because free content is never comprehensive and all-encompassing because they just don't go deep enough and you're always missing something. So, you get overwhelmed and sometimes discouraged and you just give up because you're not getting anywhere. Then, you spend another 6 month trying to piece everything together.
You're still confused about how things connect, but this is the worst part. When you get stuck, you have no one to ask and if that could be the most discouraging one. Now, think about it. You're working through a Terraform demo.
You hit an error. You spend 4 hours debugging. You still can't figure it out. You give up and move on, never actually understanding what went wrong.
In a structured program, you have experienced DevOps engineers that support you. When you get stuck, you get unstuck quickly, but importantly, you also learn why something went wrong. You don't waste days being blocked on a simple configuration issue and that's important when you want to move fast, but also keep the motivation for going. Now, I'm not saying don't troubleshoot yourself and try to figure things out on your own.
That's how you actually learn the most and it's an important skill in itself, but at some point, it's better to get help to be able to continue and move on. But, it's not just about having someone to ask when you're stuck. It's also about having fellow learners around you who get it, who are on the same journey as you because learning alone is extremely isolating and I know this because I did this journey for a whole year learning Kubernetes alone. If I had a community back then, people going through the same struggles or people a few steps ahead of me who could help or experienced engineers that I could ask questions to, I would have saved myself so much time and frustration.
Now, let's talk about opportunity cost because it's real and most of us totally ignore it. A software engineer who knows DevOps is more valuable than the one who doesn't. A test engineer who can not only write automated tests, but build infrastructure to run those tests and maintain those systems gets paid more. A sysadmin or a network engineer who understands cloud and infrastructure as code does not get laid off when companies modernize or even shrink their resources.
DevOps and cloud is a premium skill that increases your value automatically regardless of your engineering role. And that means, and we're getting to the calculation here, if you waste 1 year learning inefficiently, basically with no results, you just lost 25 to 35,000 in potential income you could have been earning if you had a acquired those skills sooner, which is logical, right? But there is another cost that people don't think about. The cost of not being confident at your job for another year and building a fear that sometime in the future you may be replaced by AI or another engineer who learned DevOps and added other skills to their knowledge.
And I think this one is even more important than the financial cost. Because what happens is that, let's say you finally land a DevOps job or engineering job with DevOps focus, but you have knowledge gaps. You're not confident. You can't contribute at the level that you should.
You're learning on the job things that you should have learned before. And guess what? I know about this because around 30% of our boot camp students are already working DevOps and cloud engineers. They are actual practitioners, but they feel something is missing and they hate it.
They're employed, but they're not confident. So, they want to learn to fill those knowledge gaps because they can't contribute the way they want to. So, yes, you can learn for free, but count the real cost of that. The higher income you are losing out and the delayed confidence once you get the job.
So, here's my point. Invest in quality education if you can. If you're already employed, use your stable income to speed up your skill development. It is an unfair advantage over others who are being cheap and won't invest in themselves.
And looking back, I have never once regretted investing money in my education and in my skill set. And again, I was cheap myself. So, I have made this mistake more times than I can count. And the thing is, I'm not saying you need to spend $50,000 on a university degree, but if you're serious about changing your career or leveling up and you can afford it, then structured programs are the best way to reach your goals 10 times faster.
I personally always invest in myself and my skills because I've learned that in the long run, it always gives me the highest ROI. Mistake number six, learning only in sandbox environments. Now, this mistake deserves its own section because it's one of the most damaging ones that I see. A lot of people love sandboxes.
I did as well. When I was learning programming, I was using platforms like Codecademy with preconfigured environments. Everything is set up for you. Click here, copy this command, paste it here, boom, it works.
Green check mark, confetti, dopamine hit, next lesson. Repeat the same cycle. And I completed entire courses this way. HTML, CSS, frameworks on JavaScript, module after module.
I thought I was becoming a developer. But guess what happened when I secured my first job as a software engineer. I had no idea about Git. I barely used the terminal.
I didn't know how to install tools with package manager or set up development environment. When someone said clone the repository, I froze. When I needed to debug an error, I didn't really know how to do it. And here's the thing, knowing all this stuff around coding was just expected.
Nobody was going to teach me Git or terminal basics. They assumed that I already knew it as a junior engineer. Because in the real world, these aren't extra skills. They're fundamental skills.
You should know how to use Git as a developer. Long story short, I felt completely unprepared, like an impostor. It felt like I had learned to swim in a kiddie pool and suddenly got thrown into the ocean. And honestly, this experience was so painful for me that it's exactly why I created our IT Fundamentals course to help others avoid the same pain.
Covering all those critical things that I was missing for the first two years while working as a junior developer. Because they somehow get skipped during learning or training. Because people assume you just learn them at work, which you usually don't for a long time. Because the truth is, in those sandbox environments, you're literally just copy-pasting commands that someone else wrote into an environment that someone else configured.
And it feels great during learning. You have no errors, no troubleshooting, no headaches. You're moving fast without any issues. But the question you need to ask yourself is, would you rather experience troubleshooting for the first time during your learning or during your first week on the job?
Because think about it, and with DevOps, this problem is more critical. DevOps is all about infrastructure and integrations. You're connecting cloud platforms, orchestrating containers, automating deployments, configuring security, managing real systems, and dealing with real problems. So, sandbox learning is like being baby-sat through DevOps.
Everything is controlled, nothing ever really goes wrong, nothing breaks, so you're just following instructions almost blindly and intuitively. It's like going to kindergarten when you actually need a university degree. And naturally, it won't give you the confidence that you need to tackle issues in real projects. Because when something breaks at work, and it will break, there is no pre-written command to copy-paste.
There's no sandbox tutorial to follow. It's just you and error message and the problem you need to solve. So, real learning means facing the exact challenges that you at work. And real DevOps is not about what works, it's about fixing things that don't.
And this is exactly how I learned on the job. My first week as a DevOps engineer, I broke things. I had to fix them. I had to read error logs.
I had to troubleshoot. And that's what made me competent. So, you need that experience while learning. And yes, you might spend a few dollars on cloud resources while learning, but that investment pays for itself because when you get to your job, you're not panicking and asking for help because you've already faced this challenging during learning, but without pressure.
Or think about the job interview itself. When they ask you, "Have you actually implemented this?" You won't have to lie because you actually did it on real infrastructure with real challenges and not in sandbox controlled environment. Again, ask yourself, do you want to learn in a safe sandbox where everything always magically works, or do you want to learn on real infrastructure where you'll face the same challenges you will face in your actual job? Because if I could go back, I would always choose the second option.
Yes, it's harder, but it would have prepared me for the reality. Let me ask you this. Have you ever looked at a DevOps roadmap online? You know those big diagrams with boxes for every tool and technology?
They're overwhelming, right? Now, here's the problem with most roadmaps. They tell you what tool to learn, but they don't tell you how much to learn about each tool, why you need to learn it, when to use it, how it connects to other tools, and where to actually learn all of this. So, you look at the roadmap and you see Docker, Kubernetes, Terraform, Jenkins, Prometheus, Grafana, Bash, Python, Git, thousand other technologies, and you think, I need to master all of this and be expert and proficient in all of these tools?
The answer is no, you don't. You need to understand maybe 20% of each tool that covers 80% of real-world use cases. And most importantly, the connections between them, which you don't see on the roadmaps. But, how do you know which 20% that is?
Roadmap also doesn't tell you that. The roadmap says, learn Kubernetes, but a good program says, learn Kubernetes core concepts, pods, services, deployments. Understand how networking works. Learn how to deploy applications.
Then, integrate it with your CI/CD pipeline. Then, add monitoring. And here is a real project where you will use all of these together. Let's go through it step-by-step together.
I'll explain everything while we go. That's how it should work. See the difference? One gives you a list, the other gives you a complete journey with clear milestones and destination.
And look, we create roadmaps as well. You can find them and download from our website. I have roadmap videos on YouTube. So, there's definitely some usefulness to them.
Like they give you a very rough overview, so you know where to even start and how the journey will look like in case you decide to follow it, but it's all on a very high level. So, this is what you need to understand. Don't expect roadmap to teach you DevOps. Don't expect it to tell you how deep to go or how to actually apply each tool on the roadmap.
This final mistake costs people the most opportunities. And most engineers don't even realize they're making it. So, as you can imagine, I experienced the impact of building in public first hand. When I started recording Kubernetes tutorials to document my learnings, despite not looking for anything and without any expectation, I started to receive consulting requests with very high hourly rates daily because my knowledge and experience was made visible.
But you know what? I would rather tell you the story of one of our graduates because I think it relates more with you and it also makes the point that you don't need to become a full-time educator like I am. It works with a much smaller scale as well. So, he was a sysadmin at a mid-size company and went through our DevOps program.
He learned Docker, Kubernetes, CI/CD, the whole stack. Then he went back to work and applied everything. Automated their backup processes, reduced deployment time by 70%, saved them thousands in cloud costs, so became really valuable for the team and the company. His team loved it, his team leader was happy, but nobody above them knew about it.
Not the engineering director, not the VP, not the recruiters who could have offered him better opportunities. So, he was doing excellent work in private. So, I advised him to start posting on LinkedIn. Nothing fancy, just updates on what he was actually implementing at work.
A simple diagram of his CI/CD setup, a decision-making process, a post about Docker networking issue that he just solved. Within 2 weeks, his VP commented on his post, a recruiter from a Fortune 500 reached out to him, and other boot-camp graduates of ours at a different company asked if he was open to opportunities. So, same skills, same work, different visibility. And I know most engineers hate self-promotion.
It feels fake, it feels forced, like you're showing off. And I get it, I felt the same way, but this is how you can think about it. You're not bragging, you are teaching. Like, share the Terraform module that you debugged for 3 hours, or post the monitoring setup that caught a production issue.
Write about the CI/CD mistake that cost you 2 days, because someone else is struggling with the exact same problem right now, and your basic knowledge is gold for someone earlier in their journey. And while you're helping others, you're also building proof of your skills, creating content that recruiters can actually see, differentiating yourself from 100 other DevOps engineers or certified Kubernetes admins, and especially if you are a junior engineer. The job market can be tough. So, if you're not marketing yourself while you're employed, you are kind of setting up yourself to panic apply when the layoffs start.
So, I always strongly advise to start building and learning in public. Now, not when you're desperate. Okay. So, we've covered the eight mistakes in detail.
So, the question is how to avoid all of this. Here's a framework that actually works. First, choose a structured program. If it's a really good one, it will solve almost all these problems for you.
Not scattered YouTube tutorials, including ours, not random Udemy courses, but a comprehensive program that teaches you tools and concepts and how they fit together. With a good program, you should be building end-to-end DevOps processes. And by the end, you should have a portfolio projects that you can showcase. This should be real projects that demonstrate that you can architect and also implement complete systems, not just use individual tools and their syntax.
And the good program will have you learning on real infrastructure, not sandboxes. Yes, it's going to be harder, but that's the point. Now, look. Yes, our DevOps bootcamp is built exactly this way.
Otherwise, I won't have the experience to tell you about all these mistakes because I've literally seen how we've solved these issues for our students. But, that's not the point here. The point is find a program that fits your specific needs and your situation and use it to fast-track your career. Second, get certified strategically, which means build hands-on skills first, then get certified to validate what you already know, not the other way around.
Third, and this one makes huge difference, share your learning journey. Post your projects, write about problems you solved, help others who are one step behind you. As you saw, I made many of these mistakes myself when I was starting out. So did Israel and Anna and hundreds of our students.
But we all corrected course and that made all the difference. And that's why I wanted to share this with you so that you can avoid wasting months, sometimes years, going in circles because companies are really desperate for qualified engineers right now. And by avoiding these eight mistakes, you're already ahead of most people trying to break into this field. Now, if you found this advice valuable, then please share it with someone who's also learning DevOps because they need to hear this as well.
And as always, thanks for watching and I'll see you in my next video.


The video emphasizes that the biggest mistake in learning DevOps is treating it as a checklist of tools rather than understanding it as a mindset focused on the real-world lifecycle of software. It advocates starting with foundational knowledge of operating systems and basic commands before diving into tools like Docker and Kubernetes, which should feel like earned shortcuts rather than intimidating obstacles. The speaker suggests a hands-on approach by developing a simple application, deploying it, and intentionally breaking it to learn about reliability and recovery. The importance of automation in deployments through CI/CD tools is highlighted, alongside the necessity of observability for understanding system performance post-deployment. Finally, the video encourages avoiding overengineering and suggests using Boot.dev for practical, project-based learning in DevOps and backend development.
The biggest mistake people still make when trying to learn DevOps is thinking it's a checklist of tools instead of a way of thinking about how software actually lives in the real world. DevOps is not Docker plus Kubernetes plus some cloud provider logos on your resume. DevOps is the ability to take a change, any change, and reliably move it from a developer's laptop into production while understanding what can break, how you'll notice it, and how you'll recover when it does. Once you internalize that, everything else starts to make sense because DevOps stops being abstract and starts being very practical.
That's why the smartest place to start isn't with flashy tools, but with systems, real systems, Linux processes, memory, networking, files, ports, DNS, and what actually happens when something crashes. You should be comfortable with commands like PS, top, netstat, ls, off, and journalctl, and understand why a service can't bind to port 80 or why a process gets killed by the OOM killer. If you skip this, Kubernetes feels like black magic instead of what it really is. A very opinionated process manager built on top of Linux primitives.
When you understand the operating system, tools like Docker, SystemD, and Kubernetes stop being scary and start feeling like shortcuts you actually earned. After that, the best next step is to follow the life of one single boring application all the way through. Write a tiny app, put it in GitHub or GitLab, containerize it with Docker, and run it locally. Then deploy it somewhere simple like a single VM or a small Kubernetes cluster using something like K3S.
Break it on purpose. Kill the container. Misconfigure the database connection. Limit memory until it crashes.
Watch the logs with Docker logs or Cubectl logs. DevOps lives in that loop. Tools like Docker Compose, SQite or Postgress and even a basic reverse proxy like Engine X teach you more in this phase than any polished demo ever could. Once you're doing that, CI and CD stop being buzzwords and become necessities.
If deployments depend on someone remembering steps, you don't have reliability, you have hope. This is where tools like GitHub actions, GitLab CI or Jenkins come in. Tests run automatically. Docker images are built the same way every time.
Deployments are triggered by commits instead of humans. Whether you're pushing to a VM with SSH or to Kubernetes with Helm or Argo CD, the point is the same. Consistency under pressure. When production is on fire, you want boring, predictable pipelines, not heroics.
Cloud infrastructure fits naturally after that. AWS, GCP, and yes, even Azure are just rented computers with APIs. EC2, Compute Engine, and virtual machines are still servers. S3, GCS, and blob storage are still object stores.
Infrastructure as code with tools like Terraform or cloud formation matters because it lets you define reality in code. When something breaks, you can inspect your Terraform state instead of asking around in Slack. Small setups using a load balancer, a couple of instances, and managed databases like RDS or CloudSQL will teach you far more than overengineered microser diagrams. But at some point, you realize deploying software isn't even the hard part.
Knowing what's happening after it's deployed is that's where observability comes in. Logs, metrics, and traces are how you understand reality. Tools like Prometheus for metrics, Graphfana for dashboards, Loki or Elastic Search for logs, and Open Telemetry for tracing turn vague feelings into concrete signals. When latency spikes, you should know where to look first.
When error rates climb, you should know whether it's the app, the database, or the network. Modern DevOps assumes failure will happen and optimizes for fast detection and recovery, not perfection. Another underrated DevOps skill is learning how to say no. Not every app needs Kubernetes.
Not every system needs CFKA service meshes or 10 microservices. Sometimes a single container on a VM behind enginex is the correct solution. Overengineering is often a sign of insecurity, not maturity. Good DevOps is about choosing the simplest architecture that can survive real usage and only adding tools like Kubernetes or Reddus when they solve an actual problem.
This mindset reduces outages and makes systems easier to reason about. The real learning acceleration happens when you stop chasing new tools and start repeating the same workflows under slightly different conditions. And if you are looking for a great place to level up your DevOps or backend skills in general, then you need to check out today's sponsor, boot.dev. Boot.dev teaches DevOps and backend from the ground up in Python, SQL, Go, and TypeScript.
But the key difference is that you're actually doing the work, not just watching someone else do it. You're building real projects, writing real code, and solving the same kinds of problems you'd face on the job. I've been using boot.dev a dev myself and what keeps me coming back is that it stays fun without becoming shallow. You earn XP, level up, complete quests, and yes, occasionally fight bosses, but it's all built around genuinely solid fundamentals.
And whenever you get stuck, boots, their bare wizard AI tutor jumps in with contextaware hints and follow-up questions instead of just dumping the answer and moving on. They also recently launched training grounds, which lets you grind infinite custom challenges so you can really lock concepts in before moving forward. All the content is free to read and watch, and a membership unlocks the interactive coding, AI help, and progress tracking. If you want to check it out, use my link in the description and code codehead for 25% off your first year.
This was Codehead with yet another tech rant. If you enjoyed it, please leave a like and subscribe. Lights up.
In the first part of the DevOps master class, the instructor introduces the series, emphasizing its relaxed format and the goal of transferring knowledge on DevOps concepts. The class will cover foundational topics such as project management frameworks, mastering Git, and the importance of continuous integration and delivery. Key themes include the collaboration between development and operations teams, the significance of delivering value to customers, and the need for effective monitoring and security practices. The instructor encourages viewers to engage with the content through comments and subscriptions, and highlights that while the course will focus on Microsoft Azure, the principles discussed are applicable across various platforms. Overall, the master class aims to provide a comprehensive understanding of DevOps as a methodology rather than just a set of tools.
Hi everyone. So, welcome to part one of my DevOps master class. I put out a poll on my channel a little while ago saying, "Hey, what should I work on next as kind of a big project?" And a DevOps master class was kind of the most popular by far topic, so that's what we're doing. Um this does kind of go I have other master classes on my channel like the PowerShell master class and the Azure master class.
This will follow the same format. I want it to be kind of relaxed. There's a playlist where I'll have all the videos. I'll try and add one a week.
Sometimes there might be a bigger gap if I have another topic I will kind of want to put in the middle. There's a GitHub repo for the slides, um the whiteboard, the code that goes with it. But I'm really just trying to transfer the knowledge over. There's a lot of work that goes into these, so please if it is useful, give it a like, subscribe, comment, and share, and hit the bell icon.
So, you'll be notified when I add new kind of lessons to this when I maybe add supplementary or I change something. So, my goal for this now the structure I have some PowerPoint, but it will vary week by week. Like I'll do a lot of whiteboarding mainly, but when I'm talking about maybe a certain technology like next week I'm going to cover really a master Git. That's really going to be all demo.
So, there won't be much whiteboarding it I think be no PowerPoint. We'll just be demoing for the entire time. So, it's going to vary. But what I want to really focus on is these key topics for DevOps.
Now, obviously this is a recording, but I do kind of check the comments of my YouTube channel. I do not look at LinkedIn. I do not look at Twitter. None of those things work if you tag me.
Comment in the applicable video. So, we're going to really focus on sort of DevOps foundations. So, that's this lesson. So, we're going to go kind of quickly over a lot of different areas.
We're going to spend a bit more time on kind of some of the frameworks around the project management side cuz there's not other lessons on those. But really just introduce the all really the goal behind DevOps. And then preliminary plans. Next week will be mastering Git.
So, huge amounts of detail on becoming a master of Git. This applies to everyone and that's DevOps in general. This is not just developers, it's not just operations, it's not just architects. Everyone should kind of understand DevOps.
It really is this universal thing right now. And then I actually want to look at some of the tooling, um Azure DevOps, GitHub, how they differ, where they're going, what parts we might want to use. Think about continuous integration, continuous delivery, continuous deployment, how pipelines play into that, why it's important. So, I want to dive into those concepts.
Thinking about handling secrets is actually a really important thing. We will talk about don't have secrets in your code. Don't put them anywhere. So, where do we put them?
How do we handle secrets? We're going to dive into that. Thinking about infrastructure as code and have a really critical element to everything we're going to do. Key to the pipelines this declarative this is what I want it to be.
Let's make sure it really is. Looking at containers, Kubernetes, images, image builder, repositories, registries, all of those types of things. Monitoring. Monitoring is huge to DevOps.
Not just that traditional monitoring we think of for how busy is our server. Monitoring what are the interactions with our service? Monitoring what's the user behavior? What path do they take?
What is their experience? And then GitOps. Um Um Um and then security. All of these important topics and this is just my preliminary thinking as I start to plan this out.
I may absolutely add other things in here. I might move things around. As I'm going to talk about the playlist is really the source of truth. So, as technology changes, I will update modules over time.
I might completely replace them. I might add ones in. I might add supplementary videos. So, So, So, I will reference and link to deeper dives in certain areas.
Like I might have a whole video just on Key Vault. Well, we're going to reference that. So, make sure to subscribe. Hit the notification.
You'll see those things. Use the playlist. Now, the it's in the description as is the GitHub repo. Right now it's going to be empty.
The playlist will have all of the key videos for the DevOps master class. And the GitHub will have the whiteboard, the PowerPoint, the code, links to the videos, links to the additional learning. So, they're going to be your sources of truth. Now, the question always comes up whenever I do the kind of any video or class, is this specific to some kind of certification?
The answer is no. I'm not geared towards any particular cert. My focus is just to transfer the knowledge, make you digest the knowledge. However, it's definitely going to help with the Azure DevOps engineer.
I obviously do come from an Azure background, those that know my content. So, I'm going to focus more on the Microsoft side of the house. So, when I demo deployments, it will be to Azure. Now, the same concepts would apply to Google Cloud or AWS or on premises.
I'm going to show GitHub, but the same thing would work if I'm using a different Git repository. But certainly it will help with that DevOps engineer. And so, what I'll end each module with is kind of questions go ask in the comments below. But with that, I want to get to the first lesson, foundation.
And the whole goal is really well, what is DevOps? What are some of the key concepts we think about? And how at the end of this session you could start to get ready thinking about things you could do now that will set you in good stead for the future lessons. Key part here, DevOps is not a product.
Now, that's confusing because yes, there is a product you can buy called Azure DevOps. But it's really much more than that. DevOps is a tool. Yes, it will help.
I can use as much or as little as it as I want to. I don't have to use any of it. DevOps is more than just a single product. And I think it's summed up very well by Donovan Brown.
He's kind of one of the lead evangelists around DevOps at Microsoft. And he kind of come up with this idea of what it is. So, it's the union of people, process, and products to enable continuous delivery of value to our end users. Now, the keyword value.
Everything we're going to do around the DevOps is about delivering value for the business to our customers. And something that really sets the whole idea of DevOps apart from maybe other methodologies we've used in the past is this idea of continuous delivery. It's not these huge 6-month or 1-year product projects. It's these continual smaller increments of value that build on the previous increment.
That's really what's going to kind of set this apart. Okay, so we know it's not a product. Why are we worrying? Why are we thinking about what is DevOps?
What does it do? So, before DevOps, we had the business. Now, our company is really focused around it's performing a certain business. And no matter what that business is, we want to deliver value to our customers.
It doesn't matter what that type of business is. Fundamentally, we want to get value to our customers. That's how a company differentiates itself from its competitors. What is the value we can bring?
Now, these customers could actually be employees. It might be an internal service. It could be external people. Could be partners.
But it's all about the value. So, if I think about this for a second, um there's some important things that really kind of gel together. Now, I can think about the two other teams. We have kind of a business owner, product owner.
We have developers. Developers want to create new stuff. That's really how they're gold, how they're paid. How much new stuff can you get out there?
And then we have IT operations. They are given the code by the developer to put into production. And their goal is to keep things running, to keep things stable, to ensure that continual availability of the value. So, I think about that for 1 second.
Let's just compare those things. So, I can think about, okay, what I have at the top is the idea of well, here it's it's the business. So, I can go, okay. So, I have the business whose key focus, their guiding star, is to deliver value.
Perfect. Then we have the idea that, okay, well now we have over here the developers. And their shining star, their goal, is to really introduce change. That's probably how they're gold, how they're rewarded.
Okay? Over here, we have kind of operations. And their kind of guiding star is stability. i.e.
no change. And you can start to see a problem kind of straight away. You have these conflicting goals that are generally just going to put them in conflict straight away. Developers want to put in change.
Hey, we're gold on how many new things we can do. do. do. Operations are gold on keeping things running, making sure it's stable.
They they don't like each other. With operations doesn't like developers, you keep trying to change stuff. Developers, are you impeding our ability to change and do fantastic new things? Now, additionally, when I think about this, the motivations were very different.
Because the developers are rewarded on change, operations are motivated on keeping the lights on. Also, the developers for the most part, we can think about well, they just create the code and pass it over. If it gets into production and doesn't run very well, eh, eh, eh, they they don't really have that big a deal. Yes, they have to fix it at some point, but they're not really on the hook.
Additionally, we can think about those projects we have over here. The projects actually tend to be very long. See, if I think about the business, kind of have some set of kind of requirements that maybe change over time, but they have the requirements to kind of gather at the start. And then we have this huge long-running project.
This is a long time. And then at the end of that long time, they actually get a delivery. And they don't really interact at any point in between. So, hey, we get the requirements from the business.
Okay. And then there's this huge long project. It takes 6 months. If the customer's requirements change at some point, there's no provision for that.
I can't go back and get that. And if at the end what's delivered is wrong, tough. There's really not a lot we can do. The other thing about traditionally our projects, we think about this very monolithic application.
It's very tightly coupled together. If I try and change one piece, I have to make sure I go and I test all the other pieces as well. I can't really just change easily some item because of this very tight coupling calling I need to know what the schema is that it's using internally cuz I'm accessing that as well. So, if you change that, I need to know and I need to change.
It really prohibits the ability to change. So, it slows everything down. If I change one thing, there'd be this huge cascading set of changes I'd have to make to a whole bunch of other things. So, it really wasn't a great place to be.
Okay. So, the goal, what we're trying to get to, to, to, as the name DevOps implies, it's really about trying to bring the people together. We want to try and get the operations, get the developers to better collaborate together. Now, obviously, you're still going to have individual teams.
There's still going to be, for example, um a network specialist team, a security team. But for the general kind of workings, what we want to try and do is really unite. We want kind of bring things together. So, the developers are invested in the quality of the code.
They're they're on the hook for that as well. When we think about this new cadence of hey, we're going to deliver things quicker, it doesn't work if we've got these very isolated teams who still have these very conflicting goals. We want a shared success criteria. We want to deliver the value.
We understand what the value is. The developers are involved in the complete flow. Even security. Yes, we're going to have a security team.
You'll often hear about this thing called shifting left. The idea that instead of waiting till something goes into production live, and then we look at how secure it is by doing pen penetration testing or whatever, we introduce security much, much earlier. Hey, as soon as we do that commit into some repository, there's some scans going on. As soon as we build a container image, there's scans going on.
What are its dependencies? Maybe we we run that thing. We issue pull requests to say, "Hey, look, we noticed you're using this dependency, there's issues with that. We recommend you take a dependency on this instead where that is fixed." So, there's this whole idea of really building things in, unifying it earlier and earlier.
Additionally, we can really think about there's going to be this idea around more self-deployment. If we're going to do this more frequent delivery, it really doesn't work where hey, okay, I've written this thing. Okay, now go and deploy this to this small test environment. Let's check it still works.
There's going to be this self-serve automated deployments. But when we do that, we still have requirements. As a company, I still have requirements. There might be regulatory requirements, where I can deploy, what sort of replication I need, um what backups I have.
So, we have a governance. Who can do what? Um how much are you spending? Budgets.
There's still all those things that need to be there. When I think about the teams, what we really want to think about as much as possible is they are vertically structured around a certain skill set, a certain discipline that's going to help scale. I.e. a team around each element of the solution.
Maybe it's the shopping cart team. Um maybe there's some other element, but you want to align them as opposed to just a team of skilled data people, of writing Java people. That makes it harder to collaborate. We're still going to have individual skills, but as a team, we want to be really focused on being able to deliver kind of that set of value.
Okay. So, So, So, when we think about bringing all these different things together, well, it's going to require some new processes. Now, that is going to mean I require proper tooling. Like, we're probably not going to be able to use the same tooling we've used in the past because hey, we we're doing things in a new way.
And I think about, okay, well, I want this new continuous cycle. I want to ensure this continued delivery of value. That's going to do a lot of different things for us. One of the biggest ones, there's not going to be this huge gap anymore between the customer, either the app owner, the product owner, and seeing a result.
So, there's this huge gulf between where they can provide input. Instead, we want this continuous delivery. So, I can think about, well, to that great big horrible long project, I can instead think about a cycle. Now, the exact steps may differ, but I can think about, well, we're going to plan and track.
So, obviously, at this point here, requirements can come in. Then obviously, we have to develop. So, we're going to create something. It doesn't have to even be code.
It could be new templates to deploy infrastructure. Maybe it's a resizing exercise. Then maybe there's something I need to build. Hey, some maybe final template, do something there.
I'm definitely going to want to always do testing kind of coming into whatever we're doing. I'll have some kind of release. So, I've tested something. Now, I'm going to build a release.
Maybe it's a container image. Um Um Um maybe it's a new configuration file, it's get ops, but there's some kind of release. Then I'm going to deploy that thing. Once it's deployed, well, it's then actually going to be operated.
So, it it still has to have operation tasks running. And then what I need to do is kind of monitor and learn. That's a huge piece. And then that learning, that monitoring goes back in to the planning and the tracking for the next cycle.
So, what you kind of get in here is this idea of continuous improvement. I'm continually improving. I'm continually learning. I've got this cycle.
So, each cycle is giving me small incremental value. This is huge. That idea that I'm just constantly iterating and adding in value, but in what are fairly small steps. So, I can think about this whole loop.
This whole loop, so, I think about a loop time, I want this fairly short. Because this kind of equals my speed to react. Cuz kind of once I've started a loop, I'm kind of invested in what I'm doing. If some new requirements came in, it's very hard to adjust in the loop.
So, I don't want these loops to take huge amounts of time. So, we typically think kind of a few weeks it should take to get through a loop. Cuz then if hey, some new requirements comes in, it's not the end of the world. The loop only takes a couple of weeks.
Then we can get back in, we can get new things actually coming. So, So, So, it's a continuous cycle to actually ensure that continued delivery of value. But we say value, what do you work on? That word value can mean different things.
And what I really care about is what is valuable to the end user. I.e. the the the final customer of whatever this solution is. Maybe it's what is causing the most pain.
That is the most value. And if we think about that and all those different things, how do we know those things? Well, it's that monitoring and learning. And we say monitor is not just monitoring the CPU usage or the IOPS of a system.
We still do that. We need to make sure we're sized correctly. It's monitoring the user behavior. What paths are they taking?
What are they clicking? Where do they give up? I get that piece of information, that telemetry, that helps me adjust and create the right solution and know where I am focusing on. Also, the human interactions.
I might want to get feedback from the customer. What do you like? What do you don't like? So, there's a whole set of extra tooling.
So, when I think about this plan and track, what I'm really focusing on where is is is most value. That's the key part. I'm going to have a whole list of things that I want to do. I'm going to have a product backlog and we'll talk about this.
But the way I decide what's next to work on, no matter what my methodology, it's generally going to be what's going to give me the most value. I'm a business. I want to differentiate myself. I want to win.
I want to be better than my competition. I need to make sure that I'm focusing on the right things. If we're not focusing on the right things, then really, what's the point in that? So, you want to make sure we're really understanding what is the most value.
So, we need good information coming in to make sure we we know what is the right thing. Now, there's going to be a shift in application architecture and hosting most likely as well. So, remember before we had that big monolithic application? Well, that doesn't lend itself well to this continual improvement that we really want to do.
I I I don't really like this. That is very hard for me to continually be improving on. That that's hard to focus. It's hard to how to change a small thing to bring some small incremental value and not break a hundred other things.
So, what I think about moving to is what we want to get to is the idea of kind of these microservices. And the idea of we have this loose coupling. So, instead of this big block, I have different services that sure, there's going to be requirements and they're going to be communicating, but you'll hear things about like REST, communicating over URLs using common get and port. Very, very common ways to communicate.
I can expose those. It's a standard way for different components to talk, but they don't need to know anything about internal structures or schemas. I can completely change the internals of this part. None of these need to know.
They're interacting via a loose coupling. It doesn't matter. I can now do what I want in here and as long as that kind of fairly loose way of calling remains consistent, nothing else needs to know. So, I don't want different components to care about the structures and internals of what other things are using.
Now, also, most likely there's going to be shifts. As I start going to things like microservices, over here, I probably focused a lot on maybe virtual machines. That's super common. Over here, I'm going to start focusing on things like containers.
And then I'll have an orchestrator like Kubernetes. The benefit of containers I can spin them up and down super, super quickly. I can create a container sub-second. Does its job, it can go away.
I can respond to changes super, super quickly. I'm not wasting resources by having all of these virtual machines maybe not doing that much. There's less OS for me to manage and that's another key part. I'm trying to get away from things that don't bring value.
We're going to keep saying the word over and over again. Value, value. We want to do stuff that brings value to our company. Patching an operating system, worrying about antivirus and its firewall and its config is not bringing any value to our company.
Making changes to our products and giving new functionality brings value. So, the less management and a sort of um ownership of things that I can give up that don't bring value, the better. I want to focus on my app and my code. So, uh things like containers, things like serverless.
Hey, with serverless, there's some code I have, it's triggered by something. Maybe it's an event, maybe it's a schedule, maybe it's a webhook, whatever that might be, it just gets triggered. So, I'm really shifting the responsibility to just the stuff I care about. And that that is another kind of motion we're seeing.
More and more things now are kind of shifting to the cloud. One of the big reasons for that what is the availability of these types of services? If I think about the cloud, we have all these different very rich services. On premise, you probably have VMs, maybe you have some containers.
Maybe you have a database farm. In the cloud, there's Kubernetes services, there's managed database services, um products, open source solutions, there's machine learning services, there's serverless. Because then I only pay for the stuff I use. So, that consumption basis is very attractive to companies because I'm only paying for what I use, which goes back to the idea, hey, microservices and auto scale.
Hey, I'm busy at this moment, I need this many. Hey, I'm more quiet, I need this many. That's huge cuz now I can save money. So, I super, super care about those things.
So, we see these kind of shifts happening in the environments. Okay, so that that's kind of the goal. See the shift in the architecture, shift in the hosting. Let's make it a little bit more real.
Waterfalls and kind of being agile. The whole process, um the project manager, the project management we use is a huge piece of the continuous cycle. Now, I'm going to spend more time on this than any other section because I'm not really going to go into this in other lessons in the course. All the other parts we're going to have entire parts about.
So, waterfall used to be very popular. We had these large, very dependent faces phases of the project. I can think about this as okay, get my board back. What's going on?
It's refusing to There we go. So, So, So, if I think about Let's go over here for a second. So, let's think what is waterfall. So, this was kind of the the standard way and we'll see why it's called waterfall.
We have the customer. We always have the customer. This could be the product owner, business owner, whatever that is. They're the people that really know what they want.
So, that the customer always has requirements. Now, we do our best to understand those requirements as well as we can. Super important to get those. So, we get the requirements and from those requirements, we do a design.
So, that's the user's interaction, that customer's interaction feeds into that. And then they're done. Cuz once the design is complete, we have to have design complete first, then we can develop. Once the development is done, then we can test.
Once the testing is done, well, we can deliver it. And as you can kind of guess why it's called waterfall is, well, it it flows like a waterfall. Each of these kind of has to be complete before we can move to the next one. And if you think about the customer, their next interaction is here.
Okay, the requirements of this went. And this is a long time. 6 months, maybe longer. Depends what this is.
Maybe the customer's happy at the end of this time. Maybe not. Maybe there was a misunderstanding. Maybe the customer's requirements have changed.
Hey, 6 months a year is a long time, especially in modern business, that's a really long time. Maybe they had some new requirements. Well, if you think about, hey, they had this new requirement, if I'm here, can I easily incorporate that? No.
So, it's very rigid. And so, what we end up with typically is a fairly unhappy customer because of that lack of interaction. It's very rigid. I maybe can work out things like costs fairly well and timeline fairly well, but it is a super rigid structure that takes a very long time.
So, generally, we're not going to end up with a super happy customer. So, what can we do? So, the idea here is is is Yes, that used to be very popular with these large dependent phases. Today, we're really thinking about moving to an Agile mindset.
Now, this whole Agile mindset is built on kind of four key values. These are primary for everything we do with Agile. It's really about these iterative delivery of small increments. We're constantly going to build additional value.
And because we get these much, much smaller cycles, we can get feedback far more often. So, if I think back, so if that was kind of waterfall, if I move over and now we think of Agile. So, a core component of Agile are these small loops. And then another loop.
But, it's building on the previous one. So, each time the total solution is getting bigger because we're building on the previous work. So, it's this constant incremental value. Now, each of these loops still has those same core phases.
Hey, we do a design. We do a develop. We do a test, hopefully, most of the time, and we do a deliver. But, they're all smaller.
And a key part here is that that customer still exists, obviously. We still have the customer. And the customer's interactions now are constant. This is constant interaction with what we're doing.
And so, I can think about the core tenant of Agile is kind of focused on the individuals and interaction. We want that constant communication within the team. I want it with the customer. It's about focusing on providing working software over, for example, comprehensive documentation.
Now, you're going to see these things like individuals and interaction over process and tools. We want to make sure we get in those good interactions. It doesn't mean the other things aren't important, they're just not as important. Working software over comprehensive documentation.
I can think of customer collaboration over contracts. So, it's more important to collaborate with them over You still need contracts, but that collaboration is more important than a contract negotiation. And we think about responding to change over some fixed following a plan. Now, there there are other things.
So, if I jump over for a second, in addition to those kind of four key principles, and again, the link to this Let's jump over for a second. Will actually be in kind of the the GitHub I have the links for all of this. But, you can see it's, hey, these individuals and interactions over processes and tools. We can kind of see that right here.
We can see the working software over comprehensive documentation, customer collaboration over contract negotiation, responding to change over following a plan. And then also, beyond that, what we can actually see as well is is is there are these 12 principles. You can go and kind of go and click on those. But, if you go to the 12 principles, it's all about customer satisfaction, welcoming changing requirements, deliver working software frequently.
Business and developers working together, build projects around motivated in individuals. Efficient and effective ways of working, working software primary measure. And again, you may be kind of looking at this kind of like, why are we spending so much time on this? Because this is one really the fundamental about DevOps.
Yes, there's tooling. Yes, there's Git. Yes, there's CI/CD and images and all that other stuff. But, if you don't understand the why we're doing these things, it's really not super useful.
So, it's critical we understand these things to understand why we're doing all of this in the first place. So, we want to make sure we really understand those key components. Now, within Agile, there's actually different methodologies. Now, there's a lot of different frameworks.
Um I'm going to focus on two because I think they're kind of the main ones you're commonly going to see. So, I'm I'm going to just focus on those. So, let's think about this for a second. So, we have Agile.
And again, there's two kind of I don't know if flavors is the right word of this, but we're going to think about Scrum and we're going to think about Kanban. Now, Kanban is actually a few different things which can confuse things. Um but, I'll I'll explain that as kind of we go along. Now, both of these things actually start with some things in common.
We have the idea that we have this product backlog. And you can really think about these are items we want to do. And obviously, those come from essentially, well, we have those customers who feed in requirements. So, those things we have in common.
Let me just kind of draw a dotted line as we separate where those things differ. Now, a key part of both of those, big list of features that the product owner wants, and they're both going to have stages we go through. And something common with all of these is we pull. We have a certain kind of capacity, and we pull items from the previous stage.
We never push items into the next stage. Hey, I have capacity, I'm going to go and get something that is available to me. me. me.
Now, when I think about Scrum, what really you you'll nearly always hear about with Scrum is the idea that I have a sprint. Now, a sprint is a duration of work. It's typically 1 to 4 weeks. I think 2 weeks is fairly typical.
And the way we really think about this working is the team that is part of this, they can do a certain amount of work. Uh maybe they can do 10 points of work. So, what happens is the items in the product backlog, they they're kind of assigned points to based on how much work it's going to take. Hey, this one is two points, this one is three points, that one is one point, etc.
So, at the start of the sprint, so we think, okay, we have this sprint. They have a meeting. So, we meet. And the whole team, the goal here is they agree.
They pick the high priority items. Things that are going to provide the most value. Again, that's that's a key point. That's what's the priority.
That they believe they can do in that sprint. Sprint has that defined time. They assign a point of work they can do. They look at the items, and they're going to bring those items in.
So, they pull things in into, in this case, a sprint backlog. So, they take items from the product backlog and bring them in based on hey, I can handle up to 10 points of work, whatever that might be. Now, it might be these are kind of big user stories. And we might break those into smaller tasks.
We don't want them too small cuz they just clogs everything up, but we're going to break those out. Now, within the sprint, there were then phases, just like we have. We have a build phase, maybe a test phase. And that I would say build test develop.
A test phase, a deploy phase. And the whole goal is, hey, we pull things into here because hey, I've done that piece of work. I have a I have capacity I can use. Okay, the testing person has finished.
Okay, so they pull something that's finished from the build so they can start testing. The deploy person, hey, we we pull something in that's been tested that we can do. So, this takes place over that period of time. And then at the end of it, they kind of go and have another meeting at the end.
So, we have another kind of sprint meeting. What did we learn? What worked? What didn't work?
Uh where were there backlogs? And this is always a pull motion. We're never pushing things in. That's really kind of a key point to the whole sprint thing.
So, we have this idea, we have that framework, we're pulling things in constantly. So, they they move through. We have those constant learnings. That's kind of really a a key point.
Now, also there are other things you may see as part of this process. For example, um it's very common actually across both of these, but you might hear about kind of a a daily stand-up meeting. And the reason it's called a daily stand-up meeting is everyone has to stand up. Why do you have to stand up?
Cuz it's 15 minutes max. By making people stand up, they're not going to want to talk for that long. If people are sitting down and they're comf- and they're having a donut and a drink, they'll waffle on and chat for as long as they feel like it. They're standing up and they're kind of uncomfortable and they're like, "Oh gosh, I just want to sit down." They're going to get to the point.
So, you have a daily stand-up meeting to just quickly sync on where we are, if there's any challenges, then we kind of get back to that work. And then again, at the end of the sprint, they meet, they realign, they shift. They can do that. And that's one of the benefits here.
Because it's a fixed duration, at the end of the sprint, they kind of starting fresh again. They could completely realign. They could completely change anything they're doing. Now, one of the things you you'll hear about sometimes, and I think again, this could be in kind of common, is you you have this notion.
I've heard this called two pizza teams. Now, I think that's very very subjective. I will eat a whole pizza on my own as we'll talk about in a second. I'm assuming these are really really large pizzas, what would be a team of two, but you don't want teams bigger than I can feed with two pizzas.
Again, you want that close collaboration and and the bigger it gets, the more unwieldy that kind of gets, and it's really harder to get what we're trying to do. The key point, Scrum. I have sprints, fixed duration. At the start, I pull in an amount of work that I believe I can do based on pointing.
It still moves through phases, and I'm still going to track this. I still might have a board, which we're going to come to in a second, where I move these bits. I go and look at what's available. I'm a tester, I've finished my testing.
Okay, I need to go and pull something that's finished in build. These might absolutely be divided up into kind of doing and done. You might see that very commonly. So, I'm always I'm always pulling something from the previous stage.
Developer's never pushing it to test. That's the key point of this whole motion. Okay. So, that's Scrum, sprints, all good.
Kanban. Kanban is different. Instead of a fixed duration, it's continuous. So, it is just a continuous stream of work.
Now, you could argue if I think about well, it's just continuous then, it's hard to completely realign cuz there is no end window. If I decide I want to completely change what I'm doing, that's actually a bit harder with Kanban because there's always things in motion. There isn't a point where everyone has stopped. That can also be a benefit.
But we still need to make sure we're not getting some huge accumulation in any one portion of our stream. So, what we have is we have this work in progress limit or whip. That's critical to this working. Because what we're going to now do is it's actually going to look very very similar.
It's that methodology of how we arrange the work. I still have kind of a build phase. I still have a test phase. I still have a deploy phase.
But the way we protect it is we have a work in progress limit. The maximum number of items that can be in any one stage. So, for build, maybe we say I can only ever have three things in build at any one time. In testing, maybe I say I can never have more than two.
So, these kind of slots we're allowed to fill. Maybe deployment, I say that's three as well. So, once again, hey, if I'm at build and I only have two items, I can pull something from here. So, now I've got three things filled up.
Hey, if I'm in test and I've completed testing and it's now deploy I pulled it out, I've got a spare slot, or maybe I've got my doing and done again. So, maybe I have an extra slot. How I arrange this can vary. I would pull something from build.
Deploy would pull something that's completed out of test. So, if they're the same ideas, we pull when have space. That's the key point really for all of these. I'm always It's always a pull motion from the previous phase when I'm ready.
And that work in progress makes sure I don't have 50 items sitting in test. Cuz I still want to make sure things can move through fairly rapidly. What I don't want, because it's about agility and being able to respond, is I have 50 things just waiting in test. And then, hey, I have some new requirement come in.
Well, maybe build can take it, then it's going to sit behind 50 other items for 9 weeks. I don't want that. I still want this total time of this cycle from something coming in to exiting to be a couple of weeks. So, I I do really think about sort of time entry to exit.
I want it to be weeks, not longer than that. And that whip ensures that. It makes sure I don't have some huge bottleneck at some point that everything will just get chewed behind. So, it's super important that I I have that as part of that overall solution.
So, when I when I think about okay, that whip limit, there's no time box, it's just this ongoing thing. People pick up capacity as we go through. I mentioned Kanban was multiple things. So, Kanban is actually really old.
I think it started in Toyota factories as a method to make the manufacturing more efficient. So, it's a very lean process. That's kind of a key point. And Kanban is actually a Japanese word for I don't know if it's visual signal or sign board, but it's all about that visualization.
So, we think about Kanban is all about that way to visualize the work, having Kanban cards, an item from that product backlog, which again, I could break up into different um tasks if need be if it was too big, that's going to move between the stages. And as a team, I could have an actual physical board where I maybe posted notes and I move them in between. It could be a tool. Now, an example of that, and I just kind of threw this together for a bit of fun, this could be a Kanban board that I might use for my video creation.
Now, this is Azure DevOps. GitHub has a similar idea. It's not quite as rich today. And you can see I've got kind of got my product backlog on the the left over here.
You can see I've got kind of my researching. So, I have And again, the columns themselves could be different. I name them what makes sense. So, for me, I have to go and research the topics.
So, you can say, "Okay, yeah, I'm researching Windows 365 overview in a DevOps masterclass two." I've drafted I actually have finished drafting. So, I say eight. My recording, I can have one thing. So, notice these numbers in the top.
I'm allowed to have These are my work in progress limits. I'm allowed to have three things researching, two things drafting, I'm allowed one thing recording. Well, my recording has I'm available. So, I can actually pull this over cuz I'm actually recording this class as we speak.
So, I can actually move this to recording at this point. Now, I can customize kind of what all these different things mean. So, I can rename them. I can configure different things.
So, I can see here the recording. Actually, my user story is not resolved. So, I can change What does it mean? It's still active.
So, I can save and close that. So, now my recording Oh, I kind of messed that up a little bit. But, now that's actually gone back over to somewhere. And it did warn me, but now So, that's If I actually change as backlog, there's my master class one.
So, it's gone to resolved. But, I can actually go and look at that. This is not obviously not my focus for this particular thing, but I could change that back to active. Save.
And there it is again. I'll move this back into recording, so it's still active. But, you can see here I'm pulling things over. And now drafting has spaces.
Maybe if I am ready and there was kind of a done, I could pull one of these over. Because sometimes someone's not ready that to pull it straight away, but I want to be able to signal to them Well, I am finished. So, on all of these different things, I could actually Notice here there's a split column into doing and done. So, if I save that, now my drafting it's the same shared whip limit, but if I finish drafting something, I could move it to done.
So, that signals to the person doing the recording, "Hey, I could pull from that done column when I have capacity." So, that's something I can do. So, this is a Kanban board. Now, notice this board I might absolutely use with Scrum as well. This type of board would absolutely maybe make sense.
But, this idea of the work in progress limit is absolutely critical. That's what stops me overloading. And here's where I can go and say, "Hey, my work in progress limit." This is what's going to make this process work. Without the whip, uh it it it could just have a huge massive things just bottlenecking at a certain point, which makes it very hard for me to then actually get things through as my requirements change.
So, I'm actually going to change that drafting back to not split just so it looks better for what I'm doing. But, you get the idea. So, that that is a Kanban board. And you could see here I could absolutely use that on Scrum as well.
That same thing would absolutely apply. Now, Kanban has a whole number of principles. And I guess we should kind of write these out. So, if I think about for a second, what matters to Kanban?
So, a key part here is start how you work. Don't have to do some massive change in this. Least start with how you work. And do incremental evolutionary change.
Rome wasn't built in a day, nor does my shift to this. Respect roles. Every role has a place. Understand what that role does.
Leadership from all. Likewise, accept input from everyone on the team. I want to think about that visualization. This is the key point.
It's a visual system of things moving over that board. Limit the whip. The work in progress is critical. Again, without the work in progress, time from entry to exit could be huge and it becomes worthless.
Because I might get some new high priority item added. Well, that's fine. I can re-prioritize and I'll grab it on the next available build slot. But, if then it gets stuck somewhere, it's going to take months to move through.
I don't want that. I want to limit the amount of work that's in progress, so people aren't just sitting there wondering what to do and nothing constructive gets done. We want meaningful work to be happening on any item that's part of our Kanban board that's actually in progress. We want it to be meaningful, not just stuck behind a whole bunch of different stuff.
Always pull. We don't push something to testing. Testing have an empty space. They finish testing something, maybe it's in their done.
They have an empty slot. They will pull something that I've developed the code for. I don't tell them, "Hey, you go and test." So, we're managing the flow. I want good definitions.
Everyone has to be in agreement of what those different stages, those columns are, so we are working collaboratively because we want to improve that collaboration. That really is kind of a key point to everything we're going to do. So, use and focus on the principles. Just using a board doesn't mean you're doing Kanban.
It means I'm doing a Kanban board and I've got notes. But, if I'm like, "Oh, I finished building. I'm moving it to test." That's not the point. They have to be pulling those things.
We want to collaborate, understand what they mean together. So, understand the core principles. If I have bandwidth and I'm working in a particular stage, I pull something that's available that I can now work on. Those teams might be cross-skilled.
So, if I find now I really have nothing to do, maybe I can help out and I can help maybe on another stage to can keep the things running. Now, still with these, we still probably can have meetings periodically. Might still have those stand-up meetings. We're still going to have meetings where we discuss what's working, what's not working.
We'll be able to see where there's bottlenecks. Because when we have those communications, if test is saying, for example, "I'm just sitting here. I've got nothing to do." Well, building. Now, realistically, building is going to take typically the most amount of time.
But, maybe, "Hey, we need more development resources." Um Um Um or if we find things are just sitting in test deploy is taking too long, we need more deployment resources. So, we can use these things to understand. So, we always pull. Going to highlight that.
When we have space, we can help actually go and see when there are actual things we can do, etc. And again, Kanban boards could absolutely be used by Scrum. They still moving items. And we actually saw with Azure DevOps.
Azure DevOps will actually let you specify Am I using Scrum? Um Each of these items Actually, see I've got points. I did that just for fun, but I can assign points to the different user stories that I have. And if a user story is too big, like my master class, for example, well, that's actually made up of multiple classes.
So, if I look at it as a backlog, so you're going to see, "Hey, these are all my user stories." But, I also have work items. And I have a DevOps master class epic. So, this is a big all-encompassing bigger initiative that you can see down the bottom here has child items. So, you can see it has child items, master class one and two.
And actually, it should also have a link to it has another child, master class three. So, I can actually create these bigger narrative, these bigger things I'm trying to do as an organization for my product, but it doesn't make sense to try and do all of that as one item of work. So, I break it down into individual user stories that I can have those digestible kind of bites out of and actually make progress with. So, that's kind of a key thing that we want to be able to actually go and leverage.
Okay. So, So, So, that those are really kind of the key difference. We want those key things we can buy. You can mix them together.
You'll see people that are Scrum that are moving to Kanban. I think there's actually a Scrumban, where it's a mixture of Scrum and Kanban. Whatever works. The key point of this You don't have to be super rigid necessarily.
What works for your team and how you deliver, but as long as you all agree on that and it works, so be it. Change is never easy. Start small. Look for pain points.
Look for teams that are willing and want change. Introduce the change with them. Start with something that's small enough that I can actually make some real progress in a relatively short amount of time. I want to win.
I want a hero win that I can then demonstrate the value of this to the rest of my company. Then build on that success. Again, you're not going to change overnight. People always hate change.
Um Get the showcase win. Show the value and then kind of build from there. Now, all of this Kanban and Scrum can kind of be a little bit confusing. So, I want to talk about pizza.
That'd be the second time I've mentioned pizza in this. I love pizza. Pizza is I think it's It's favorite food. And And And I was actually planning this out, the drafting, and it was Friday night.
Every Friday night for me and my household is Grimaldi's night. Fantastic pizza. Um Um Um brick oven pizza, awesome. As I was thinking about it, I was ordering the pizza, it occurred to me it's actually a fantastic example of Kanban.
So, I actually went and picked up the pizza. I take it home, and I took a picture. It was kind of awkward. They were kind of looking at me like, "What are you doing?
Why are you taking a picture of us?" But it's a great great example. So, I think about it. I phone up, okay? I phone up, and I place my order.
Now, I actually took the ticket. It's actually my kids' pizza. 12-in cheese, half pepperoni, no basil, light cook. Okay?
So, this essentially, if I think about Kanban, is a Kanban card. It's It's a It's an item of work. And this requirement from a customer would actually go to their product backlog. So, that wheel that they have there of all the pizzas to be made would sit on there.
You can see they're kind of got those tickets. They would get added to that. So, if I for a second take that, let's go back. Okay.
So, that was Kanban. Now, let's think about something closer to my heart. Something that I I really care about, I can get behind. So, I'm going to think about pizza Kanban.
I'll be more enthusiastic. So, I have still a product backlog. Remember that little circular thing with the tickets pizza on there. Now, remember, a key point of this, this ticket also has the requirements.
So, this ticket has the requirements on it. So, it's kind of a a 12-in cheese, no basil, yuck, anything green, etc. And those come from the customer, me. And they're sending in their requirements.
And it really is me. There's There's no hair on that picture. Now, in terms of the restaurant, let's think about it. So, we have the product backlog, that big wheel.
But this is a phenomenal idea behind it. So, someone actually took the order, customer, and added it to the product backlog. Now, the people actually cooking the pizzas have stations. They maybe have four slots that they can actually make pizzas at.
So, if I think about the flow of this, well, I have the ability to make pizza, actually construct them. They have a finite amount of space actually on their table. So, maybe there's This is where they can make pizzas. Maybe there's four spaces.
So, what that gives them there actually is a whip limit, a work in progress limit of four. They can only be making four pizzas. Now, maybe that's a doing, and they also have a done. Maybe they have a little done space over here as well.
Maybe they can store two pizzas. Maybe they have a whip limit of two for done, so the total whip limit would be six. So, whenever they have a space, what do they do? They pull.
They pull a ticket that is the next priority item. So, imagine as a customer I got the wrong pizza, it had basil on it. it. it.
Um that would be a high priority. They would pull that off the product backlog and make that pizza next. Now, back to the picture. Okay, so they've made it.
The oven is next. The oven has a finite amount of space in it. So, I can think, "Okay, well, then they have to cook the pizza." So, then we have cook. And once again, the oven Let me get the the fire.
It has a finite number of spaces in the oven. Maybe it has a whip limit of, let's say, nine. And maybe once again, there's kind of a spare done of a single space they can put a pizza. So, there's a whip whip limit there.
So, maybe it's a 10 is the total whip limit. When they're done, well, someone has to actually go and check the pizzas and cut it and box it. And maybe there there's just two stations, there's two people. So, that has a whip limit of two.
And then from there, it either goes to the table where people are sitting to eat, or maybe it's being picked up. So, there's kind of a warmer. But essentially, it's being delivered. So, always it's a pull action.
The person who's doing the oven pulls from the done. The people making the pizza never throw it at the person who's putting the pizzas in. The check in box people take it from kind of that done. It's always a pull that way.
And then the the waiters, the waitresses take it from the done that are boxed up. It's always pulled between those various sections. And that's kind of a really really important point when we think about that. So, I actually think it's a a really nice idea.
So, those whip limits really do control the pizza kitchen. Because again, what I wouldn't want is to have no limits, and they just start stacking up pizzas here that are cooked, and they're getting cold. Or they're stacking up here, and they just all going bad cuz they need to be put in the oven. Also, if there was just a huge number of pizzas stuck at one stage, if there was a reorder coming, a high priority, it would take ages to move through.
So, by having these work in progress limits, it makes sure if there is a priority order come in, it can still move through in maybe a 10-minute time window. It's never going to get stuck behind cuz there's so much queued up. So, I think a pizza restaurant actually does a really good job of really showing the idea of a Kanban board. They They are a Kanban board.
This ticket, my ticket, moves through the stations. It follows. They take the order, it goes on the board. They tuck it under the bit of wood as they're making the pizza.
I don't quite understand how they put it in the oven, but somehow it still follows through. It goes in the box, and then it gets delivered to me. So, the pizza moves through all of the stages. I take the pizza, I deliver it, and then there's me eating my tasty tasty pizza every Friday without fail.
So, you can see the kind of importance of those various things. Now, I guess you could what you could argue actually, "Okay, John, so that was Kanban. How would this look if it was Scrum?" So, you could say well, that the stages would actually be the same. So, if I now went to a Scrum idea of the pizza, you still have the same product backlog with all the tickets on it.
I would still have the same kind of make. I would still have the same kind of um cook. Oh. Oh.
Oh. I would have the same uh check and box. The difference would be I would have a sprint. And I would have maybe a 30-minute sprint.
I'm going to make pizzas in a 30-minute block of time. So, the difference would now be what I would do is I would have that kind of sprint backlog. And I might say in 30 minutes, we can make 60 points of pizza. Now, depending on the pizza order, like an extra large everything on it might be five points.
A small cheese might be one point. Medium pizza, two points. They would take tickets that they're going to make in that next sprint. That's the priority.
So, Kanban, you're prioritizing every time. Kanban, every time they have a space, they're looking at the product backlog and taking the next priority item. The manager can move things around and give things higher priorities, so it's the next one taken. That process in the sprint in the Scrum model can only take place at the start.
They're pulling all of the tickets they're going to do in that next 30 minutes. And then it would look the same. They're going to Oh, okay, we'll take these and make them. Then we'll pull They're still It's all still a pull motion there to the customer.
At the end of the 30 minutes, they would say say say "What went well?" "Okay, well, okay, we were a bit slow doing this part. We need someone else cooking." It's harder to react mid-sprint. I I really can't. Like if an urgent order came in, I have to wait till the end of the sprint so I can really do something.
But I know I'm going to get this many pizzas made in that sprint. It's easy to plan out. So, if I look at sort of Scrum, because we have these set duration sprints, because we have these units of work I can do, I can actually plan out further in advance. I can absolutely say, "Hey, okay, I know I'm going to make this many pizzas in this sprint.
I know I have this many, it's going to take me an hour and a half to clear this complete order. I can plan well out in advance." Whereas with the Kanban, because it's continuous, it can be a little bit harder for long long-term things to plan out, work out exactly when they're happening, but I can definitely react faster. Because it is continuous, at any point I can kind of Hey, there's a gap. I'll take the new requirement that's come in.
I will start processing that one. So, that that made sense. I really just wanted to be able to talk about pizza. Um but I think that's kind of a a really good analogy actually for Kanban.
I think it relates well when I actually think about doing those things. So, I spent a bit more time on that than other things we'll talk about today, but it was kind of an important point. So, we want to make sure we did actually focus on that. So, now let's think about for a second.
I've lost my remote. I already have lost my remote. The next slide. Oh.
Oh. Oh. Under my ticket. So, just quickly get uh continuous integration, continuous delivery, continuous deployment.
If I'm going to have this constant incremental value, it probably means I need new ways of working, new ways of testing, new ways of delivering. Now, again, I'm going to cover all of this next week is going to be probably a really long lesson all about Git. I want to do a master Git next week. But I'm going to have people working on the same potential areas of code.
They need to be able to bring that together constantly without locking each other out. In a traditional version control, I need version control. I need to be able to see what changed, who changed it, why. And traditionally, we would check out a file where no one else could change that file.
And that's not going to work well in these types of things. So, I need to be able to track what changed. I'm going to maybe have the same file changed for different region reasons. I have a bug I need to fix.
I have a new feature. I have a new release. Same file might be changed in different ways. How do we handle that?
So, a Git-based solution is actually perfect for that. We use this Git for source version control that enables that concurrent development. So, I think about this actually scroll back out for a second. We'll go back over We'll go back over to here.
So, So, So, what I want to think is Let's zoom in. There we go. So, with a Git, I have an idea of a repository. So, we have this Git repo.
Now, in the common kind of symbol for Git is kind of this. And it's really showing the idea of branches. Hey, the code goes in different directions, but we can bring them back together. Now, an important part, Git does not mean GitHub.
Git is a a standard. It's a tool set that I can use through version control. I can use it just entirely locally on my machine. But I have this repository.
And I can store different things in there. I can store text files. I can store images. I can store artifacts.
There's different things I can do with that. But a key point it is a distributed system. So, I think about it, Git repository has a whole bunch of code in it. And if I'm a developer over here, if I'm an IT operator over here, we all have a full copy of that repo on our machine.
Completely full. All the files the same size. And what we do is we commonly we're going to sync it to that common shared copy. So, a big deal with this, it is distributed.
I have a complete copy of the entire repository on my local machine. Now, when we talk about this next week, I'll talk about how hashes are used to make sure no one can change anything. So, I can track everything that changed. We can still be assured of all of that.
But essentially, is it fully distributed? I can change any file I want. And then through very powerful mechanisms, even if someone changed the same file, I can merge them back together. I can find conflicts.
I can resolve them very easily. Now, what I do want is a central copy. If I'm collaborating, I want that central copy. This is where you will hear about things like GitHub.
Um obviously, Azure DevOps is a big solution. Um Bitbucket I mean, there's a whole number of solutions. There's not a right or wrong. Use what works for you and your company.
But I'm going to demo mostly GitHub. But again, there's Azure DevOps repos. There's There's There's lots and lots of those kind of central Git repositories. So, So, So, everyone has their own copy.
Fantastic. The challenge with that is if everyone's got their own copy, I'm syncing them. It's really important there's not big long gaps between syncing them and bringing the code back together to make sure someone's not introduced a bug or an incompatibility. Now, we're using loose coupling.
We're doing these good things, but if multiple people are changing the same files, still problems could occur. So, we need to make sure that doesn't happen. So, you want to integrate each person's changes in very very frequently, maybe nightly. And we do that through the kind of like they they commit the changes they've made so far to a certain branch.
And we need to basically bring those in, build the solution, run some tests, and make sure the result is kind of what we expect. Maybe we go and create some output. So, we have the idea of this continuous integration. So, from here, yeah, I've got this Git repository, and what kind of happens is people will make commits.
A commit is Hey, there's some unit of work that I have done. And so, that will then build into this idea of continuous integration. CI. CI.
CI. So, that commit will likely trigger. Now, it doesn't have to be a commit. It could be some kind of schedule.
But what we're going to have is a pipeline. That's supposed to be a pipeline. And the whole point of this is this is automated. Now, again, we think shift left.
Ideally, there's going to be some kind of security straight away. Oh, we've checked in this code. Let's go and check some things. There's no secrets that have been put in the repo.
I'm going to talk more about that in a second. Um I don't have something I I shouldn't have. I'm not using a bad dependency. And then it does a build.
This is all automated. Then maybe there's some automated tests it can perform. I can have some automated tests. Maybe there's some manual ones.
Maybe then it goes and creates an image of some kind once it passes the test. And then maybe it uploads that image to some kind of registry. So, this is just all happening automatically. And if there was a problem, we can even have this go and create a work item, say, "Hey, this test failed." Or this check failed.
Or this security thing, "Hey, it's going to create a pull request and say you should have this dependency instead." So, I can have those capabilities, but it's continuously integrating everyone's code. Yes, I'm working on my own distributed copy, but And this is again process, people need to make sure they check these things in. If someone doesn't do a commit for 3 months, and then commits 1,000 changes, it's going to be a bad day. So, again, part of the people process.
Tools. Process. Make sure you're frequently committing. And then we're going to have this continuous integration.
We're constantly bringing everyone's changes together to make sure it's still behaving as we need it to. Okay. So, that's checking everything is still good. Awesome.
Then I need to think about Well, I want to continually bring that value. Maybe it's creating some EXE or an image, Docker image. Maybe it's a image for a scale set. Maybe it's a a package, Maven, NPM, whatever that might be.
It creates something that then I need to deploy and actually get used by something. So, how do I then actually think about doing that? Once again, I want the idea of continuous delivery and maybe even continuous deployment. Now, obviously, I have to deploy this to something.
So, this is maybe creating something. Maybe I've loaded to a registry, and I could I could kind of think of that. Maybe how I Okay. So, this pipeline went and did it to some registry somewhere, created something.
So, now I want to think about Okay, I want this continuous delivery. So, there's another pipeline. Now, again, this pipeline the trigger could be Hey, look, something new has been put in that registry. A new image has shown up.
Okay, we need to go and test it. That could be the trigger. Maybe it's an an artifact. A new XE has shown up.
Whatever that is. Now, remember, I have to deploy to something. So, maybe this is actually build or verify infrastructure. Do I have my Kubernetes environment there and ready?
Then maybe I actually go and okay, deploy whatever the thing is. Deploy I'll say artifact. Could be an image. Could be an XE.
I don't know what that is. Then I I have a test. At this point, I probably have a gate. Now, a gate can be many different things.
A gate could be maybe a number of work items raised. I bugs. It could be an approval. Maybe it's combined with a time window.
There's some delay. And then maybe it goes and repeats kind of these things. Maybe now it's a UAT infrastructure. Deploy or validate.
Then it's deploy the solution to UAT. And then maybe it's again, there's some other thing. But all of this is kind of my continuous delivery. All the way through deploy UAT, test UAT.
And again, this could be a manual approval. Maybe there's a test plan that humans have to go and do various things. So, that's delivering the all up solution. And then what I can now also have at this point is actually continuous deployment.
Actually now getting it to production. So, continuous delivery is about getting it ready and oh, it's good. I think about having a really big gate here. But then the pipeline could actually kind of continue to kind of prod infra.
Make sure it's good. Prod deploy. And also there be an a prod test. We still would do those kind of validation tests.
I'll add that. So, I have all those different kind of things going through. So, the continuous deployment actually goes through and into production. Now, when I think about production, I'm not just going to deploy this.
Like when I'm here, these types of things are all going to be about different types of deployment pattern. Very rarely would I just stick all of that in production. Maybe I have the idea you might have heard of blue green. The idea that I basically have two environments.
And so, I would deploy the new code to the green environment and then switch to make green production. If anything goes wrong, I can switch them back very, very simply. Um I might hear about things like canary. So, with canary, I deploy it to a very small sampling of my users to see if any of them have bad experience and complain.
If I don't, I can expand out. So, maybe it's kind of 5% and then I deploy it to 15%, then 50%, then like 100%, and I'm waiting for people to complain. Maybe it's rings. Rings would be very similar, except I'm not so much waiting for a certain portion to complain.
I just have these rings of deployment I follow. But there's many other There's there's a whole ways to think about that deployment. With continuous deployment, I'm actually driving that value through. So, if you look at the entire pattern, it's like, wow, the code comes in, is continually integrated to make sure something's not broken.
I want to find the problems early. Find them early and often. I don't want to wait a month. Someone did something, it broke something.
Who cares? I found it that day. I'm going to fix it before it becomes a big issue. Move on.
But we're going to find it through continuous integration. I hey, when we pass a certain gate, we've created an image, it got through all of these things. I can actually get those delivered out. So, I can have the artifact ready to go to a production.
And maybe I actually do continuous deployment to actually get it to production in automated fashion. Again, gates to validate things. I'm using different patterns to get it out there. There's all different things I can do, but I can absolutely do those things.
So, I have that idea. I have to think about secret handling as well. So, all those pipelines, there's tools to do that. Um Um Um definitely.
Good to do. I can check for secrets. I can look for some credential. But this really does come down to that kind of people process thing in in a huge way.
I'm going to stress this here. Never put secrets in your repos, in your code, in your config files. No No No secrets. No private keys.
Not hard coded in configuration files here. Never, ever, ever. What I do is I have a vault. Now, in Azure, this would be Azure Key Vault.
These are good at storing secrets. A secret is something I can read and write back. Could be like a shared access signature. I store my keys.
A key is something I can't extract back out, but I can do cryptographic operations in the vault. So, I can send it hey, do this cryptographic operation. Create me this signature. Validate this thing.
Um maybe certificates. Kind of life cycle management. That's where those things go. Now, I can bring those in to my pipelines.
All of these pipelines run as a certain credential. So, I can use role-based access control to control which secrets, which keys can be used by dev, UAT. I I can control all of those things there. So, that's really kind of a an important point around that.
So, I'm never putting secrets in my repo. I'm always using a vault. Okay. Importance of monitoring.
And I can kind of just Monitoring is always important. I want to make sure my production systems are running. They have enough resource. I'm maybe doing scaling intelligently.
Yes, always important there. But for DevOps, almost more important is monitoring of the interactions and that user behavior. I've talked about that already. We want to drive value.
And we have to make sure the value we drive is the priority value. What's going to have the biggest bang for the buck. What's going to mean the most for my solution that differentiates me from my competitor. So, I have to know what matters to the end user.
Um So, what features are they using in the app, through the service? What's getting called? When do they give up? This bit must be super painful.
What features get used the most? Are there poor user experiences, very long delays? If I just look at the counters on a server, CPU and IOPS and network, I'm not going to see those things. The only way I can see those things is to actually get feedback from the user.
So, I potentially need new tools, new telemetry to actually be able to get that. So, I think about hey, my my overall solution, all of this here, yes, there there would be things tracking through those things. But at the end of the day, there is some end user here. Like the customer.
What is their experience? That's really what I care about. So, I need feedback. Now, that feedback could be in the terms of especially in testing surveys.
Hey, what did you like? What didn't What didn't you like? But also there's going to be maybe a some device they're using. Could be a phone, whatever.
I kind of want to be able to track telemetry of what paths they took. On the application, what functions are being called? I want to be able to know those things to see what they like, what they don't like. On Azure, things like app insights.
I can hook into my application code. I can hook into the end user device, mobile platforms, to see what they're using to actually go and get that feedback. I have to have that. And additionally, when I think about monitoring, we're going to have a whole unit on this.
There probably are key performance indicators, PKI definitions that I need to have to work out am I working on the right things? I'm picking from that product backlog what I believe is driving value. Is it driving value? I need to know that.
I might have KPIs. How often are we releasing? What is the deployment speed? How many deployments are we doing?
How long does it take to release a new priority item? If something new shows up on that pizza twirly, how long does it take to actually get at the customer's table? What is the sentiment of the user population? Are they happy or getting happier?
Or are they kind of getting fed up? up? up? Are we more efficient?
How many admins do we have per customers? Uh how many support calls are we getting? How used are the different parts of our application? How many bugs are being raised?
Indication of quality. Are we meeting SLAs, service level agreements? Ideal quality. What's the morale of our team?
Is our team happy? Are our people leaving? Or are we retaining them? So, what's the overall morale?
So, there's all these different interactions I really have to think about. So, monitoring is key to everything. We're changing all these processes, remember? I'm making all these big changes, okay?
I need to make sure it's a value. Is the customer happy? Are things performing well as as a I've got customers in different places here. There's different ideas.
There's like the business owner, there's maybe the end users target, it could be different. Am I providing value? The team that's doing all of this stuff. How are they?
Do they hate this? Is it improving their lives? Are they overstressed? I I need to know and understand those things.
To really understand, is what I'm doing the right thing? Or do I need to reassess? The whole point of this is remember those continual learnings in those loops. There's always that monitor and learn.
We have to learn. We have to We have to take those steps. Okay, so last key thing. Infrastructure as code.
So, self-service is a key to agility. I talked about those pipelines and the idea that hey, I'm not waiting for some operator to click the button. It kind of just goes through. But I also talked about build and validate in the environment.
I don't want to create things through a portal. Portals, while intuitive, uh uh uh I mean, they're just subject to error. I'm going to click the wrong thing. I do the wrong thing.
I want it automated. So, what we always think about is infrastructure as code. So, I don't want to create via the portal. I want my infrastructure to be defined by some kind of code.
Now, these are typically declarative and item potent. This is what I want it to look like. I'm not telling you how to do it. And I can just keep re-running that.
If it already matches, great. It won't change anything. I'm going to use them actually in my pipelines. So, if I go back to my picture kind of over here, I could absolutely think about, okay, I have my infrastructure as code.
Now, that infrastructure could be a storage account. It could be a Kubernetes environment. It could be a bunch of VMs. Whatever that is, I have my infrastructure as code.
Now, that's got a whole bunch of resources it's defined. This could be a JSON file. It could be a YAML file, things like Kubernetes. It could be a bicep file if it was Azure specific.
But the key point it is declarative. It is item potent. I can keep re-running the same template. It's not going to error.
If it's already deployed, then it's just going to match. I think that's what the cloud is wrong. It's an A. Terrible spelling.
This is a key property. It's prescriptive. It's going to look this way. I can I can source control this thing.
It's JSON. It's YAML. So, because it's kind of textual, well, I can actually store that in my Git repo. It's not some special unique butterfly.
It will be in my Git repo for my project the same as everything else. So, I'm not doing anything kind of special around there. And it is human readable. And because it's declarative, saying what I want the desired state to be, it makes it I can order it very easily because hey, does it match what is deployed?
So, I can demonstrate, yes, we have had this configuration which is required. And from these, hey, I can push out resources to the cloud. I could push out saying to a Kubernetes environment. That's supposed to be a steering wheel.
I can't draw that at all. It could push out to things like an operating system. I could use Chef, Puppet, PowerShell DSC. There's all different things.
I could create Docker files, composition files. These could be um YAML files for Kubernetes. I'll talk about in a second. I can also do things like GitOps.
So, GitOps is the idea that I can just point my, for example, Kubernetes cluster to a repo. And every time there's a commit made, it will actually go and pull down the changes and apply them. So, again, those YAML files are all stored in the repo. And through things like Flux and Helm, Helm is really just a structured um combination of multiple YAML files that make up a complete solution.
I just have to once deploy my new desired state, and all my Kubernetes clusters will just go and pull those things down straight away. This single template defines an entire service. Now, I could have smaller kind of um kind of parameter files that might be environmental specific. So, I have a dev one.
I might have a UAT one. I prod. But the actual template itself is the same. I could use that in completely different applications.
They can all share those things. And so, all of these files, when I talk about build verify infrastructure, I'm doing that with my declarative files. Every time we see that validate infrastructure in all of the pipelines, I'm using an infrastructure as code to actually do that. All of these things really come together.
That's kind of the the key point in what we're doing on this. So, talk about GitOps. We're going to have a whole lesson on GitOps as well. Getting ready.
So, that was all the topic I wanted to cover. There was a lot of stuff, I know. There is nothing cloud specific. There is no tool specific really about this.
I wanted to talk about the principles and the ideas behind it. I am an Azure person. Go and get Visual Studio Code. It's free.
Cross-platform, Linux, macOS, Windows. I'm going to be demoing a lot of things in that. Go and get Git. Um again, it it's available cross-platform.
I can use Git entirely on my local machine. I don't have to have any kind of server. I can have a complete repository on my my machine. I'm an Azure person.
I'm going to demo when I deploy things to Azure. If you have a different cloud you use, use that. Not going to make any difference. If you don't have anything, you can get a free Azure um subscription.
It gives you a bucket of money you can use, I think, for the first 30 days. And there's some some services that are free for a year. There are some that are free always. So, go and sign up.
You can go and sign up for a free GitHub account. So, one of the nice things, I'll actually show this quick. So, there's different GitHub plans, but for free, I can have unlimited number of public and private repos. There's number of automation minutes, package storage, issues, and projects, community support at $0.
So, I think we can all likely do that. And likewise for Azure DevOps as well. So, if I go and jump to the Azure DevOps link, and all these links are actually in the description. And I'm these actually more about the GitOps repo.
I'll have all these things. Azure DevOps is actually free for the first five people. So, again, if we go and look at the pricing, there's stuff I can get individually, but notice the first five users are free in any company. Like if they have MSDN, they don't even count out of those five.
So, I can actually go and start using this even with a create a couple of accounts, so I can show things working together. I can go and create that thing. So, go and sign up, so I've got these tools available. Most of my focus when I'm talking about tooling, again, will be GitHub and Azure DevOps.
But again, there are other solutions. You don't have to use these. These are just what I'm more familiar with, so I'll demo on those. It's the concepts that matter.
And those GitOps those concepts are fairly universal across different solutions. So, that was it. Um any questions about this lesson, please post below. Please don't say when's the next one coming out.
I'm going to probably try and live on a weekly cadence. There'll be times I won't cuz I want to do a different topic about a certain technology in between. But for the most part, I'm going to try and do one of these a week. Um comments about this content below.
Huge amount of work to create this. So, please please like, subscribe, and share. And uh until next lesson, take care.

The video discusses the role of a DevOps engineer, emphasizing that it combines development and operations to streamline software delivery. DevOps is not just about using specific tools like Docker and Kubernetes; it's a mindset focused on automation and continuous improvement. The demand for DevOps professionals is high due to the need for rapid and reliable software updates in modern companies, with salaries often exceeding $190,000 a year. To succeed in this field, one should enjoy problem-solving, automation, and have a solid foundation in Linux, networking, and cloud platforms. For those interested in starting a career in DevOps, hands-on experience through personal projects is crucial, and resources like boot.dev can provide valuable training and support.
So, you're thinking about becoming a DevOps engineer. Maybe you've heard it pays well, or that every company wants one, or maybe you just like how DevOps sounds cooler than just developer. But before you start installing Docker and pretending to understand what kubectl even is, let's break down what this job actually is and whether it's worth your time. The whole idea of DevOps started because developers used to throw code over the wall to operations teams, and of course, it broke immediately.
Devs would say, "It works on my machine." and ops would say, "Cool, then deploy your machine." DevOps was created to fix that chaos. It's not just a role, it's a mindset that combines development and operations to make software delivery faster, safer, and less painful. As a DevOps engineer, your main goal is to automate everything. You'll build CI/CD pipelines, basically automated conveyor belts that take code from a developer's laptop to production without human intervention.
You'll use tools like Docker for containers, Kubernetes for orchestration, Terraform for managing infrastructure, and monitoring tools like Prometheus or Grafana to keep everything running. You're the bridge between the code and the cloud, making sure deployments don't crash and systems stay stable. But DevOps isn't just tools, it's a culture of constant improvement. You'll constantly ask, "How can I make this faster?
How can we deploy safely without breaking anything?" You're part engineer, part firefighter, part automation wizard. And when things go wrong, and believe me, they will, you're the one everyone calls. So, why is it in such high demand? Because every modern company needs to release updates constantly.
Think of how often your apps update. Spotify, Netflix, even your bank's app. Without DevOps practices, none of that speed would be possible. Big companies like Google and Amazon deploy thousands of times per day.
That's why DevOps engineers are worth their weight in caffeine, I mean gold. Now, who actually succeeds in DevOps? Well, if you enjoy solving problems, automating workflows, and working behind the scenes to make systems run smoother, this might be your dream job. You'll need to love scripting, debugging, and building processes that make life easier for developers and ops teams alike.
But if you hate dealing with infrastructure, logs, or endless YAML files, this job will drive you insane. DevOps isn't about building flashy products, it's about making sure those products actually work. Let's talk about skills. You'll need solid foundations in Linux, networking, and scripting.
You'll be working with cloud platforms like AWS, GCP, or God forbid, Microsoft Azure, building pipelines, and writing infrastructure as code. It's a lot to learn, but it's worth it. Once you get good at DevOps, you start to under- stand how everything in tech connects, from front-end to back-end to deployment. That makes you one of the most valuable people on any engineering team.
And yes, let's be honest, the salary doesn't hurt. DevOps engineers are some of the highest paid professionals in tech. Their earnings can reach more than $190,000 a year. Even junior DevOps roles tend to pay better than standard developer jobs because the skill set is so specialized.
But it's not a job you can just wing. You'll need hands-on experience and real projects under your belt. If you're wondering how to get started, the best way is to build something. Host a simple app on AWS, automate its deployment, containerize it with Docker, and set up monitoring.
You'll learn more from that one project than from weeks of tutorials. So, should you become a DevOps engineer? If you love automation, solving deep technical problems, and making systems run like clockwork, absolutely. It's challenging, rewarding, and one of the most future-proof careers in tech.
But if you prefer creative coding or design, you might be happier elsewhere. DevOps isn't glamorous, but when everything runs smoothly, you'll know it's because you made it happen. And if you're serious about the DevOps path, then you need strong foundations. And the best way to build those foundations is today's sponsor, boot.dev.
After hearing about the salary range, I've been trying to level up my skills in DevOps to secure a promotion at work, and boot.dev has helped me a lot. They offer tons of great back-end courses and projects. And for DevOps specifically, the resources that helped me the most were the Linux course, which gave me a better grasp of the commands every DevOps engineer must learn, the CI/CD course, which helped me hone my skills in GitHub Actions, and the File Servers and CDN course, which focuses on AWS S3 and CloudFront. And if you ever feel stuck, don't worry.
boot.dev has a handy bear wizard that's trained on every lesson. You'll always have the help you need without feeling like you're just copy-pasting stuff. And the best part? All their courses are free to read and watch, but you'll need a membership to unlock the interactive features.
Don't worry, fellow code head. >> I got you, homie. >> You can use my link in the description along with my code code head to get 25% off your first payment. This was Code Head with yet another tech rant.
If you enjoyed it, please leave a like and subscribe. Lights out.

The video addresses the widespread concern among engineers about whether AI will replace their jobs, particularly in fields like DevOps and cloud engineering. Through interviews with various professionals, it highlights that while AI is automating tasks such as code generation and infrastructure deployment, it is not likely to fully replace these roles anytime soon. Experts emphasize that AI tools can enhance productivity but still require human oversight and expertise to ensure accuracy, especially in critical areas like DevOps where precision is essential. The key takeaway is that understanding the fundamentals of technology remains crucial, as the ability to discern when AI is correct or incorrect will be a valuable skill moving forward. Ultimately, the demand for skilled engineers is expected to grow as technology evolves, rather than diminish.
Everyone is asking the same question right now. Will AI replace my job as an engineer? And I see this fear everywhere in comments, in emails, in LinkedIn messages. And I get it.
AI is automating code generation. AI is automating writing tests. AI is even doing infrastructure deployments in some cases. So naturally people wonder should I even bother learning coding or DevOps or cloud engineering or will AI just make these skills obsolete in two years?
And here is what I discovered after interviewing multiple people like DevOps engineers with different backgrounds who just transitioned into the field plus industry experts in the field. And the answer honestly surprised even me. And I created this video because I did not just want to have theory of me explaining some of the concepts. I wanted to have real people with real jobs with different backgrounds, real salaries and industry experts all giving different perspectives from their environments for a complete and full picture.
And let's start with the fear everyone has. So this is Anna. She worked in medical devices manufacturing for eight years and then decided to switch to tech during covid. >> Yeah, I think it was it was a cumulative of things uh that I have already been working in the medical devices sector for quite a long time.
It was like seven eight years. I also have worked for different industries and I saw that the type of job it was kind of the same you know even change companies >> and I also it was the time during COVID that also boot camps were very famous you know and I was seeing a lot of stories on the internet from people that they completely uh switch careers you know after doing a boot camp >> and I was really really intrigued by that and uh yeah and I decided to to bet on myself, you know, and do the same >> and it worked for me. >> Yeah. Now, listen to Anna's reasoning for choosing DevOps specifically.
This is really important. Honestly at the beginning I was preparing a bit for everything you know that's why I did data science data engineering you know um but uh then I realized that uh yeah DevOps uh was like a very strong trend you know >> and then after chat GBT came out you know and all this revolution I saw that yeah DevOps it's one of the more uh careerproof you know future proof careers uh that exist >> and I'm very happy you know that I ended up in this field and also yeah it's a field that it's always growing you know it's uh challenging always you know you will never get bored you know >> because there are always new tools appearing you know and you have constant constantly be learning >> and I like that >> did you catch that after chat GPT came out she researched which careers were future proof and DevOps clearly stood out but why let me show you something that will make this crystal clear. >> Yeah, exactly. Um, and as I say, I think this is this career is very futurep proof.
I think AI is not going to to replace it anytime soon. So yeah it's only yeah it's only benefits you know in the future because you have more experience more knowledge and also there therefore you get a better pay you have more options you know more companies >> call you you know uh recruiters yeah they they contact you more often you know >> now Anna is not alone in this concern let me show you Roi he's a test automation engineer with 13 years of experience and he saw something happening in his field that made him realize that he needed to act fast. Okay. Interesting.
Did you also make the decision a little bit based on like what the future job requirements would look like? Like did you consider that in that mix? >> Definitely. Yeah.
Because as I see um what I well what I see in the field with QA is that initially you had manual QA then all of a sudden QAS were expected to do automation then all of a sudden CI/CD so I can already well at least in my opinion I think that the next step would be even more because yeah technology is moving forward so QA also needs to move with for example with AI or with infras code these kind of things you see the pattern these are not people running away from AI. They are running towards the skills that work with AI. And that's the key insight that I want you to understand. But before I show you why this works, let me introduce you to the expert perspective.
I interviewed Brett Fischer. If you don't know him, he's been teaching Docker and DevOps for over a decade. He has his own courses, his own podcast about AI and DevOps. And I asked him directly, is AI going to replace DevOps engineers?
And his answer is going to change how you think about this entire topic. So pay close attention to this. And even the best models that we have, the absolute best models at the top of the rankings are only going to fix about 2/3 maybe if you're lucky three4s of GitHub uh issues. So if you so we we have this thing called SweetBench now and all the models are listed there and they're constantly competing with each other for the top rankings.
But even if you paid the most money the hundreds of dollars for the high-end uh clawed models or the high-end GPT models you are at best going to get about 70% accuracy which for a software developer 70% means it won't work. >> Yes. [laughter] >> Uh it's not going to function at 70% correct. the app the app will not function eventually there'll be so many bugs right so it does I think there is a moment with every developer where they where they're picking up steam and then they realize that we're still many years I think away from these models being so trustworthy that we can just pass on our our our requests and not have to look at the answers um I think that that's a real so so the idea of like an AI writing the PR and then an AI uh reviewing the PR and approving the PR whether it's for software code or develop or devops YAML I think we're still many years away from that um for sort of fully AI which is why I'm not worried about jobs and >> and interesting I think most of that stuff is really hyped up and don't believe anything in AI if they work for an AI company you just can't trust them because they're living >> they're not living in reality with the rest of us they're living like 10 years in the future or 15 years in the future and and and >> okay This is huge.
Let me break down what Brett just said because this applies directly to you. Even the best AI models today get about 70% accuracy. That means 30% of the time they are wrong. And in infrastructure, in DevOps, production environments, 70% correct means a lot of things break.
So you cannot deploy a Kubernetes cluster that is 70% correctly configured. It will not work. This is fundamentally different from other fields. In content writing, for example, if AI gets 70% right, you can edit the rest.
But in DevOps, in automation stuff, if your Terraform configuration is 70% correct, your infrastructure will not deploy or will just be misconfigured. Your CI/CD pipeline will not run. You will have to go through and fix all the issues and in addition validate whether the running or functioning code is actually correct with best practices and your security policies will not protect anything if they're just 70% accurate. So what does this mean for you?
It means AI becomes a tool that speeds you up. But you still need to understand what's happening. You still need human judgment to review the generated code. the YAML Terraform code.
You still need to know if the AI suggested the right Docker configuration or the wrong one. The skill that becomes valuable here is not can you write YAML from scratch and learn the syntax of Terraform by heart. The valuable skill now is do you understand infrastructure well enough to know when AI got it right or wrong. And that understanding that comes from learning the fundamentals and concepts and the purpose behind each technology in DevOps properly.
not from watching a few YouTube videos or doing some shallow Udemy courses, but from actually building projects hands-on, like doing it yourself, breaking things, fixing them, troubleshooting them, understanding why they broke, and most importantly, building complex projects and not just one Terraform script that creates an EC2 instance. Now, here is where it gets even more interesting. So in all those generations of us moving from one one evolution of infrastructure whether it was a PC or servers or whatever each time the CIS admin grew. So I in '90s I could only really manage 10 servers.
I don't even think I had 10. I had to babysit them. Everything was manual. There was no scripting or automation.
Open source wasn't really popular yet in terms of typical enterprise infrastructure. And as it open source grew, as the tooling grew over those decades, we went from and I have a chart that shows like one CIS admin to 10 servers. Then with virtualization, it was one CIS admin with a 100 servers. Then with the cloud, it was one CIS admin with a thousand servers.
Then with containers, it it sort of went beyond servers and you thought about workloads and it went to one CIS admin or DevOps person could do 10,000 containers. And our tooling got better, our automation got better. And each time it was all about a single individual managing a bigger and bigger fleet. So I don't look at that as DevOps lost jobs or in ops lost jobs.
We just were able to manage more. And it turns out so far at least in my whole career that companies and organizations are in are they will take as much infrastructure as you can give them. Like they they will take as much automation. They always want to run more stuff.
I've never seen a team have an inq like their their ticket queue be zero forever. Everyone's got bro bro bro bro bro bro bro bro bro bro bro bro bro bro bro bro bro bro bro bro bro bro broken stuff bro bro bro bro bro bro bro broken stuff everyone needs more st more more things they want to launch more apps more copies of the app to make it stable more for capacity more more de more disaster recovery locations where we can spin it up on the fly in case this place goes down like that's been expanding and expanding expanding and I don't think AI is going to cause that to stop I think AI is just going to cause us all to manage more this is the most important concept in this entire video so I even suggest that you write this down throughout DevOps history. Every new automation technology made a single engineer more powerful. It did not replace engineers.
It made the individual engineers more powerful and productive. That has been a pattern. So, one admin went from managing 10 servers to 100 servers with virtualization, then to thousand servers with cloud, then to 10,000 containers with Kubernetes. Each time people feared this will take away my job and my career safety.
But what actually happened? Companies expanded, the projects expanded, they built more applications, they needed more infrastructure, they opened more data centers, the automation did not reduce jobs, it increased what was possible per engineer team or per individual engineer. And AI is actually showing the same pattern. AI will help one DevOps engineer manage 50,000 containers instead of 10,000 or even more.
But companies will not fire engineers. They will expand their infrastructure even more. They will build new AI applications that need deployment. They will need more monitoring, more security, [clears throat] more compliance.
So the demand does not shrink. It actually grows. It changes its mode. So you will not be doing the same thing as you were doing before.
But it doesn't mean that the number of engineers with whatever skills become demanded will shrink. And you want to be the engineer who knows those new skills when the old ones get outdated. Who knows how to use AI to manage infrastructure at scale or containers at scale or application deployment and development at scale. Now, let me show you what Kelsey High Tower said about this.
And Kelsey is someone who has been at the absolute cutting edge of cloudnative technology for over a decade. >> One thing I love about open source is the fact that it has a way of correcting, right? It has a way of balancing the scales a little bit. Um, and there's various projects, but I remember when Deep Seek came out.
>> Mhm. >> Oh, it was so great to see this because everyone thought that the endgame was Open AI, ChatGpt, and Nvidia. That's it. everyone else would just fall in line.
End of story. And then Deep Seek comes out and everyone's like, "Oh my god, whoa, whoa, whoa, whoa, whoa." And these guys like, "Yeah, look, maybe they copied some parts, but who cares?" >> Yeah. >> This is the power of open source. We take the best ideas and we democratized them.
And so when they did that, it reset the thinking a little bit, right? Whoa, whoa, whoa. Looks like open source is going to be competitive here. Nvidia isn't the only game in town.
And going around the world, I'm seeing other countries getting inspired that, yo, wait a minute. We can build things too. We can create things too. We can compete too.
We have good ideas. And so the way I'm thinking is that humans will do what they normally do. They will show up and leverage all of our tools. There's 9 billion people in the world.
I don't think we're going to rely on just like a few million of them to decide what happens to everybody else. That's insane. And so as as great as this AI train is moving, let's not forget the momentum that we've been building behind open source for the last 30 years. And I think if I had to bet, I think the inertia from open source, the appetite for humanity to continue to share and care about each other.
We see this with recipes, right? People come up with an amazing dish, they cook it for other people, they figure out the recipe, and they share with each other. And I don't think that stops when it comes to things like technology because we've seen it with operating systems. We've seen it with protocols.
I don't know why we won't see with AI, especially once we democratize like the hardware and the rest of the stack. So my bet is most people are good. Most people want to do good things and if we give them the tools to do that, they will. >> Kelsey is talking about something deeper here.
The question is not will AI replace us. The question is who controls AI? And in the open-source world, in the DevOps world, we have a history of democratizing powerful tools. Kubernetes was open sourced by Google.
Docker was open source from the start. Terraform, Enzible, all these tools that we use daily, they're open source. This means AI will not be controlled fully by three companies. It will be accessible to everyone.
And someone needs to deploy these AI models. Someone needs to manage the infrastructure for AI applications. Someone needs to set up the pipelines, the monitoring, the security. And that someone is usually an engineer in many cases right now.
DevOps engineer, MLOps engineer, whatever role that may be. In fact, let me show you something that makes this even more clear. Brett told me something that completely changed my perspective. There are actually two separate worlds forming right now.
DevOps for AI, which is building infrastructure for AI companies, and AI for DevOps, which is using AI to do DevOps work faster and more efficiently. And both of them need DevOps engineers. Let me show you. >> Yes.
And in fact, that preceded everything we just talked about, right? Because I think we we as ops and devops people, if we just combine all those into one, I think we understood that we were going to have to start building or managing GPUs and GPU clusters and Kubernetes on GPUs and like that we were going to maybe have to do that as just a new piece of hardware. We haven't had a new piece of hardware really in infrastructure for decades. you know, we've been managing the same memory, networking, compute, uh, disk, you know, uh, we've been managing that stuff for, you know, forever since the PC was invented.
And we haven't really had a to worry about TPMs and TPUs and GPUs and AG APUs, I think, are another one that's new. And these are new types of hardware. So for three years now, ever since really um like a little bit before Chad GBT, but for at least three years at KubeCon specifically because KubeCon is an infrastructure conference. So it's really about how that conference is how do we do DevOps on infrastructure.
It took us a while to get functionality even to do that and then and to get the Nvidia drivers on there and to you know all that stuff and then how to know the difference between servers with GPUs and servers that don't have GPUs and how do we make sure that we get the we assign the right places in the right locations how do we schedule all these things how do we you know and that was even if you just look at the most recent KubeCon probably 50 to 100 talks on that very topic and there's it turns out we now have years later we now have lots of examples well docu doumented examples, tons of KubeCon uh talks that you can look up on YouTube for free about building infrastructure on top of these specialized pieces of hardware. And then also how do we what does it look like to run a rag yourself, right? What does it look like to deploy a model in a container image? Let me explain what Brett is saying here because this is a massive opportunity that most people don't see yet.
Every AI startup needs infrastructure. They need to deploy their models. They need GPUs. They need Kubernetes clusters that can schedule workloads on expensive GPU hardware.
They need monitoring to make sure their inference endpoints are responding. They need CI/CD pipelines to update their models. But here's the thing. AI companies are full of data scientists and machine learning engineers.
They know how to build models. They don't know how to deploy them to production. They don't know Kubernetes or Docker. They don't know how to set up proper monitoring or logging or security.
And this is creating a massive demand for engineers who know how to do that. Again, mostly DevOps engineers who understand both traditional infrastructure and the specific needs of AI workloads, which usually is referred to MLOps. And even if you're not working at an AI company, every company is starting to integrate AI in their workflows. And that means more infrastructure, more services to deploy, more complexity to manage.
And all of that again needs infrastructure automation, DevOps expertise, which gives you this nice additional database of context to your your AIS. you learn how to run the AI models in the background using uh we all these little Python scripts and things like that that can now fit into containers. So that's the AI engineer that it turns out. And then the DevOps engineer now if we're going to use AI for DevOps doesn't have to know any of that and can just use the models and and type in system you know prompts and build scripts and automations to automate their own work.
And I think all three of these could live in separate silos more or less and and they could they maybe share a little internal guild or or group together that just talks about the AI stuff in general. But you could you don't have to specialize. You don't have to become an AI engineer to stay relevant in DevOps and you don't uh but if you want to um you can do that. However, I would say I do think for a very long time we are going to have way less need for AI engineers coming soon.
Then we're going to need DevOps engineers who know how to use AI. I think that that like we always we we have this saying now that you know AI is not going to replace your job. A human that knows how to use AI is going to replace your job. Well, that that does apply in DevOps that if you are about you know to me using AI for DevOps is just like saying I know Terraform.
You know, there was a time where if you knew Terraform, you were you were bleeding edge. >> But nowadays, if you're going to get a job in DevOps, you probably have to know that tool. >> Yeah. >> So, in the future, or if not very very soon, maybe 6 months a year, you're going to if you don't already see it, you're going to start seeing DevOps engineer jobs that list you know how to cla code.
This is the critical takeaway. You don't need to become an AI engineer. You don't need to understand machine learning algorithms or neural networks. What you need is to be a DevOps engineer who knows how to use AI tools.
Just like you need to know Terraform today, you will need to know how to use cloud or CHBT or cursor to write your infrastructure code faster. The skill is not building AI. The skill is using AI to do DevOps better. And that requires you to understand DevOps first.
You need to know when the AI generates correct Kubernetes YAML versus incorrect one. You need to know if the Terraform code makes sense or creates security vulnerabilities. So AI makes you faster but only if you have the foundation to evaluate its output and that foundation is DevOps knowledge or the knowledge of the concepts and technologies behind. Now let me show you again real people with real experiences who are living this reality right now.
First, let me introduce you to Joseph, a staff level cyber security engineer at PayPal with 15 plus years building cloudnative platforms and now works at the intersection of DevOps, security and applied AI. So, I have two final questions. Uh the first one is a huge topic right now and I would really love to have your um insight here and also advice from you to uh a lot of the you know again like a lot of junior engineers who fear it and they feel threatened by it but also a lot of experienced engineers who are maybe in a little bit more outdated IT roles like networking network engineers you know data science um you know CIS admins and so on. uh because you also have a unique perspective of not just you know engineer but you're also uh a managing a manager of uh cyber security engineering uh at a large company.
So what is your career advice to people that are feeling threatened by AI? And many times they're asking themselves, is it actually worth for me to invest next two to three years learning uh something that may get outdated in the future because AI is going to take over any every single job including the IT roles. What would you tell those people uh in a way that they actually believe rationally um that they are not completely threatened and going to be replaced by uh AI? Yeah, definitely there are couple of spaces definitely I think uh we can contribute a lot with all the other AI productivity tools right so security and the infrastructure side of it right the way we ship even if it is a it runs on a bare metal server somewhere on a VM or somewhere right so infrastructure provisioning or managing the infrastructure uh that is definitely not going to change it's going to be there for a long time I will say and security Right?
We know uh we know about the shared responsibility model when it comes to AWS. Right? So you know what AWS will take care and what we need to take care what is the application deployment team will take care. So uh these AI tools right now there is no shared responsibility model at all like it generates based on what it is uh trained [clears throat] right.
So maybe the responsibility and ownership side of it is definitely going to be there for a long time. Even though we buy different tools and other things, end of the day, the tools will be managed by us. >> Now let me introduce you to Israel. He's originally from Nigeria.
He studied civil engineering. Then he moved to the UK and decided to transition into tech. And his story shows exactly why DevOps is so futureproof. >> Okay.
Uh so I need to say this that I came from not like an IT background like um I did civil engineering on my on my like back in Nigeria because originally I'm from Nigeria and um I went through the university and after my graduation study civil engineering I you know something within me tells me that this is not for me like I feel that like there's no way I can continue you know going studying civil engineering and one thing I said to myself that I want a a skill that is like a global skill because when you think about civil engineering and those kinds of professions they're kind of you know specific to one country because it looks like you went through like this long journey of trying you know front end development the back end the devops but you still get it you did the course like what made you still persevere and be like I'm still going to continue learning um and finding out how to get into this field and not give up and say maybe it is not for me maybe I should learn something else other than engineering like what made you stick to it long enough? >> Okay. Uh so one thing about me is that um when it comes to um so I have like that kind of resilience spirit you know. So what actually kept me not giving up all this why was uh you know I had the vision that okay if I give up because then I was in the UK and you know how visa restriction is and you know and all of that it means that after my studies if I can't get a job that's going to sponsor my visa that means I need to go back to my country and that was a huge motivation for me that I can't go back to my country without you know uh you know having a company that will sponsor me and you Being a DevOps engineer in the UK alone gives you you know that that opportunity that leverage for any company to sponsor you because um DevOps engineer are they highly [clears throat] skilled and they are highly paid and if you are being paid that kind of salary automatically you beat the salary threshold for company to sponsor your visa.
So becoming a devops engineer alone gives you has already put you way above other professions and put you in a better position for you to be sponsored. So that was one of my major reason. Israel went through front-end development, back-end development, tried multiple path, but he kept going and eventually he found DevOps. He did the CK certificate, then he enrolled in our devs boot camp and before he even finished the boot camp, something happened.
So, let's talk about that. So you basically uh get through like twothirds of the boot camp and did you start looking for the jobs because you felt ready already or how did the the interview come about? >> Like it's is like my journey is just kind of amazing [snorts] how I don't know how to say it but the truth is that I didn't even apply for the job like being that I was coming from a boot camp the thought of even applying for a lead deos engineer role is just you know far away from me. So I would I didn't even have the the boldness or the confidence to to apply.
So I think um the recruiter the talent recruiter for my company sent me a DM on on LinkedIn you know but then I was you know I was I I was not I was not even posting anything. I just posted my CK certification and then I did Terraform certification that was what I did and there was nothing special about about my LinkedIn. So what I did was I just added some keyword on my LinkedIn like DevOps engineer, listed some tools on my bio and that was it. So let's stop right here because this is critical.
Israel did not even apply for the job. The recruiter found him and this is happening more and more in DevOps. Why? Because there is a shortage of qualified DevOps engineers.
Companies are desperately looking for people who understand Kubernetes and Terraform CI/CD cloud infrastructure. The demand is so high that recruiters are actively hunting for candidates. But notice what made Israel visible. He had certifications on his LinkedIn.
He had keywords. He had proof that he knew these technologies. You don't need 10 years of experience. You need proof which is visible that you can do the work that they are hiring for.
And here's what happened in his interview. Pay attention to this because it shows exactly what I have been saying about AI not replacing these jobs. >> And one of the question I was asked that actually gave me that selling point like actually um you know um pick the interest of the CTO was you know if you have a pipeline that is taking too long to run for like 10 minutes. How do you you know shorten the pipeline?
How do you optimize the pipeline to make it run very fast? Because sometimes developers feel frustrated when pipeline is taking too long, you know, to to run and all of that. And that was one of the stuff I actually learned from your boot camp. How to optimize a pipeline by using caches, by caching dependencies, you know, uh leveraging docker caching layers in the in the docker file all of that.
So that was what I explained that to the like I explained it very well. I I told them how docker leverages you know layers. So as I then if you want to build an image it's better for you to place those layers that don't changes frequently at the top and the ones that changes more frequently at the bottom. So I was able to explain this conceptually and all of that.
So the the CTO was just nodding his head and you know that was my first task as well when I joined you know I was trying to optimize the pipeline to make sure builds are many very fast efficient using caches dependencies and you know etc. So you see what happened there? The CTO asked about Docker optimization. Israel explained the concept of Docker layers not from memorizing the syntax but from understanding how Docker works.
And this is exactly what I said earlier. The AI can generate a Docker file, but can it optimize it for your specific use case? Can it understand your build process and make it 10 times faster? That requires a broader and more complex understanding.
And Israel had that understanding from actually building projects, not just watching videos. And this was not just any job offer. Listen to this. >> Okay, let me share something with you.
So I need to say this. I landed two offers, not just this one. So I landed two offers. The first one with was with a company um in the company was based in Poland, but they have the headquarter here in the UK.
That was actually a devos that was a junior devops, right? It was a junior devos role and I I smashed the interview even before the end of the interview. They were already asking me like how much do they need to offer me to take my CV off from the market that they don't want me to apply for any job. They just want to take me and there but because I was naive I was looking for a job.
I was so fast. I just want to get something. So I I said okay I needed something between 30 to um 30 to 40,000 thereabouts. the okay they're going to send me the contract and just 1 hour after the interview they sent me a contract to sign so two job offers before finishing the boot camp one company sent him a contract within 1 hour of the interview this is not luck this is market demand very clearly and by the way Israel is now a lead devops engineer so he passed his probation after just one month instead of 3 months he got a 10% % salary increase after his performance review.
Why? Because he keeps learning. He didn't stop after getting the job. And let me show you another example.
This is Patrick and he was a network engineer. >> Okay. Yeah. Good.
Good. Good question. Uh and I think uh yeah. So first of all, a lot of companers are not looking for specialized people right now.
I mean the big companies small still look for specialized people but the big companies look for people all around there that would take any task that they have some Python knowledge they have some AWS knowledge maybe some Asure uh they are looking for basically problem solvers. They are not looking for software engineers or DevOps engineers anymore. They just want the work to be done and that you are have this personality of of delivering the the the work they need. So if if I was just starting out out, I would probably join your boot camp again, build one one big project and try to learn uh a lot of different different different stuff to be just all around to to have >> uh yeah to to to be able to ship something from from from the beginning to an end.
>> Patrick said something really important here. Companies don't want specialists anymore. They want problem solvers who can work across the entire stack. And this is perfect for DevOps because DevOps is inherently crossfunctional.
You work with developers, you work with infrastructure, you work with security, you work with networking, you understand the entire application life cycle. When AI comes in, someone who only knows one narrow thing becomes much more easily replaceable. But someone who understands the entire system, who knows how different pieces connect. That person actually becomes more valuable, not less.
And AI actually makes this role more important because now you are managing more complexity. You are deploying AI models plus traditional applications. you are managing GPU infrastructure plus the regular compute, you need that broad understanding. Now, let me show you Rodie.
He's been a QA engineer for 13 years and he saw exactly what I've been talking about AI starting to automate testing. So, what did he do? >> Yeah. Well, basically the letter I really enjoyed, let's say, the more technical things.
Uh, and not to discredit test automation because I really like and enjoy test automation [snorts] but I feel like these frameworks they really overlap with each other. Like the other Cypress is is very similar to Playright. Of course it has some discrepancies between one and another but when I was really doing the technical stuff that I didn't know I felt the enjoyment that I was like oh wow this is actually interesting and challenging because I don't know. Uh so that was definitely one of the triggers for me and I'm not saying that test automation is easy because every problem has its own uh difficulty let's say >> but I felt that it would be for me a skill that would be very useful and helpful to to get to uh get to know and learn because I can use it in my dayto-day.
Um but next to that it was also really challenging and for me in jobs I really need to be challenged to stay motivated and to uh yeah move forward because I'm quite ambitious. >> What would you suggest them to learn as the very first step or like the the simplest entry point into DevOps? >> Uh I would say uh pipelines for me together with Docker. >> Rodi identified the exact skills that make him future proof.
CI/CD pipelines and Docker. Why? Because test automation alone can be automated by AI. But setting up the entire testing infrastructure that actually requires much more complex and broader DevOps knowledge.
When AI writes your tests, someone still needs to run those tests in a pipeline. Someone needs to set up the test environments using Docker. Someone has to design those systems and think about architecture and optimization of that architecture. Someone needs to configure when the tests will run, how they report results, what happens when they fail or what happens with those results, how to make them easily consumable.
That's DevOps. And Rodie saw this coming. He learned DevOps on top of his QA experience. And now he's a freelancer as a test automation specialist with DevOps skills.
and he's definitely not worried about AI replacing him anytime soon because he's using AI as one of his very strong and efficient tools. Now, here's something really interesting. Israel told me about how he's actually implementing defication and this shows why DevOps keeps expanding and not shrinking. Did you get any feedback from your uh employer, from your manager about your because it seems like you were you know actively trying to improve the processes without definitely having to tell you like hey Israel like can you can you do something like you are self motivated to learn you are self motivated to implement those learnings like what was your feedback from the the managers >> yeah so so on my performance review I added that to um because we have like a performance review every every first quarter And being that I was on my provision was supposed to last for six months.
>> I my review [clears throat] had to elapse for like one year. So in the annual review I added that as one of my um how I improve the security posture of the companies by you know making sure that containers are not running as root users in production um to ensure that we are we are using the least privilege you know for our deployment and also giving uh proper arrowback permission to service accounts that are running um stuff in Kubernetes you know and also implementing um scanning our containers scanning our pipelines you know you know scanning in our pipelines to see if there's any hardcoded credentials and and all. So I added that to uh my uh what's it called? I added that to my uh PDRO and after that I had a pay rise which is like 15% I think no sorry 10% of my base salary.
So all of that actually added to my performance review and yeah so it actually helped. So I had a feedback from my manager was super happy. The CTO were happy. They were so happy about my my work rate and the value that I've added the value that I've added to the companies you know um across the years.
>> Look at what Israel is doing. He's not just deploying containers. He's making them secure. He's scanning pipelines for credentials.
He's implementing proper permissions. So this is deficults and this is one of the fastest growing areas right now. Why? Because AI applications handle sensitive data.
They need security and every company integrating AI needs someone who understands both DevOps and security. AI will not automate this away. In fact, AI creates more need for this because now you have AI models that could potentially leak training data. You have more APIs to secure, more services communicating with each other, more a tech surface.
So every new technology creates new security challenges and devs secops engineers are actually the ones who can solve them by automating security checks and security audits and Israel got 10% salary increase for doing this work and it is a proof that companies pay for skills that protect them that give them very tangible value and security automation is definitely one of those skills. So now you understand why DevOps is futurep proof. But how do you actually position yourself to take advantage of this? Let me give you the exact strategy based on what worked for these engineers who participated in our Davos boot camp.
First of all, you need hands-on projects, not tutorials that you can passively follow, not just certificates, like actual projects where you build something complex end to end. Anna said something that perfectly captures this. >> The DevOps boot camp. Um yeah, it was super useful for me because I I don't have a computer science background, you know.
>> But also I find that uh they don't really teach DevOps, you know, uh if you study computer science. So the only way to really learn it is either by the job, you know, if you have the experience or through a boot camp like yours. >> Yeah. Or self-study.
But yeah, if you self study, it's a bit difficult to really show, you know, that you have the level enough, you know, to work later as a DevOps. >> Yeah, that's a really good point. So, you can't have a traditional degree in DevOps. That's that's current at least currently it's not possible.
So, you have to have it either from self-arning or from experience um or like a like a boot camp or a professional program. This is important. You can watch YouTube videos. You can buy Udemy courses and those are good for learning concepts or like very very high level stuff but they don't give you the depth that you need to actually work as a DevOps engineer.
Like what are you going to do at the first day on your job as a DevOps engineer when you get hired if you never build something that resembles the actual real life project. And why is this happening? Because these resources teach tools in isolation. You learn Docker in one course, then Kubernetes in another video, then Terraform in a third course, but you never see how they connect together in a real project that is way more complex than just deploying a few EC2 servers with Terraform and configuring some basic networking configuration.
So in our DevOps boot camp, my goal was to make sure that the projects are completely end to end. You're not just learning Kubernetes. You are deploying an actual application to Kubernetes with a CI/CD pipeline automation with monitoring with proper security configurations. You are building exactly what you would build in a real company in a real project.
So you're actually prepared for that job. And that's what employers test in interviews as well. They don't ask you what is a pod in Kubernetes or what is a service or what is the difference between them. They ask you how would you deploy this application to production and if you've only watched isolated tutorials you will not be able to answer that.
Israel told me he used concepts from the boot camp directly in his interview. Anna said that the Terraform and Kubernetes modules were the foundation for her current job. And Patrick said that he would build one large end toend project if he was starting over. One solid complex project teaches you more than 10 simple tutorials because you have to make decisions.
You have to troubleshoot when things break. You have to understand why you're using each tool, not just how to use them. Second strategy, portfolio plus certificates. Israel had both.
And that combination got him two job offers before he even finished learning. So I had just uh my little devops experience like when I was I told you earlier that I was shadowing my friend in Poland on cap Germany I just added some few things and I also butress on what I'm actually learning on the boot camp like those my project so I added my project on the project session with a link to my GitLab. Yeah I think GitLab. Yeah.
>> So you included the the the project portfolios as well from the boot camp. >> Yeah. Yeah. in the GitLab and also added some I also added my GitHub portfolio as well because what I do is that whatever I learn using GitLab I try to do it in GitHub as well just to see how it works.
So I added GitHub GitLab and I also added my certifications just my CK and and Terraform your portfolio is proof certifications show that you have passed the exam but a portfolio shows that you can actually build things and here's what most people don't know. Employers actually look at your projects. Anna told me that they asked her specific questions about her configurations from her demo projects that she sent along. They wanted to know why she configured things in a certain way.
And that proves that employers are interested in your project portfolio and they want proof that you understand what your project is about and you didn't just copy it from somewhere. So your portfolio needs to be on GitHub or GitLab publicly with proper structure readmi file explaining what you built and why with clean code structure easily understandable for whoever is looking at them with actual working configuration not just empty files and combine that now with certifications CK for Kubernetes maybe AWS certificates and this entire thing validates your knowledge together with projects they make you a strong candidate so you can stand out. And this is especially important if this is your first ever DevOps job because you don't have a work experience. And this combination is what got Israel noticed by recruiters.
He didn't apply, they found him because he had visible proof of his skills. Third strategy, keep learning even after you get the job. This is what separates good engineers from great engineers and it's what makes you truly futureproof when you do not stop learning. Let me let me say something.
I will go back to that question. So when I joined the company, it was like my was it called my probation was was to will last for 3 months but then even after 1 month I already passed my probation. So as I then I decided to um you know obviously the one thing about me is that I don't like being in one place for a very long time. So I want to be upskilling.
Israel passed probation in 1 month instead of three. Then immediately enrolled in the deficops boot camp. Why? Because he knows the learning never stops.
Anna is preparing for the Redhead certification while working full-time. Rod is building additional projects and writing blog articles. Patrick is exploring AI tools and automation. Do you see the pattern?
This continuous learning is what really keeps you ahead. When AI evolves, you just evolve with it. When new tools emerge, you learn them. You stay curious.
You stay hungry while you still have that comfortable job security. Companies pay more for engineers who grow. Israel got a 10% raise after just one year. Anna says that recruiters contact her regularly now because of her continuous upgrade of her skills.
Grody went freelance because he had options. And that only happens if you keep improving and upgrading your skills. Now, let's talk about the investment because learning DevOps properly takes time and effort. It's not a weekend course and it's not a quick fix.
But here's what the payoff looks like. That was actually one of my questions I wanted to ask. So, uh let's zoom in into that moment like the day that you decided to to enroll in the boot camp. So, you did you studied the curriculum, right?
Because you want to be sure that it matches the requirements of the job. So, you see what technologies are taught, which projects. So what was your thought process? So when you decided this is because it is a considerable amount of money when you don't have the job yet, right?
So you have to be kind of kind of sure that you're going to get the job after it. So investment pays off. So what was your thought process exactly of deciding you know what I'm going to make this investment. So my thought process was like the first thing I did was when I went through the road map I saw all the tools and then when I compare it to most of the job descriptions like jobs and everything everything mashes especially the terraform the kubernetes the anible and AWS and those you know highly those were high in demand as then you know in the UK and when I saw it I said I I I think you know I think it's the investment is actually worth it.
Israel did market research. He looked at job descriptions. He compared the boot camp curriculum to what companies actually need and he saw that they matched. And this is very smart.
Do not just randomly learn technologies. Learn what the market demands. Right now that's Kubernetes, Docker, Terraform, CI/CD, cloud platforms, monitoring, security. These technologies are not going away.
Companies have massive investments in Kubernetes clusters. They have thousands of containers running and they need people who can manage this infrastructure. And yes, it requires investment. It requires time investment.
Our boot camp takes six to sometimes longer if you're working full-time and learning part-time. It takes money investment. It costs money if you want to get quality training. But compare that to the payoff.
Israel lended a lead DevOps engineer role. And if you look at the job market in the UK, that's 50 to80,000 per year. Anna landed a DevOps role in Switzerland. Patrick is working at the big tech company.
Rodie went freelance and can charge premium rates now because of his edit skills. So the investment pays for itself like the first few months of your new job. And then you are earning significantly more for years to come. And here's what you need to understand.
The investment is not optional anymore. the market is getting more competitive and evolving every day. Anna said this perfectly. >> Yeah, I find that I mean I cannot really say because I I didn't experience it before but this is what I read that I find that now as the job market it's very challenging.
Uh yeah the process it's more and more difficult and there are more rounds than they used to be and also the difficulty you know on the interviews it's much higher than what it used to be. The interview process is harder now. Companies are more selective. They are testing deeper.
They want to make sure that you can actually do the work, not just talk about it. And that means you cannot shortcut the learning anymore. You can't watch a few YouTube videos and expect to pass technical interviews. You need real depth like real projects and real understanding.
And you cannot build this deep technical understanding with simulated lab environments. We're not actually deploying stuff in real environments or with some shallow Udemy courses or even YouTube tutorial. Even including our YouTube videos and courses because they're just not deep enough and practical enough to prepare you for an actual job. During technical interviews, they ask you stuff, ask you questions to validate that you're ready for an actual job.
And that takes structured learning, not random tutorials just chained together. A proper curriculum that builds knowledge step by step and projects, complex end to end projects that force you to connect concepts together. And you also probably need support from the community and actual engineers when you get stuck. And this is why graduates from proper boot camps like ours succeed because they invest the time and money upfront in building those skills.
They build the foundation and then they have careers that last decades, not just years. Let me summarize everything you learned today. DevOps is not being replaced by AI. It's a very clear and solid statement right now.
It's becoming even more valuable because of AI. And here is why. As a summary, first of all, AI needs infrastructure. Every AI application needs deployment, monitoring, security, CI/CD release pipeline because the AI models get updated and deployed with new versions and someone has to build that infrastructure and that someone is usually a DevOps engineer or engineer with those DevOps skills.
Second, AI increases scale instead of reducing jobs. Throughout history, automation made engineers more powerful. one engineer managing more servers, more containers, more complexity. AI actually continues that pattern and companies expand because they can do more now.
They need more engineers to manage that expansion. Third, AI is a tool, not a replacement. No matter how powerful and self-thinking and creative it is, it's still a tool. You still need human judgment in many cases.
You still need someone to verify the AI got it right. You still need someone to deploy the production and take responsibility. AI gets about 70% accuracy right now and in infrastructure that means it fails. You need the knowledge to fix what AI gets wrong.
Fourth, new specializations are emerging now. Devsops, MLOps, platform engineering. So AI actually creates new roles not eliminating existing ones and all of them need DevOps foundation. You heard from the real people today.
Israel from civil engineering to lead DevOps engineer in under two years. Anna from medical devices to DevOps in Switzerland. Patrick from network engineering to big tech with a much more challenging and exciting job. Rodie from QA to freelance with DevOps expertise.
They all made the same decision to invest time and effort to learn DevOps properly once as a foundation and then reap the benefit of it for years and decades to come. Not from random tutorials. I mean, they tried, but they still needed structured training with real projects to really get that knowledge. And now they have careers that are growing and expanding, not shrinking.
And the experts even confirmed it. Brett says that we're many years away from AI replacing DevOps work. Kelsey says humans will control how AI is used, not the other way around. And both of them confirm the increasing demand for DevOps engineers or architecture roles in general who have this skill set.
So here's my question for you. Are you going to wait and see what happens or are you going to position yourself now actively while the demand is still high and companies are actively looking for DevOps engineers because the window is open right now. Companies need people. The shortage is real.
But as more people realize this opportunity, competition will increase. If you want to see exactly what technologies these graduates learned, what projects they built, what curriculum gave them the foundation to lend these jobs, we actually have two resources for you that you can check out and see for yourself. First, you can download the DevOps road map that shows you exact learning path, the technologies you need to know, the sequence of how to learn, in which order to learn each one, and it is the same road map that Israel used to research whether DevOps was worth learning or not, and it's free. Link is in the description.
Second, check out the demo projects from our boot camp to see the actual hands-on work that teach you the indepth knowledge, not just simple demo projects. The projects that got Israel two job offers. The projects that Anna showed in her interviews. The projects that gave them confidence to answer technical questions.
Also free to download from the link below. And if you decide you want structured training like they had, our DevOps boot camp is available. But even if you don't enroll, use the road map, use the demo projects, start building, start learning without actually learning the practical skills because whether you learn with us or somewhere else, the important thing is that you start the opportunity is here. DevOps is future proof and AI is actually making it more valuable, not less.
So use that opportunity. The engineers who understand this will actually thrive in the next decade and I will keep making videos or give you updates on where the trend is going so that you're always informed. You need to decide which one you're going to be. Decide to actually really lock in and learn that those foundational skills to accelerate your career growth or you know kind of stretch it out and feel stuck or like running in circles for the next month or years.
So download the road map, look at the projects, make your decision, and let me know in the comments what your biggest concern is about transitioning into DevOps. I try to read every comment, and I'll help you figure out the right path for your situation. As always, thanks for watching and I'll see you in the next

The video discusses the importance of DevOps as a growing IT profession, especially in light of AI replacing various engineering roles. It presents a structured learning path divided into four stages to simplify the process of mastering DevOps. The first stage focuses on foundational knowledge, emphasizing the necessity of understanding Linux, Git, and package management tools, which are essential for managing code and dependencies. The second stage introduces containerization with Docker, highlighting its role in packaging applications and their dependencies for consistent deployment. Overall, the video aims to provide a clear roadmap for aspiring DevOps engineers, breaking down complex concepts into manageable parts to facilitate effective learning.
Welcome to The Ultimate Guide to mastering develops in 2025 develops is one of the largest growing it professions and because of AI threatening to replace many roles like uh test Engineers database administrators data analyst and so on devops is becoming the futureproof alternative for all those engineering roles so if you have already recognized the importance of develops for your future engineering career but are abs abely overwhelmed and unsure where to start here is the clearest most straightforward learning path for you to learn devops now no matter how complex something is even if it's rocket science you can always break it down into manageable simpler pieces so instead of giving you this huge list and guide of learning devops where by the end you're already overthinking whether you really want to pursue devops or not I wanted to make it simplified and manageable so I broke the whole thing down into four stages or layers that each lead up to the next one and you will find this whole road map as a PDF below to serve as your guide in your devops journey now picture this a symphony orchestra where you have various instruments like various devops tools that each play a critical role and you have the conductor who brings it all together and that conductor is the cicd pipeline which I also call the backbone of devops orchestrating a harmonious flow of code builds tests and deployments so I want to explain to you all of devops with this analogy where at the end of the video you will understand that streamline Pipeline with all these tools is the Symphony of Music the orchestra produces and yes that's how much I love these things that I'm literally comparing an endtoend CSD pipeline to a beautiful Symphony of Orchestra so let's walk you through the devil's road map divided into four phases to help you become the Maestro of this Orchestra and here is an important part this is exactly the order in which you should learn these things to make your learning as smooth as possible because when you learn A New Concept usually you need to know some other underlying Concepts before that so knowing what to learn when and in which order will not only make your learning smoother because you will be building your knowledge in layers but also reduce the time you need to learn tremendously because you won't need to go back and forth getting stuck because you missed an important part before and this is exactly how we structured our Devil's boot camp to literally take you by hand and walk you from start to finish step by step without any detour and of course everything that I mentioned here you learn in detail and in depth in the devops boot camp before we dive into the road map it's important to understand that devops engineering is not an entrylevel engineering role instead it's a highly valuable skill set that Professionals in various it roles such as software developers looking to stand out or system administrators aming to stay relevant build on top of their existing EXP expertise so let's start with stage one which is prerequisite knowledge of devops so these are the things that you need to build before you even start with develop specific Technologies and Concepts and with Orchestra analogy first we need to tune our instruments so let's start with getting the basics right before we can even start first we have operating systems like Linux as the common stage for our Orchestra almost every tool in devops runs on Linux so you need to learn how to navigate Shell or manage processes and understand file permissions and so on so knowledge of Linux and Linux commands and scripting is foundational but very powerful part of devop skill set operating systems are basically Foundation of computing environments whether you want to run pipelines or spin up servers for kubernetes it's all powered by Linux most do containers use Linux images and as a devop engineer you will work most of the time with remote servers on cloud which use Linux operating system so this skill is as essential as you know like having a stage and a solid floor for the concert to even take place along next up we have git which you can think of like music sheets for the orchestra to make sure everyone plays from the common music sheets and things are documented transparently music changes are made on the Sheets first before they are played so git is like the sheet music it tracks changes and ensures that everybody in the team is playing the same tune so with Git You would need to learn about branching strategies like git flow and trunk based development and tools like GitHub and gitlab and so on and it's very important to understand that in devops we have this common concept that we call everything as code or X as code that includes other underlying Concepts like infrastructure as code configuration as code and so on so this is like an umbrella term and git actually plays a central part in all of these Concepts it means we code a lot of the configuration that previously were done manually on local computers of some Engineers so we Cod configuration we C infrastructure creation we called the pipeline logic we code every type of automation logic in our systems and so on and that code will leave in a repository which all the team members can access and using various G features can collaborate on that code like you know creating merge requests resolving conflicts creating branches using various git workflows and so on so you need to learn those git features that let teams collaborate on code changes efficiently so this is another skill that you need across multiple tools and DeVos Concepts whether you are writing a pipeline or infrastructure configuration or kubernetes manifest files or application code or whatever next up we have build and package management tools now whenever you are developing an application you have an application code but we use bunch of libraries and modules basically code that other people have developed and are hosted on internet within our ation these libraries have versions and release Cycles um bugs get discovered in them or new features get added so you need to upgrade them to use the new versions of those libraries or dependencies for your application so for managing this list of dependencies for applications we have the dependency management or also called package management tools and there are different tools for different programming languages like we have npm package manager for JavaScript we have Gradle and Maven for Java applications and so on similarly music Publishers distribute the right versions of the sheet music to ensure musicians have the most upto-date music notes in front of them so the last tool set of devops Essentials or prerequisites is the application dependency management or packaging tools as I said these tools resolve dependencies handle any compatibility issues between those dependencies but also allow to run automation tests on your application code and so on so these package manager or packaging tools basically we're creating jar files from java applications or zip files from JavaScript applications and so on but now that we package everything as Docker images those tools are not needed for that specific use case and we're going to come to the package repositories or artifact repositor to understand how that affected the distribution of application packages and that leads us to the stage two of devops which is devops fundamentals and first we have containerization with a specific popular most popular container tool Docker now again back to our analogy the music instruments need a case to be safely transported to the concert venue right imagine if you just threw them all inside a car without a case not only they may get damaged but it would be hard to untangle them from each other once you unload them from the car also think about this some instruments actually have additional parts or maybe some replaceable pieces that the player can actually mount on the instrument itself so with the case you can actually pack everything that the instrument needs inside the case so container technology like Docker is the instrument case that ensures that every musician's instrument is safely packaged easy to transport and with all the needed Parts packaged inside ready to play upon arrival the same way Docker containers encapsulate an application and its dependencies and everything that application needs to run ensuring its consistency no matter where the application gets deployed so a learning Docker is an absolute essential skill of a devops engineer next up we have what's called an artifact repository now those instruments need to be stored somewhere safely right so we can grab them anytime we need they need to be I don't know maybe temperature controlled in know locked room that someone doesn't steal them and also organized in a nice way so that we can grab them easily whenever we need to use them so that's where artifact repositories or artifact registry comes in so artifact registry is like a storage for all the different types of instruments and as I said before Docker we had instruments stored without cases in the storage rooms like having jar files and War files and zip files built with those packaging tools just lying around without this common packaging or cases and Registries like Nexus for example supported storing different types of artifacts or instruments so no matter which programming language you use to WR appication you can store the artifact of that specific text deck in Nexus because it supports different types of artifacts and also very important to note the difference between registry and repository registry is like a storage building or a whole section for storing the artifacts and repositories are like individual storage rooms inside and each room has one specific type of instruments stored in it so you had one room that stored only violins let's say you had another room that stored only saxophones and so on so a repository is one specific room that stores one specific type of instrument while registry is the entire building with all these different rooms and with Docker as I said the change was that those instruments are now stored with their cases instead of just sitting there without the casing and Nexus itself has a Docker repository type as well but as you probably have learned with the docker we actually have specific Docker Registries for storing only Docker images where you have rooms for each instrument so Docker repositories within that registry but the instruments are stored with their corresponding cases and when we want to deploy containers we can grab the image from that Docker repository now the next one is cloud Basics now for the concert to even take place we need an actual concert hall or building where the concert will take place so that is a cloud infrastructure all the servers that need to run the systems so think of the cloud platform as the concert hall or the venue where the Orchestra is playing the audience is sitting all the lights and electricity the heating and so on that make up that building so Cloud platforms provide the underlying infrastructure the servers that are connected with networking configuration to power and run all those services and applications so you need to learn how this infrastructure is set up the all the servers and the storage and the networking Basics to connect those things together to understand how all this underling infrastructure actually works now that we have all the instruments in place and packaged and stored safely and even being transported safely now it's time to get everyone in their place let people in and set the stage so this is stage three of devops which I call devops core and the First Tool in the stage is kubernetes so think of kubernetes as an orchestra manager who prepares the stage who lets people in brings in the players on stage and so on those instruments that are in boxes or containers need to be unpacked and deployed placed on stage to be played right so kubernetes assigns the seats distributes the music sheets and ensures that every musician is present and ready to perform it takes the containers or the instruments from the cases and arranges them into a cohesive group managing their placement load balancing and scaling and so on and if one violinist for example suddenly cannot play anymore kubernetes will quickly find a backup or adjust their arrangement to compensate for that loss so in the same way kubernetes is this powerful technology that runs all the services smoothly making sure all the operations is actually done seamlessly so here is an easy explanation of kubernetes for you in just a few sentences imagine taking hundreds or thousands of Linux servers on cloud and putting a layer on top of that an abstraction layer which is kubernetes that turns these machines into one giant powerful machine and thousands or tens of thousands of services and applications can run on this one giant machine and talk to each other and connect with each other as if they were really on the same machine so kubernetes basically takes care of networking between these thousands or hundreds of servers to make sure that we can deploy all these applications and services on top of that in an easy way but that's not all once the applications and services packaged in containers get deployed on kubernetes kuet also becomes your operations engineer that works 24/7 for you so if any service dies or has any issues it basically just goes and restarts them automatically which is this famous self-healing feature of kubernetes kues also allows you to run multiple clones of each application with deployment components so when you add a new replica it basically automatically reconfigures everything on the Fly Like updating the service and load balancing to this additional replica of the application to Route some traffic to that new instance now it was obviously clear that I would spend most time talking about kubernetes again because I love kubernetes and I could talk about it for hours but let's move on to the next important Concept in the devops core phase which is Advanced Cloud platform skills and specifically with one of the largest public Cloud providers such as AWS now let's say your Orchestra is so popular that more and more people want to hear you play so you suddenly need a larger venue or larger Cloud infrastructure to accommodate for that and obviously the larger the venue the more complex it becomes to manage right larger venues have more features they have higher security demands and measures uh they have more sections more complex infrastructure requirements and so on you also have bigger stage so maybe you need more players and more instruments so it's a devops engineer you will need to learn how to manage all this complex infrastructure and how to scale infrastructure and use kubernetes your general manager to fill the stage allow more people to come in as an audience so if that smaller Concert Hall was a simple Cloud platform like digital ocean for example Now we move to more complex Cloud giants like AWS or Azure or gcp uh where the the services are more powerful and flexible but also more difficult so you go from easy high level to complex low-level infrastructure configuration so kubernetes will also use the venue the cloud environment for more advanced use cases using various features that the venue offers to run everything smoothly and efficiently and as devops engineer you will need to learn one of these Cloud platforms AWS is largest one that's why I always recommend to learn AWS first because the good news for you is the concepts are very much transferable from one large Cloud uh platform to another and as Cloud platforms provide hundreds of services obviously you need to learn the foundational set of services specifically as a DeVos engineer and some of those services are networking and compute Services storage configuration as well as general account Security Management Services for Access permissions and so on now those large Cloud platforms actually have own services for everything for example imagine if that larger venue had their own storage rooms for the instruments or containers the same way AWS actually has its own Docker registry called ECR where you can store the docker images so the larger the cloud platform the more Services they usually provide inhouse so you don't have to use those external third party tools but you can basically do all the things in that cloud itself which has a disadvantage to be logged into that cloud platform so people still prefer to use independent open source third party services but they do provide those services for convenience to use on the cloud platform itself so imagine if the venue had their own manager for the entire cont conert remember the main manager that basically runs everything and oversees everything is kubernetes so instead of the orchestra hiring the manager imagine they used the experience manager that the concert hall itself provided and this would have a lot of advantages because again let's say they have an experiened manager um also the manager knows better than you how the venue is actually set up and how it works so they can run these things without you like managing the building and tickets and all the infrastructure but you still need to train them on your Orchestra specific needs like managing your players or Distributing the sheets or instruments making sure that it all runs smoothly well that is an analogy for managed communties cluster on cloud platforms such as eks on AWS so the cloud provider manages a lot of the work and administration of kubernetes For You especially the parts related to the cloud resources themselves and they do it better often than you so you can just focus on running your services and applications or in this case on the orchestra part instead of all the work around the concert organization and because commes is so complex a lot of companies a lot of the projects actually prefer to use a cloud-managed commun cluster because it reduces the complexity of managing commence cluster yourself which is a very challenging work so that complexity and effort is reduced tremendously and that's why services like eks is actually widely used and a lot of devops Engineers are expected to learn and know how to run and use those Services because even if manag commun clusters are easier to run they're still complex to use and manage because there's still a lot of work that remains on your side that's how complex kubernetes is now it's time to actually play the music we have prepared everything all around it but now it's time to play so we have the whole Orchestra set up everything is organized players or musicians are on stage but there is the most important thing or element missing here which is the conductor you know the guy waving the want so bring in the conductor the CIA City Pipeline and this is literally where magic happens why is it important because conductor an orchestra sets the direction sets the pace they give cues to when to start playing in which order so that's the cicd platform the orchestrator of all things conductor who leads the entire performance ensuring all musicians tools and processes are in sync playing their parts flawlessly and maintaining the rhythm of the piece the conductor is at the heart of the orchestra itself the conductor is basically the element that brings together all the musicians ensuring that everyone plays in harmony keeps up with the pace transitions smoothly from one movement to the next and the same way cicd pipelines actually coordinate the workflow of building testing deploying monitoring applications and that's why cicd tools like Jenkins GitHub actions gitlab C and so on integrate with every single one of these tools that I mentioned because it needs to talk to each of the tools to execute them to tell them what to do when in in which order when to build Docker image when to push it to the repository when to deploy it to C cluster so learning CSD platforms as Devil's engineer is the absolute core skill set but you also need to understand all the other tools first because you will be automating workflows and tasks of those tools with the cicd technology and that's why devops Engineers need to know such wide variety of tools because they literally have to take them and integrate them with each other to build this complete full devops processes and finally we get to stage four of devop which I call devops Advanced so we mastered the core of devops which means we already are able to build complete and end to end devops automation processes now it's time to take it a level up to the absolute Mastery level of devops and as I said here you become the Maestro mastering the tools that make the orchestra truly world class first we have infrastructure as code and these are the tools such as terraform or pumi that give you this power in your hands to automate almost everything to build up the entire Cloud infrastructure in kubernetes on top of it from scratch using automation scripts so think of infrastructure as code tools like composer of music so terraform and pumi can be used by teams to manage resources across multiple clouds to track any changes to maintain consistency and as I said build everything from scratch with a really high level of complexity now before moving on I actually want to give a shout out to pomi and thank them for sponsoring this video palom is actually a game changer for those working with infrastructures code because unlike tools like terraform that use their own domain specific languages palumi lets you use the programming language that you already know and use extensively like python JavaScript typescript go lank whatever you are already using in your text dech and this means you can use your favorite code editor and your favorite text deck to write infrastructures code leveraging all the great features like error checking autocomplete refactoring and debugging tools that you're already comfortable with and familiar with so a huge benefit of pumi is its flexibility pumi integrates very easily with cicd pipelines and works with all major Cloud providers and essentially it's a great tool for both developers and operations teams now since we're moving into an aid driven World poi's latest feature pomi co-pilot can actually help you generate infrastructure code by simply describing what you need in natural language but it goes beyond that by asking questions you can actually get deeper understanding of your team's specific Cloud usage and valuable insights of your infrastructure for example you can ask pumi co-pilot whether you have any unused AWS resources and you can immediately reduce your AWS costs by simply removing those unused unnecessary Services pumi is open source so you can use it for free but if your team wants to unlock Enterprise features including pumi cloud with its automation API policies code and the popular palumi deployments feature you can use my code Nana 500 and you will get $500 worth of credits for the Enterprise version I will leave the link in the video description of course and now let's get back to the next skill in the delas road map which is yet another automation tool and a programming language Python and while terraform or pumi are composers of the music that Orchestra plays think of python as your versatile assistant it's like your Runner assistant so python can be used to basically automate any type of small repetitive task that you can imagine on a very flexible level you can write scripts to interact with apis you can write scripts to monitor different tasks you can write scheduled scripts and so on and as a devops engineer learning a programming language such as python is a huge Advantage because in devops everything is literally about automating and making things efficient you will often need to automate tasks and integrate systems and troubleshoot complex issues so python can be that glue that basically lets you integrate different systems or it could be just a simple tool that you can delegate some repetitive manual tasks that need to be run consistently on multiple systems maybe and python is one of the best choices in automation scripting because it's very easy to understand especially For Engineers coming from non-developer background like system administrators Network engineers and so on they can easily Learn Python it's flexible and more importantly it has a very large ecosystem of Library specifically for automation use cases then we have yet another popular automation tool enzi with enzi you can actually think of it as section leaders to each group of musicians in your orchestra that basically ensure can consistent guidelines within that group of players and make sure that all musicians within their section are in sync playing their parts correctly all the time and adhering to the overall vision of the conductor so the responsibility of enable in this case is to coordinate repetitive tasks which are very critical for the overall configuration of the systems like tuning instruments before a performance so everyone is prepared and L and en specifically is a tool that helps you manage hundreds or thousands of servers in a consistent manner keeping the um operating system packages up to date on all those servers patching those servers and so on so combination of these automation tools such as infrastructure as code tools and configuration tools like anible with an addition of python for edit flexibility will basically help you create systems that even if you replaced musicians or even if you changed venue everything will still run consistently with no hiccups everyone will still know what to do and how to do it so this infrastructure and configuration automation is like your well-defined processes and systems so using this tools you can basically replicate the same experience and music with any players on any venue and the same way for example if your entire infrastructure goes down and you lose all the servers and your Cate cluster crashes and you cannot recover that old running system because you have scripted everything from scratch you can use the same script to recreate exact same replica of the system within minutes because all the logic and all the configuration is direct ly baked into those terone pumi enable and Python scripts and that's how powerful automation is especially in complex environments where you have thousands of servers because imagine manually creating and configuring and updating and keeping track of such a huge and complex infrastructure that's why knowing these tools is absolutely essential especially if you join a company that has complex infrastructure so these skills will make you an extremely valuable engineer now we're not fully down here because we want to achieve complete Mastery we don't want to just be average and that's where the final piece of the automation tool set comes in in devops advanced stage which is monitoring and observability and specifically with one example of a popular observability tool is Prometheus especially in a community's world think about Prometheus as the audience listening carefully to the orchestra's performance basically having the real life experience of how things are going identifying immediately when something feels a little bit off like the player is out of sync or a note is missed they analyze the performance and provide detailed feedback to ensure continuous Improvement of the performance so Prometheus or observability Tools in general they capture realtime metrics from the systems the infrastructure applications the kubernetes platform itself so basically all the moving parts of the system notices any spikes in usage any downtime and so on much like an audience will detect errors in a performance so these are the four stages or four parts of learning devops that each represent a layer of devops knowledge that you can build on top of now there is one important element that is it's not really a tool or a concept that you can learn in isolation but rather something that is ingrained or should be ingrained throughout the entire process of develops and as part of each and every single technology that we discussed and that is security and security security is especially important skill set from a perspective of a company or an employer and security is an extremely important but often kind of overlooked skill set but it needs to be taken very seriously imagine with our analogy someone changed the notes of the best players for example they will be completely off tune and ruin the concert or let's say someone impersonated the conductor you know the guy who controls who does what in which order so they can take over and do evil stuff and completely ruin the music or let's say someone broke into the instrument storage and broke the instruments and damaged the entire room or manipulate it secretly one of the instruments so for every part of the process we need to have security measures in place like the guards at the entrance that validate the entrance tickets to the concert making sure that nobody comes in that disrupts the concert making sure the storage rooms are locked and only authorized people have access to them making sure that no one can impersonate the conductor so security is kind of this hidden thing that should exist everywhere and you only notice its absence if something bad happens so security as I said is extremely important especially in devops where so many different Technologies are integrated with each other where every single integration actually exposes in a tech surface so that means while learning each and every one of those tools you need to learn them with the security best practices as well and as I mentioned at the beginning you learn every single one of those tools in exactly this order in depth in the devops boot camp and if you check the devops job descriptions no matter in which country or which company you will see that this is a pretty complete list of what an experienced devops engineer is actually expected to know and what we teach proficiently in our devops Bo Camp which means we take even beginners of devops but we don't just prepare you with some entrylevel devops knowledge just enough to get you an interview or just enough to get your foood into a devop job because that's not a goal to strive for that's a very low aim instead we prepare you to crush any devop interview to stun your interviewers making them question how come you know all this stuff even though you don't have any devops work experience and perform confidently in your devops job after you actually get hired so that's the level that we are aiming for and that's what we prepare you for with our devops boot camp now I hope this video gave you some guidance in your journey of learning devops if you did please let me know in the comments what was the most interesting or most helpful part of this road map and don't forget to grab your learning path as well to help you in your develops journey and with that thanks for your time and see you in the next video
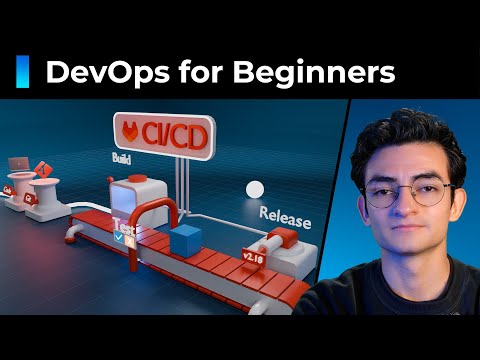
In this video, Diego explains the essential tools in the DevOps process, comparing it to a factory for software development. He emphasizes the importance of understanding tools like Jira for task management, Git for version control, and CI/CD pipelines for automating the deployment process. He also covers Docker for containerization, Kubernetes for orchestration, Terraform for infrastructure management, Ansible for automation, and Prometheus and Grafana for monitoring and visualization of system metrics. By grasping the purpose of each tool, viewers can better navigate the DevOps landscape and improve their software development practices.
DevOps is like a factory but for software. Each part of the factory is a tool you should learn and more importantly now you will understand why you should learn it. Every time we hear about DevOps and all these tools is very easy to get confused. Why do we need to learn all of them?
Why some of them seem to do the same thing? Is it enough if I just learn two or three? Well, this video is going to clarify everything for you. We are going to mention the essential DevOps tools.
There are many more out there, but this will give you the baseline that you need. My name is Diego. I'm a network and systems engineer based in Paris and I like breaking down tech concepts into simple and visual explanations. If you want to see more videos like this one, feel free to subscribe.
And that's all. Back to the video. The first tool in the process is usually a task tracker like Jeter. This might be surprising for some of you, but Jeter actually triggers the whole DevOps process.
It is a ticketing system that allows engineering teams organize their projects and tasks. I recommend learning methods like Scrum. Understand how sprints work. also get some familiarity with the tool because even if you are not a project manager, you need to know how to manage your Jira tickets, how to set your priorities and manage your time.
Okay, now let's say we have a Jira ticket to work on. So we move onto the next step. The next tool in the process is Git. Git is the tool that allows you to track changes of your code and save checkpoints along the way.
You will combine it with platforms like GitHub or GitLab to collaborate with your team. You need to learn the basic commands such as g pull, git push, git merge, g branch. I have a full video explaining git and github if you want to check it out. Whenever you push your code to gitlab using git, you will trigger something called a pipeline.
That is our next step. Most known as cicd, continuous integration and continuous deployment. This is where the code stops being just text in a repository and it starts becoming software that we can actually run. As you can see, the first step inside CI/CD is build.
Basically, preparing your code into a package that computers can run. Then we test it. If all the checks pass, we create a release. But don't get confused.
Release is not the same as deploy. A release means giving the application a version number like 1.4.2 and making it available, ready to be deployed. I recommend learning how to build these pipelines. For this example, I use GitLab CI/CD to illustrate, but there are other tools that do the same like GitHub actions or Jenkins.
The result of the CI/CD process is a new version of your application very well packed with everything that it needs inside, also known as a container. Here we are talking about our next tool, Docker. And let's clarify something here. You can build a container manually without a CI/CD pipeline.
So, it is a good idea to learn how to build a container from scratch so that when you need to automate this with CI/CD, it's going to be way easier for you. I have also a full video explaining Docker if you want to check it out. Next tool, Kubernetes. At this point, we already have our application very well packed, but is still not running.
We can say that it's ready to be deployed and we deploy it using Kubernetes. Kubernetes is the orchestration tool that has access to our servers. That group of servers is called a cluster. The orchestrator is always analyzing the cluster and based on the information it has, it will choose the best place to deploy your container.
That's why we call it an orchestrator. Is the one making the decisions. Once your container is deployed, your app is finally running. But I have an important question.
What if we run out of capacity on our servers? All of them are full of apps already running. That means that we need to add more servers. That's where Terraform comes in.
Terraform is used to define your infrastructure as code. Basically, you define your desired infrastructure in Terapform files and Teraphform will be in charge of creating those servers for you. Let's say we created 200 servers using Terraform. Everything is working fine, but suddenly we need to implement a security policy on all of those servers.
Doing just one is fine. We can do it manually. But doing those 200 that sounds like a pain. That's why we have our next tool, Anible.
Anible allows you to automate changes across all your infrastructure. It doesn't matter if there are just five servers or 3,000. You code it once and Anible will connect to each server and implement those changes. I have also a full video explaining anible and how it works.
So you can check it out. It is very important to don't confuse anible and terraform. With Terraform you create or remove those servers. With anible you configure them.
Next tool Prometheus. Promethus is also a tool that is connected to all our existing servers but with a different purpose. Prometheus is collecting all their status metrics. Metrics like CPU usage, RAM, network traffic or even specific metrics from the applications like how many users are currently connected.
Then it stores those metrics in a database. That brings us to our last tool, Graphana. We use Graphana to visualize those metrics. Once the metrics are in a database, we can connect it to Graphana and we create graphs using those metrics like curves or histograms, any type of graph that you can imagine.
Then we place those graphs in a dashboard in order to monitor the health of our whole platform. This is super important because it allows us to know if everything is running well. But let's say we detect that something is not working well. Guess what?
We create a Jira ticket to correct it and the process repeats. Once you understand the purpose of each of these tools and why you need to learn them, everything just clicks. You see the logic of it, the logic of the DevOps factory. I will be explaining deeply each of these tools and giving advice on how you can learn them faster.
So feel free to subscribe. If this video helps you to understand the essential DevOps tools better, give me some feedback in the comments. I will appreciate it. Thanks for watching and see you in the next