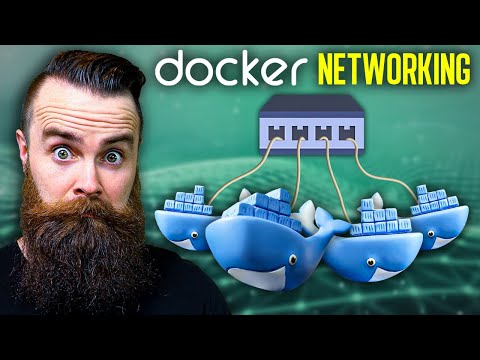
The video discusses the fascinating world of Docker networking, emphasizing its importance and the various types of networks available. The presenter invites viewers to explore Docker's default bridge network, which is automatically created when containers are deployed. He explains how to set up a lab environment using a Linux virtual machine and Docker, highlighting the ease of deploying containers and the automatic networking features that come into play. The video also covers how Docker assigns IP addresses to containers and allows them to communicate with each other seamlessly. Overall, the presenter encourages viewers to dive deeper into Docker networking to fully appreciate its capabilities.
Transcript
you need to learn docker networking right now it's crazy i can't stop playing with it i mean yeah we can all agree that docker containers i mean they're they're pure magic they're wicked fast lightweight that's why everyone's using them oh wait what's that behind your ear yeah i told you they were magic but there's something that's always bugged me a big mystery how in the world does the networking work i mean think about it by default it kind of just works but when we add these containers to a host are they on their own network can we create more networks can we isolate them can we expose them which we often have to do to make things work which is that our only option what's going on here so yeah um seven there are seven different types of networks we can deploy with docker containers in that crazy how did i miss this how did i never play with this so so so i like to invite you to go on a journey with me take the red pill let's go down the rabbit hole of docker networking you will never look at docker containers the same so get your copy ready let's dive in in in and shout out to the sponsor of this video bitdefender we'll talk more about how they can help protect you from the spooky side of the internet later now to understand docker containers and how the networking works you're gonna have to play with it like right now so let's get your lab spent up let me tell you what you need and feel free to follow exactly what i'm doing it's completely free the first thing you'll need is a bit of knowledge fun fact i met that guy in vegas hey i just saw tai lopez he's vlogging me vlog i know how we at g7x yeah man you'll need to know a thing or two about docker containers what they are and why they are awesome now i'm not going to cover that here in this video but i already did in this video right here so go ahead and watch it and click it up there or down the link below so you can keep watching but i advise if you don't know what i'm talking about when i say docker you're like wait locker no docker if you don't know what i'm talking about then go ahead and watch that one and come back and see me i'll wait don't worry i'll be here and second you'll need a host a linux virtual machine where we can install docker i'll be using the latest version of the free ubuntu desktop deployed in my favorite free type 2 hypervisor virtualbox now if all those words just scared you then go and watch my video right here on virtual machines you will be caught up to speed and by the way i'm still going to wait here for you so come back and see me when you're done but if you're not scared the final thing you need is coffee of course because everything in i.t requires coffee never chuck coffee with my coffee in hand now i'm ready for the lab let's do this do you have your coffee go go get it here in my lab i have a fresh install of ubuntu desktop as i mentioned before nothing on it i'll go and start that bad boy up right now man isn't that pretty i love this the first stop on our journey into docker networking will be the default bridge which is the first and sometimes only network we deal with when we deploy docker and it's the default for a reason because it is a little magic like trust me you're gonna have fun with this so let's deploy this and see what magic we have inside now here on my machine i have not deployed docker yet which is cool because i want to show you one thing real quick and go and do this with me if you have not deployed docker i will launch my terminal love the terminal feel so at home here let's take a look at our network interfaces let's type in ip address show and see what we have and pretty much what i expect we have our lootback interface and then we have our main interface connecting us to our home network which actually by the way let's make this change if you're using virtualbox go ahead and follow along with me i'm going to change the network for my vm by going to settings network i'm going to change it from nat to bridge adapter which will connect my vm directly to my home network getting an ip address from my router you'll want to do this for something amazing coming up called mac vlans i don't want to spoil it for you but trust me it's awesome so now with that change in place i'll do my ip address show once more and yeah look my ip address changed this is now directly connected to my home network perfect so like any good magician let me show you the current state of things before we perform magic here's the host running ubuntu here's his interface with the ip address of 1071232 on my home network which connects it directly to my router the internet and me now let's install docker do a little pseudo apt update action to update my repositories if my password is right my goodness okay cool and then we'll do sudo apt install docker dot io dash y that's all we need install quick coffee break while it's doing its thing and it is done cool so now some magic just just happened let's take a look i p address show once more in our terminal and let's see if we have any new interfaces oh look we do there he is we have something called docker zero what is that guy look where'd the ip address come from that's new docker zero is our new virtual bridge interface it is the default interface and network four the default bridge the default network in docker and pay attention to his ip address right here just remember that now there's more docker magic we can uncover real quick let's try this command docker network ls bam this will list our current docker networks one guy we already know mr bridge right here that's his name but two we don't and we'll actually cover them here in a moment they are two of the seven networks in docker and they're there by default obviously but one thing i do want you to notice is notice that little menu item up here the section called driver and docker speak driver basically means network type so our bridge network is named bridge and his type is also bridge he's using the bridge driver you'll see that terminology everywhere in docker so just like network type drivers that's what i do now what do you say we deploy some containers in our default network come on follow along with me we'll use the command docker run we'll do a few switches dash itd and make it interactable and detached running in the background and we'll do a dash dash rm so it will clean up after itself when we're done with it we'll name our container let's see what am i into right now um oh i just watched thor thor holds up man that movie is awesome so anyways we'll call it thor and then finally we'll specify the image we're gonna use for our container i like busybox it's quick lightweight fast it's just good so let's try it out bam and done i love how fast docker is i will never get over how magical that feels all right let's do one more let's hit our up arrow this time we'll just change the name of thor to to to let's do mjolnir okay no how do you spell milton here i'm butchering it i'm gonna google it real quick okay way off yeah what's miami there we go bam two containers down now i want to add one more but this time i want to add in instead of busy box we'll do nginx ngi and x as the image and we'll name this one one one stormbreaker yeah let's try it out it's gonna download the image and it's almost done okay it's done cool let's make sure they're up sudo docker ps there they all are all pretty now i want you to notice this when we deployed our containers did we say anything about networking at all no we didn't we just let it do its thing by default which means it got thrown into our bridge network we've been talking about and here's what it did when we deployed those containers in the default network docker automatically created three virtual ethernet interfaces and connected it or linked it to the docker zero bridge and it kind of acts like a switch and there's a virtual ethernet interface for each of our containers so the container's ethernet zero interface will connect to those bad boys now don't take my word for it let's take a look if we do ip address show again look at that three new interfaces one two three and then if we try this command bridge link it will actually show us their name and the fact that they are connected to docker zero super cool right i love seeing that stuff now that bridge was busy not only did he create virtual ethernet interfaces but he also handed out ip addresses which means he's also running some dhcp let's go take a look actually we can take a little dive into our bridge network with this really neat command you'll use this all the time when messing with docker docker inspect you can expect anything but this time we're going to inspect a network named bridge let's take a look now that's a lot of info but let me pinpoint what i want you to see let's go up just a bit do you notice some familiar faces or names looking at our bridge we've got our three containers mjolnir thor and stormbreaker and what else do you see do you see it right here they each have their own ip address and that same docker zero network we talked about and like every good network it has dns it actually takes a copy of the etc resolve file from the host and puts that sucker into the container so they're using the same dns and because the docker zero network acts like a switch as you can imagine the containers can talk to each other all day and don't take my word for it let's jump into each of them right now we'll do a docker exec dash it the name of our container i'll do thor first and we'll jump into his shell or n type in ip address show i can see his ip address let's try to ping milner think it was dot three and as you may have expected the container can ping the internet so networkchuck.com totally works because if i do an ip route inside of thor here his default route his gateway is docker zero which you're probably wondering how does that work how does doctor zero get thor out to the internet and it's the magic called nat masquerade we're not gonna cover that right now but it's also magic as you would expect and that is the bridge network pretty awesome right no wonder it's default but hold on we did forget something though did you forget about our web server over here stormbreaker remember we installed nginx which by default is a website and it will use port 80. now question can we reach that website and what i mean by we is can my computer over here which is you know me can it access that web server can i go to 10 the ip address the host on port 80 and navigate to the website probably not right you saw this coming 10.7.1.232 port 80. you specify that nothing can't be reached and that right there is one of the annoying things about the bridge network if you want to access any of the services that your docker containers might offer like a website it won't work by default you actually have to manually expose those ports and you may have done this before in fact let's do it right now we need to expose port 80 to the world to allow us to access after that we're going to have to redeploy stormbreaker nothing too crazy i'm going to jump out of thor real quick type in exit going to remove stormbreaker or i'll just stop him he'll remove himself docker stop stormbreaker and let's redeploy him with that same command up arrow a billion times so i have to type the command in again so here right before i do the name i'll do a dash p for port and i'll do 80 colon 80 telling docker to expose this containers port 80 to my host's port 80. let's try it out done super fast if i do a docker ps this is a great way to see like hey what ports are being exposed it'll tell you right there and now if i go and refresh my page yahtzee it's working did i just say yahtzee i don't know why i said that i'm sorry i'll probably do it again now honestly that's annoying when you're having fun in your home lab and you're like i have to expose another port but it is a pretty good practice to have that because it does put a layer of isolation between your containers and your network and for that matter of the host in spoiler there will be networks where we don't have to expose anything and they're just amazing they're my favorite but we'll get to that here in a moment and speaking of isolation let's move on to our next network this one's pretty fun because you get to actually create it now again the default bridge is cool but what if i told you docker doesn't want you to use it they're like yeah it's there but please don't use it they want you to use this next network type because they want you to create your own networks which honestly i'm like okay fine i'll create my own networks that sounds pretty fun this network is pretty much exactly like the default bridge it's just simply called the user defined bridge which means you're just defining it you're making it so let's make one real quick user defined bridge this can be crazy hard watch i'm just kidding it's so easy one command docker network create and then what do you want to name it let's name it um asgard that's it hit enter network created that simple if we do ip address show we'll see a new virtual bridge is being created right here with a new network instead of dot 17 we got 172.18 now a new bridge which if we do our other command network ls there he is asgard with driver type bridge now what do you say we throw some containers in asgard it's kind of lonely in there right now same story as before except we do have a new switch this time we'll do dash dash network because now we're out of default world we're gonna actually do something dash dash network and then after that the name of your network simple as that asgard that's it then we'll name it let's do um let's do loki this time and then finally the name of our image busybox and that should be it done so easy let's do it once more let's add a friend on there change the name from loki to i don't know odin yeah let's do odin awesome and just like before if we do ip address show we have some virtual interfaces created looking at our bridge link we can see those new interfaces tied to that virtual bridge that was created and then we can inspect that network sudo docker inspect asgard and take a look at what ip addresses odin and loki got handed in the 17218 network and here's our network now now you might be wondering okay why why is this preferred why should we do this and the key word here is isolation because right now asgard let me label it actually we gotta label asgard here asgard is isolated it's protected from the default network they can't talk to each other actually so if i jump into let's say thor once more as we did earlier and i try to ping let's say odin or notice ping loki i'm not going to get anything back they are isolated if you're already in it you know how important network isolation is you want to isolate your workloads and this is why docker recommends a user-defined bridge bridges are the probably the best network in docker if you're going to be using docker in production and you want to define your own networks there's actually one more cool benefit when using a user-defined bridge versus a default bridge and that's you get some cool container container dns action like let me show you let's jump into loki and here in loki all i have to do is ping let's just say odin odin's name and it resolves so the name of your containers will have dns entries you can ping it by name which is pretty cool because option container ip addresses will change as you'd redeploy your workloads you do not get that in the default network so just define your own networks like we just showed you super easy to do hey it's time for a quick coffee break oh that's cold i've been recording too long i still need some i'll power through anyways this coffee break is sponsored by bitdefender and the best way to protect your computer and yourself online bitdefender premium security bitdefender premium security is a premium privacy and security pack for absolute digital freedom i like the sound of that it's got everything best protection unlimited vpn a password manager and priority support it's multi-platform i've got it right here in my windows machine shoot i even have it on my phone which i didn't know that was a thing once you have bitdefender installed it'll protect you all the standard stuff you have to worry about anti-virus threat defense vulnerabilities and then even like other things because this is like a multi-layered approach they do online threat prevention a cloud-based global protective network that's pretty cool secures your device by blocking any online threat of course the firewall ooh ransomware remediation that's that's sweet why don't i have that on reverse is any damage done by ransomware by restoring encrypted files that's pretty killer and anti-spam which by the way getting phishing emails and things are one of the worst and most popular ways to get like ransomware and viruses on your pc i gotta make sure my employees use this and i know because you watch my channel you do care about privacy and bitdefender has your back on that as we mentioned they have vpn and password management they also help you safely pay in places because you don't want to lose your credit card and stuff to bad dudes they also have webcam and microphone protection because i know you're always thinking hey is someone watching me is my webcam on with bitdefender you don't have to worry about that also dude stop people from tracking you google wants to know who you are we've talked about that before on the channel bitdefender will help them not find out and then parental control which i need because i have six kids thank you bit defender now in the past programs like this may have slowed down your pc but with bitdefender they think about that they got you actually first the coolest setting dark mode but as far as speed we can actually change the profile based on what we're doing we can have a work profile movie profile game profile be using that one a lot a public wi-fi profile tailored to what you need in that moment do i need performance or do i need security do i need both and the answer is always yes but they'll help you mitigate so that stuff or go into autopilot it'll figure it out for you so you have to worry about it now if only bitdefender would help keep my coffee warm it would be absolutely perfect but beyond that you should definitely check it out link below they are what i use to protect my computers and if you want to protect yourself and your computer and your privacy and all that stuff we talked about check them out help support the channel and help support awesome sponsors like bitdefender anyways back to docker and i want to take one more sip of cold coffee now this next network is um it's kind of weird it's one of the weirder ones it's actually pretty awesome it's called the host and that might sound familiar because it was one of the default networks already there and the best way to explain it is just to show you so here what i'm going to do remember our web server stormbreaker operating on port 80 let's uh let's delete him real quick we're going to take him out and redeploy him in a host network let's try it docker stop stormbreaker then docker run once more with all our same stuff except this time we're going to do two different things first we will define our network our network name will just be host and then we will not expose any ports leave it as is we'll keep the same name stormbreaker and then of course specify nginx at the very end that's it deploy it now i want to show you something really strange it's going to be weird now so far nothing too strange but let me show you what it looks like in our network right now with him deployed in a host network stormbreaker will be moved right up here next to his papa right next to the host and that's it when you deploy a container to the host network he doesn't even really have his own network he just totally bums off the host he doesn't even have anything he shares his ip address his ports that's that's it now why this is cool is that you don't have to expose any ports check this out if i again go out to 10.7.1.232 the ip address of my host um it's working because right now essentially stormbreaker is running as a regular application on the host even though he is a container this is super cool for a lot of reasons actually my buddy christian christian's gonna tell you how he uses it if you deploy a wireguard vpn container for example you might not want to isolate this container with a separate virtual ip address instead you want to run this application directly connected to the host network just like every other application that's installed without docker so that's all there pretty much is to the host network it's just really lazy which is awesome it just runs like an application the downside is there's really no isolation right it's like right there next to the host yeah no isolation at all now this next network is my all-time favorite this thing i could not believe it's a real network and docker this sucker is called the mac vlan and it's gonna it's gonna break your brain here's the knack vlan what if we could erase all this stuff all the complication all the docker networks the virtual ethernet interfaces the separate networks what if we could take it all away and just simply connect our docker containers directly to our physical network that's a mac vlan this is basically how it would look if i connected thor and mjolnir yum yum sorry to a mac vlan network it would pretty much be like their ethernet interfaces are connecting directly to my switch in my house they even get their own mac addresses i'm just gonna make random ones up and they will have their own ip addresses on my network on my home network that sounds amazing right they're acting like virtual machines let's do it real quick i know you can't wait let's do it right now let's first create our mac vlan network this one will be a bit more involved but it's not too crazy so same story as before docker network creates this time we have to specify what type of driver we're going to use so we'll do that with dash d and then the driver which would be mac vlan and then i'll do a backslash continue my command on the next line to make it easier and prettier now here with the mac vlan we're going to have to specify the subnet we're putting it into and in our case it'll be my home network or your home network so i'll do subnet and right after that my home network subnet which is mine right here 10.7.1.0424.
do another line here we also have to specify the gateway the router in your home network mine is 10.7.1.3 then finally one more thing one very important thing do it on one more line we'll do a dash o for options and we'll say parent equals enp 0s3 you're probably like wait what here we have to actually tie our mac vlan to our host network interface so looking back at our network diagram here the main interface of my ubuntu machine its name was emp 0s3 to find yours go ip address show in terminal you'll see what it is but you must tie your mac vlan network to a physical nick the nick that's connected to the network you want to connect your docker containers to so that's that's it and finally right after that just name it i'm gonna name mine new asgard and that should be it let's hit enter yeah that's done let's do a little docker network ls action real quick there he is new asgard mac vlan so now we have to try it out right so let's put thor and mjolnir into that new network like we have here first we'll have to stop them and we can do that with one command just thor and then mjolnir just like that and then we'll deploy them inside that new network and of course here with our network switch we'll specify new asgard i'll do a backslash to make things pretty on a new line and then there's one more thing we have to do i know i keep saying new things we're going to have to specify and assign the ip address ourselves i'll explain why here in a bit we'll go ahead and do dash dash ip and then the ip address you want to use just make sure it's not being used in your network and that's outside your dhcp range i'll do 10.7.1.92 that'll name it thor like before and finally specify busybox as our image that should be it hit enter good to go and now thor is connected to my network like a regular virtual machine well actually maybe let me show you let's jump into thor real quick jumping into his shell if i do i p address show i can see he does indeed have that ap address bam but let's see if we can ping anything in my network like i say uh let's ping my default gateway which should be his as well nothing happening this right here illustrates one of the downsides of mac vlan it sounds all cool like it's amazing right but remember with mac vlans each of your docker containers are getting their own mac address now where that becomes an issue is your network may not be able to have multiple mac addresses on one switchboard so really when i drew this out the cable the connection is sharing a port with the host they're all connected to the same port which will see multiple mac addresses and a lot of times ports can't handle that they might have port security which says unit can only have one or maybe two mac addresses on one port and that breaks things you'll often see this called promiscuous mode i think i'm going to spell this right and if you want to try this you'll need that enabled so if you're like me it probably doesn't work right now but we can enable it and it should work fingers crossed we'll first start with the host we have to actually enable promiscuous mode on its network interface one easy command ip link set and then we'll specify our network interface mine is emp 0s3 then promisc that's how the cool kids say it promisc promiscuous on that should do it let's jump back into thor and see if that worked ping my default gateway still nothing that means we have to go up the chain and change it on each network device now you're seeing the pain here right it's like oh my gosh macvlan sounded really cool until we hit this issue there's a different way to do it coming up in the next network but hold on let's try one more thing and virtualbox we can also enable promiscuous mode let me jump into my virtual machine settings go to network click on advanced and right here promiscuous mode is in deny mode well of course it's not going to work so let's enable that let's just do allow everything it's a lab who cares click ok and now fingers crossed give it a second okay chuck from the future here i did have to reboot my host and then do that command once more ipsec link whatever and now fingers crossed it totally works connected directly to my network so the mac vlan literally has all the benefits of a bridge network except it's directly connected to your home network isn't that crazy and when i say all the benefits i really do mean it's like let's deploy what was the other dude what's the other dude on network oh milner let's deploy him if i jump into him real quick watch this i can ping thor we still have that cool container dns resolution thing and what this also means is if i deploy a web server in a mac vlan i don't have to expose any ports it's on its own ip address let's try it out we'll deploy jane foster as an nginx web server and i'll put her on make sure this ip address is available yes 96 and now if we just go out to this is so cool 10.7.1.96 it just stinking works that's my preferred docker way to do things it's awesome now again as i mentioned the mac vlan has a downside actually two of them that whole mac address thing happened to have promiscuous mode which you may have no control over and something we haven't mentioned and that's the ip address thing no dhcp you would expect that if you connect your device directly to your home network it'll get an ip address from your your router or whatever it's offering in dhcp no in fact it's even worse if you don't specify an ip address when you deploy your container docker will choose one for you docker will use its own dhcp and a sign like dot 2 or dot 3 or dot 4 you know the way it does a normal bridge network which could create a little bit of a conflict because you got two dhcp servers in your network so in that scenario dude just specify your ip address with every container or you can do it like christian does so i do it this way i specify the ip address range of the ip addresses the docker host should assign to the containers and i know limit this to just one ip address not used by any other device within that network this is really dumb let's be honest and yes i agree with christian it is pretty stupid that docker does that why would i want that with a mac vlan network docker now we'll talk about how we can solve the problems with mac vlan with the next network type but the mac vlan it has two modes didn't see that coming did you the mode we're looking at now is bridge mode it acts just like a bridge network except it connects to your network which is again amazing but there's another mode and this one that's gonna make the network geeks cry a little bit with joy tears of joy it has an 802 802.1 q mode with this mode and if you're a networking geek you already know where it's going not only can you connect your containers directly to your network but you can also specify this is so crazy a sub interface for example eth0.20 it's 0.30 which will have docker actually create sub-interfaces auto-magically and it will send these individual networks these vlans over the link like it's a trunk which if i lost you here then you probably don't care about networking as much as i do and others do so think router on a stick with docker containers on a host and i'll show you what it looks like real quick so let's assume 20 is vlan 20 and 30 is vlan 30. and here's their ip addresses it's a completely different network and let's create it real quick first i will delete my existing mac vlan i'll first stop thor and mjolnir i'll remove the network with pseudo docker network rm and then new asgard the name of the network oh wait i forgot i had one more endpoint in there he had jane foster sorry jane foster i forgot about you okay now it's removed now let's recreate that mac vlan with a few pretty big differences here we got a new subnet a new gateway and a new sub interface which it'll be the host uh interface same as before so it'll be parent equals en was it pp yeah zero s3 and then to create that sub interface will be dot 20. which that sub interface currently does not exist but docker will auto create it when it sees you doing this and then we'll name it i'll just go mac vlan 20. oh i totally forgot to do create network okay network there we go oh too many ticks in my o there we go why is it not working oh totally forgot to do docker network create okay gotta get that right there we go so enough to do ip address show new sub interface now of course in that scenario you would need to have trunking setup which i'm not gonna cover that's out of scope of this that's pretty stinking cool now i'm gonna delete that because i don't need it right now now let's talk about our next network now this one solves the big problem with mac vlans that stinking promiscuous stuff and it's actually i think probably my favorite over mac vlan because it has two very funky modes well one of them is funky the other mode is fine this is called ipvlan it has two modes l2 and l3 we're going to focus on l2 because it's pretty much the stink and same as macvlan with one very awesome difference and it solves our problem so whereas thor and mjolnir in a mac vlan they are assigned their own mac address which sounds cool in theory but really isn't because it messes with our switches and the promiscuous stuff you got it right with ipv lands nope they don't do that instead they keep all the awesomeness of connecting it directly to your network and getting a real ip address but they allow the host to share its mac address with the containers so thor mjolnir its mac address will match exactly to the host but they'll still have ip addresses on our network this seems to resolve all issues and in most cases will as long as your switch your router or security stuff are okay there being one mac address with like 20 ip addresses but for the most part it should be fine so let's actually create that right now to solve our promiscuous issues to create that network same story as before docker network create we'll do a dash d for our driver we're going to use and it will be ipvlan now to do ipvlan mode l2 you don't have to think about it just that's the default mode so leave it as is and at this point it's pretty much the same as the mac vlan the specify subnet gateway parent interface we'll name it again new asgard will work and that's it and when we add our containers specifying to use the new asgard network and assigning our ip address because it will still have that annoying ip address issue didn't get rid of that we'll launch thor let's jump into thor real quick see if we can pick our gateway golden let's pick the internet and then let me show you how they have the same mac address let me exit i'll do ip address show on the host notice the back address of emp 0s3 is ready to go right here ending in 33 8 or 80.
if i bring up the command prompt on my computer and ping 10.7.1.92 it'll take a second to resolve it it's trying to get through a bunch of stuff there it goes had me nervous for a second yeah it's still working i check my arp table we'll look at that the mac address i see for 107.192 is the same as my ubuntu host okay cool ipv lan l2 nothing too crazy pretty much same as mac vlan except just a little bit better in a lot of situations now time for l3 and this one's probably my favorite out of all of them because of how crazy it is the internet was begging for this and docker finally made it happen and it's pretty much a love letter to networking nerds so you're welcome ipvlan l3 is all about layer 3. when i say layer 3 i mean ip addresses routing routes that's all we're talking about here so so far actually with our bridge mac vlan ipvlan it's all been very layer two focused dealing with mac addresses arp responses and requests everything's very layer two and switch like but with l3 nope no more switching no more switching no more arp we're all layer three ip addresses so with ipvl and l3 we're not connecting our containers to our network like it's a switch we're connecting it to our host like the host is a router what i'll explain watch this let me give you an example so here we're going to create two new networks out of thin air okay we got new asgard up here with the network 192.168.94.0 24. and then we'll do i don't know like earth i'm getting lazy with my examples earth with 192.168.95.0 now what i want to point out right now is that these networks brand new they don't exist on my network at all my home network has no idea how to reach these totally brand new when we deploy these networks and throw these containers in there these containers connection to the outside world is completely layer three they connect to the host like it's a router these are layer three connections and what that means for networking people is that there's no broadcast traffic anymore no broadcast draft which you know can be a very very good thing because if you have a pretty complex layer 2 network you've got bridging loops you have to worry about all those bpu's bippydews spin it around and for a bit it's been best practice to remove a bunch of layer 2 and focus on layer 3 connections to your top of rack switches right i know i'm going real deep on networking but that's what this is for so because layer 3 no broadcast it's not responding to arp requests which again is very cool for network nerds but the problem we have here is that right now these containers really can't talk to anyone outside of their own network like for example thor cannot go to the internet thor can't talk to me which is really sad i can't talk to thor i cannot reach containers in that network at all exposed ports doesn't happen that's not even a thing because we're dealing with layer 3 and we're dealing with routing and right now my network and all my hosts in my network have no idea how to reach 192 168 94 0. that's an unknown like they don't have a route for it it's not in their routing table so they might sound kind of stupid it's like why would you deploy this if they can't reach anything well it's because you get more control and control is the name of the game here you can do some crazy isolation with your containers and you can restrict and isolate them via outlayer 3 via networks so again right now no one can reach them but i can control who reaches them all i have to do do do is in my network my home network i just have to tell my router hey if you want to reach 192.168.940 i know where you should go i want you to go to the host 107.1232 the ubuntu host he'll know how to get there because remember he's functioning as the router so i'm just telling my home network hey this network is kind of a weird one if you want to talk to these guys they're over there talk to that dude and that's really how networks work it's a static route it's so cool let's deploy it real quick you can deploy this in your own home network right now you have to have access to your router to be able to do this so real quick i'm going to delete my previous ipvlan network because you can't have more than one network linked or assigned to a network interface i only i only have one network interface on my uh machine here so i will stop thor no one can stop thor but me then i will remove new asgard and now let's create an ipvlan l3 network same story as before i've been saying that a lot lot lot docker network create our type will still be ipvlan when we do dash d and then we'll specify our subnet which is going to be a brand new network we're creating right now 94.0 24.
and then the big thing we don't do here is we don't specify a gateway because with a ipvlan l3 network the gateway is going to be the parent interface we tie it to we don't have to specify that it'll just be that way um that's pretty cool but we will have one more new thing so let's do a dash o parent we'll specify the parent interface which again was for me enp0s3 then we have one more dash o that's how you specify additional options we'll do ipvlan underscore mode equals l3 and that puts it in the l3 mode as it you know you might have guessed you might think oh hey that's it no no no we're going to go ahead and specify our other network we'll do subnet and we'll do 192.168.95.0 didn't know we could do that did you and we actually have to do that if we're going to create more than one network that are going to be using the same physical interface but anyways let's go ahead and name it real quick new asgard and that's it now as far as like what's been created in docker nothing out of the ordinary you don't see anything it's all in the background so let's go ahead and deploy some containers in there same story as before our network will indeed be new asgard and you could at this point specify or not specify an ip address but because we have two subnets in this network we will have to specify which one we want them to go into and we'll do that just by simply assigning the iep i'll do 94.7 for this one this will be thor fizzybox bam then we'll add another one we'll change the name to mjolnir we'll keep them in the same subnet as well let's do a dot eight and then we'll add the other guys loki we'll do uh the new subnet 95.7 and then odin 95.8 now we did a lot here but we pretty much just copied what we drew in our diagram here this is how it looks and let's go inspect that network we'll inspect new asgard and we can see our containers with their assigned ip addresses now let's jump into thor like we always love to do first thor he can't reach the internet while he does have a route out if i do ip route see his route is to ethernet zero which goes back to my physical interface but right now when he does make that journey out out out nothing knows how to get back to him now don't feel too bad for thor he can still ping his friends he can ping milner even by name can anything in the other network can he ping earth let's try pinging loki yeah totally can even though it's in a different subnet he can ping loki and that's a key thing you have to know about ip vlan l3 that's a mouthful and a half when separate networks share the same parent interface like these two networks do they can talk to each other all day so if you want that network isolation you'll need to connect them to a different physical interface with ipvlan l3s but i feel bad for them i want them to have access to everything so let's add a static route in my network and i'll show you how this works it's so neat i'll jump into my unify which is what i use for home networking jump to my router here and i'll create two static routes telling them the next top is 10.7.1. let me just actually make sure my ip address is the same oh it's 229 now it's changing it changed so 10.7.1.229 and then i'll add one for earth so by creating these static routes i've told my router and my entire network how to get to these container networks so in theory if i jump into thor once more that rhymed i should be able to ping google.com oh i should be able to ping my router i'll ping my nas in my office and my computer should be able to ping thor as well so thor's ip address is 192.168.947. 94.7 bam so that's pretty cool ipvlan l3 turns your host into a router allowing you to create docker container networks that are layer 3 only and routed which is like the best practice of networks i love it so much now i'm pretty sure this video has gone on pretty long but we've gotten through five networks we only have two more left and they're very very quick the sixth network is called an overlay network and i'm not going to show you what that is because it's more for if you have different hosts like right now we're working with one host and that's normally what you'll do in your home on your lap but in production and in the cloud or wherever you're going to be you might have multiple hosts running a bunch of containers all across these different machines and they're probably running something called docker swarm which is very similar to kubernetes it's just docker's version of that now you can imagine if you had multiple hosts with containers that maybe you want to talk to each other on all the different hosts that could get kind of complex that networking can get kind of crazy that's where an overlay comes into play overlay is a very common thing in networking now and basically it kind of abstracts or removes the complication for you and allows you to simply make rules on how those containers can talk to each other it's very cool very complicated and it's all the rage in networking just know you'll probably not use that right now unless you're dealing with docker swarm and you're going to create overlay networks so go look that up i'm not going to cover it and then i saved the most secure network for last this is like you can't get any more secure than this security guys get ready allow me to unveil ready drum roll the none network the name says it all it is absolutely nothing i don't have to create it it's already there see none the driver is null and if i create a container inside there network none i love putting that we'll say gore as the name busybox as the image we'll jump in there real quick if i do an ip address show there's nothing to show all it has is loot back you're not giving it anything it's got nothing none that's it so those are the seven docker networks this will open up a whole new world for you in your lab and possibly in your career having docker networks as a skill on your resume dude put that on there do this lab and put that lab on your resume and let me know how you implement this into your home lab i'm already starting to it makes things so much simpler when you know how the networking works and frankly it's just really really fun and let me know which one is your favorite i'm kind of in between the mac vlan the ipvlan l2 and l3 l3 i'll probably never ever use actually you know what i will use that just because i want to be complicated yeah i'm going to use it anyways that's all i have guys thanks for having some coffee with me and discussing something very fun and very cool i know this video may have been a bit longer but it was a pretty complex video and thanks again to christian from that digital life for his awesome content if you haven't already subscribed to him check him out link below and by the way have you hacked the youtube algorithm today just make sure you do hit that like button notification bell comment subscribe comment are you say comment you go to hack youtube today ethically of course and yeah that's really all i have um i'll catch you guys next time


